Vizio E55-C2 User Manual (English) - Page 35
Creating a Custom Picture Mode, Adjusting the Picture Settings
 |
View all Vizio E55-C2 manuals
Add to My Manuals
Save this manual to your list of manuals |
Page 35 highlights
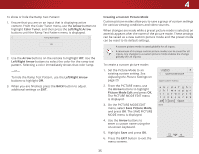
4 To show or hide the Ramp Test Pattern: 1. Ensure that you are on an input that is displaying active content. From the Color Tuner menu, use the Arrow buttons to highlight Color Tuner, and then press the Left/Right Arrow buttons until the Ramp Test Pattern menu is displayed. Ramp Test Pattern Off 2. Use the Arrow buttons on the remote to highlight Off. Use the Left/Right Arrow buttons to select the color for the ramp test pattern. Selecting a color immediately shows that color ramp. -or- To hide the Ramp Test Pattern, use the Left/Right Arrow buttons to highlight Off. 3. When you are finished, press the BACK button to adjust additional settings or EXIT. Creating a Custom Picture Mode Custom picture modes allow you to save a group of custom settings for various viewing conditions and video sources. When changes are made while a preset picture mode is selected, an asterisk appears after the name of the picture mode. These settings can be saved as a new custom picture mode and the preset mode can be reset to its default settings. A custom picture mode is saved globally for all inputs. A maximum of 6 unique custom picture modes can be saved for all inputs. Any changes to a custom picture mode enables the change globally (for all inputs). To create a custom picture mode: 1. Set the Picture Mode to an existing custom setting. See Adjusting the Picture Settings on page 29. 2. From the PICTURE menu, use the Arrow buttons to highlight Picture Mode Edit and press OK. The PICTURE MODE EDIT menu is displayed. 3. On the PICTURE MODE EDIT menu, select Save Picture Mode, and press OK. The SAVE PICTURE MODE menu is displayed. 4. Use the Arrow buttons to enter a custom name using the on-screen keyboard. 5. Highlight Save and press OK. 6. Press the EXIT button to exit the menu screens. VIZIO SAVE PICTURE MODE abc def ghi j k l mn o p q r s t u v wx y z 0 123456789 .@# .com Space Save 35
-
 1
1 -
2
-
3
-
4
-
5
-
6
-
7
-
8
-
9
-
10
-
11
-
12
-
13
-
14
-
15
-
16
-
17
-
18
-
19
-
20
-
21
-
22
-
23
-
24
-
25
-
26
-
27
-
28
-
29
-
 30
30 -
 31
31 -
 32
32 -
 33
33 -
 34
34 -
 35
35 -
 36
36 -
 37
37 -
 38
38 -
 39
39 -
 40
40 -
41
-
42
-
43
-
44
-
45
-
46
-
47
-
48
-
49
-
50
-
51
-
52
-
53
-
54
-
55
-
56
-
57
-
58
-
59
-
60
-
61
-
62
-
63
-
64
-
65
-
66
-
67
-
68
-
69
-
70
-
71
-
72
-
73
-
74
-
75
-
76
-
77
-
78
-
79
 |
 |
