Western Digital Sentinel DX4200 Administrator and Maintenance Guide - Page 56
Adding a Boot Drive
 |
View all Western Digital Sentinel DX4200 manuals
Add to My Manuals
Save this manual to your list of manuals |
Page 56 highlights
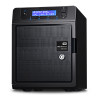
APPENDIX Adding a Boot Drive The WD Sentinel server comes a 2.5-inch boot drive pre-installed with Windows Storage Server 2012 R2 Workgroup and specialized hardware services and drivers. The pre-installed boot drive(s) provides the ability to keep the OS running from the boot drive while redeploying or changing applications and folders running on the large capacity data drives. The boot drive in the WD Sentinel DS5100 server are "cold swappable." This means that the WD Sentinel server must be shut down prior to adding a boot drive. To shut down your WD Sentinel server, follow the steps outline in "Shutting Down and Rebooting the Server" on page 31. Important: To avoid electrostatic discharge (ESD) problems, ground yourself by touching metal before handling the device. What you'll Need: Phillips screwdriver Boot Drive kit Adding a Boot Drive 1. Shut down the server. 2. Disconnect all external connections. 3. Follow the steps outlined in "Removing the Unit Cover" on page 48. 4. Using a Phillips screwdriver, attach the brace bar to the boot drive. 5. On the right or left side of the unit, find an empty bracket for your boot drive. Empty boot drive bracket 6. With the boot drive pins facing the back of the device, gently push your boot drive into the empty boot drive bracket. 7. Place and tighten two (2) screws, attaching the brace bar on the boot drive to the unit. 8. Replace the unit cover and replace and tighten the five (5) exterior screws. Note: Do not over-tighten the exterior screws. 9. Connect all external connections. 10. Restart the server. WD SENTINEL DX4200 52 ADMINISTRATOR AND MAINTENANCE GUIDE
-
 1
1 -
2
-
3
-
4
-
5
-
6
-
7
-
8
-
9
-
10
-
11
-
12
-
13
-
14
-
15
-
16
-
17
-
18
-
19
-
20
-
21
-
22
-
23
-
24
-
25
-
26
-
27
-
28
-
29
-
30
-
31
-
32
-
33
-
34
-
35
-
36
-
37
-
38
-
39
-
40
-
41
-
42
-
43
-
44
-
45
-
46
-
47
-
48
-
49
-
50
-
 51
51 -
 52
52 -
 53
53 -
 54
54 -
 55
55 -
 56
56 -
 57
57 -
 58
58 -
 59
59 -
 60
60
 |
 |
