Xerox 850DX Xerox Wide Format 8825/8830/8850/8855/X2 Tech System Introduction - Page 31
Retrieving Scanned Documents continued, Polling Interval, Raster Editor, Document Retrieve
 |
UPC - 042215454865
View all Xerox 850DX manuals
Add to My Manuals
Save this manual to your list of manuals |
Page 31 highlights
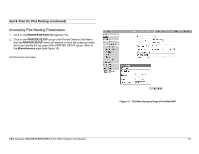
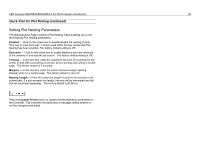
Retrieving Scanned Documents (continued) • Select this button to access the Retrieval Setup options. The Polling Interval, in seconds, determines how frequently the Retrieval Tool will check the Controller for scanned images to send to your work station. Add in the path of the Raster Editor that you want to be able to access to edit a selected retrieved file (listed in the Retrieved window) before saving the file on your workstation. Figure 12 has included a sample path. After you select a retrieved file name, you can select the raster editor by selecting the Raster Editor toolbar button, or select Image > Raster Edit, or right click on the file name and select Raster Edit. • Go to the scanner and use the Mode button to select scan mode. • If Accounting has been enabled by your System Administrator, you will be prompted to enter in your User and Account IDs. • Use the keypad on the Scanner Control Panel to enter in your 16 alphanumeric character Scan Directory name. • Scan in several images. They will be temporarily stored in the Controller's Scan Directory until you retrieve them at your workstation. • Go to your workstation. On the Document Retrieve tab, select the "List the image..." toolbar button. The titles of the images that you scanned will be listed in the Scanned window. They are still in the Controller's Scan Directory. Select the "Retrieve all scanned images ..." toolbar button. The images will be retrieved from the Controller, with a preview of each being visible if the scanner's default "Create Preview" option is on and if the AccXES Client Tools retrieval setup "Auto Preview" default is enabled. • Right click on a retrieved file name and select the Raster Editor button to edit a file before saving it. If the file does not open within the XES Synergix 8825/8830/8850/8855 & X2-TECH System Introduction Raster Editor, open the Raster editor separately, then open the file from within the editor program. • Select the "Save all images..." toolbar button. This will remove all of the images listed in the Retrieved window and save them to your file system at the location that you specified in the Directory field. • See the "Using the Document Retrieval Tool" section of the AccXES Client Tools 8.0 User Guide for more Quick Start details. New with 7.5, a dropdown menu enables Color Scan-to-Net users to select the file extension to use for retrieved JPEG files. Figure 12. Typical Retrieval Setup Screen 23
-
 1
1 -
2
-
3
-
4
-
5
-
6
-
7
-
8
-
9
-
10
-
11
-
12
-
13
-
14
-
15
-
16
-
17
-
18
-
19
-
20
-
21
-
22
-
23
-
24
-
25
-
 26
26 -
 27
27 -
 28
28 -
 29
29 -
 30
30 -
 31
31 -
 32
32 -
 33
33 -
 34
34 -
 35
35 -
 36
36 -
37
-
38
-
39
-
40
-
41
-
42
-
43
-
44
-
45
-
46
-
47
-
48
-
49
-
50
-
51
-
52
-
53
-
54
-
55
-
56
-
57
-
58
-
59
-
60
-
61
-
62
-
63
-
64
-
65
-
66
-
67
-
68
-
69
-
70
-
71
-
72
-
73
-
74
-
75
-
76
-
77
-
78
-
79
-
80
-
81
-
82
-
83
-
84
-
85
-
86
-
87
-
88
-
89
-
90
-
91
-
92
-
93
-
94
-
95
-
96
-
97
-
98
 |
 |
