Yamaha CLP-950 Owner's Manual - Page 17
The Split Mode - keys
 |
View all Yamaha CLP-950 manuals
Add to My Manuals
Save this manual to your list of manuals |
Page 17 highlights
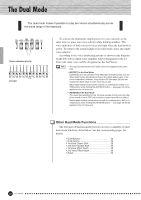
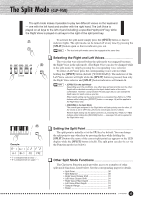
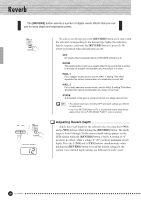
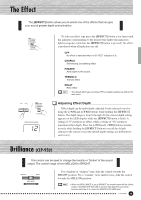
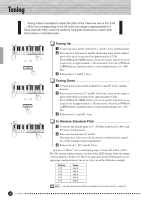
The Split Mode (CLP-950) The split mode makes it possible to play two different voices on the keyboard - one with the left hand and another with the right hand. The Left Voice is played on all keys to the left of (and including) a specified "split point" key, while the Right Voice is played on all keys to the right of the split point key. To activate the split mode simply press the [SPLIT] button so that its SPLIT indicator lights. The split mode can be turned off at any time by pressing the [SPLIT] button again so that its indicator goes out. NOTE • The dual and split modes cannot be engaged at the same time. RPSI- VIBRA- CHURCH JAZZ STRIN ORD PHONE ORGAN ORGAN SPLIT VOICE Selecting the Right and Left Voices The voice that was selected before the split mode was engaged becomes the Right Voice in the split mode. (The Right Voice can also be changed while in the split mode, by simply pressing the corresponding voice selector.) To select a Left Voice press the corresponding voice selector while holding the [SPLIT] button (default: [WOOD BASS]). The indicator of the Left Voice selector will light while the [SPLIT] button is pressed, then only the Right Voice selector and [SPLIT] button indicators will remain lit. NOTE • [EFFECT] in the Split Mode Depending upon the conditions, one effect type will take priority over the other. Depth will be decided according to the depth default value of the voice combination. However, using function F4 (see page 30) you can change the depth value for each voice as you like. Effect depth setting via the panel controls (i.e. pressing the [-/NO] or [+/YES] buttons while holding the [EFFECT] button - see page 19) will be applied to the Right Voice only. • [REVERB] in the Split Mode The reverb type assigned to the Right Voice will take priority over the other. (If the reverb is set to OFF, the Left Voice's reverb type will be in affect.) Reverb depth setting via the panel controls (i.e. pressing the [-/NO] or [+/YES] buttons while holding the [REVERB] button - see page 18) will be applied to the Right Voice only. SPLIT Example: A-1 b=1 C 2 F~2 Setting the Split Point The split point is initially set at the F#2 key by default. You can change the split point to any other key by pressing the key while holding the [SPLIT] button (the name of the current split-point key appears on the LED display while the [SPLIT] button is held). The split point can also be set via the Function mode (see below). A-1 Bb-1 C2 F#2 • "b" is indicated with a lower is indicated with an upper "~". Other Split Mode Functions The Clavinova Function mode provides access to a number of other split-mode functions, listed below. See the corresponding pages for details. • Split Point 30 • Split Balance 30 • Right Voice Octave Shift 31 • Left Voice Octave Shift 31 • Right Voice Effect Depth 31 • Left Voice Effect Depth 31 • Damper Range 31 • Reset 31 CLP-950/930 17
-
 1
1 -
2
-
3
-
4
-
5
-
6
-
7
-
8
-
9
-
10
-
11
-
 12
12 -
 13
13 -
 14
14 -
 15
15 -
 16
16 -
 17
17 -
 18
18 -
 19
19 -
 20
20 -
 21
21 -
 22
22 -
23
-
24
-
25
-
26
-
27
-
28
-
29
-
30
-
31
-
32
-
33
-
34
-
35
-
36
-
37
-
38
-
39
-
40
-
41
-
42
-
43
-
44
-
45
-
46
-
47
-
48
-
49
-
50
-
51
-
52
-
53
-
54
-
55
-
56
-
57
-
58
-
59
-
60
-
61
-
62
-
63
-
64
-
65
-
66
 |
 |
