Yamaha MT4X Owner's Manual - Page 20
Record the track, Check the completed recording - problem
 |
View all Yamaha MT4X manuals
Add to My Manuals
Save this manual to your list of manuals |
Page 20 highlights
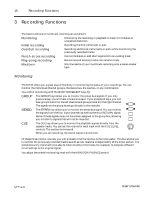
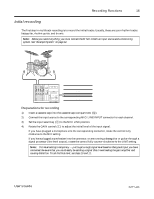
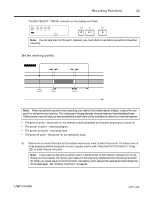
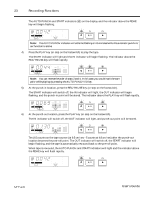
Recording Functions 18 Note: The meters display a range of -20 dB to +9 dB. If the meters exceed the normal limit momentarily, this is usually perfectly acceptable. Cassette tape is reasonably forgiving of transients - and human hearing has difficulty detecting the minor distortion that results. Where you start getting audible problems is when the meters are constantly above the normal limit. You must lower the levels in order to maintain decent sound quality. 9) Press the REC/PAUSE key (S). The indicator above the key lights and any flashing REC SELECT - TRACK indicators will be illuminated. 10) Set the channel fader (7) to the nominal level between "7" and "8". 11) Adjust the GAIN control while watching the level meters. • When dbx™ is off, adjust the gain control so that the +3 dB segment occasionally illuminates. • When dbx™ is on, adjust the gain control so that the +9 dB segment occasionally illuminates. Note: The MT4X can recall and display the maximum recording levels obtained during a session. See "Recording Levels Function" on page 42. Record the track 12) Press the PLAY key (T). The indicator above the key lights and the MT4X starts the tape. Start playing. Tip: If your song starts with drums, bassguitar, and guitars all on the first bar, you will need to record a count-in. 13) When the track is complete, press the RETURN TO ZERO key (I) to stop and rewind the tape. Tip: You may want to use the STOP key (W) to stop the tape and mark a memory point. See "Memory Functions" on page 41. The indicators above the REC/PAUSE and PLAY keys switch off and the REC SELECT - TRACK indicators resume flashing. Check the completed recording Once the tape has rewound back to "0000" on the tape counter, you should check the recording. 14) Press the PLAY key to playback the tape. 15) If the recording needs to be redone, repeat the previous steps. • If the problem with the recording was a musical error, press the REC/PAUSE key and repeat steps 12 to 14. • If the problem was due to incorrect recording levels or other engineering problems, adjust the parameters by repeating steps 4 to 14. 16) When you are finished with an instrument, you should set the channel fader to "0". You may even want to disconnect the input source. User's Guide
-
 1
1 -
2
-
3
-
4
-
5
-
6
-
7
-
8
-
9
-
10
-
11
-
12
-
13
-
14
-
 15
15 -
 16
16 -
 17
17 -
 18
18 -
 19
19 -
 20
20 -
 21
21 -
 22
22 -
 23
23 -
 24
24 -
 25
25 -
26
-
27
-
28
-
29
-
30
-
31
-
32
-
33
-
34
-
35
-
36
-
37
-
38
-
39
-
40
-
41
-
42
-
43
-
44
-
45
-
46
-
47
-
48
-
49
-
50
-
51
-
52
-
53
-
54
-
55
-
56
 |
 |