Yamaha MT4X Owner's Manual - Page 30
Using the optional footswitch
 |
View all Yamaha MT4X manuals
Add to My Manuals
Save this manual to your list of manuals |
Page 30 highlights
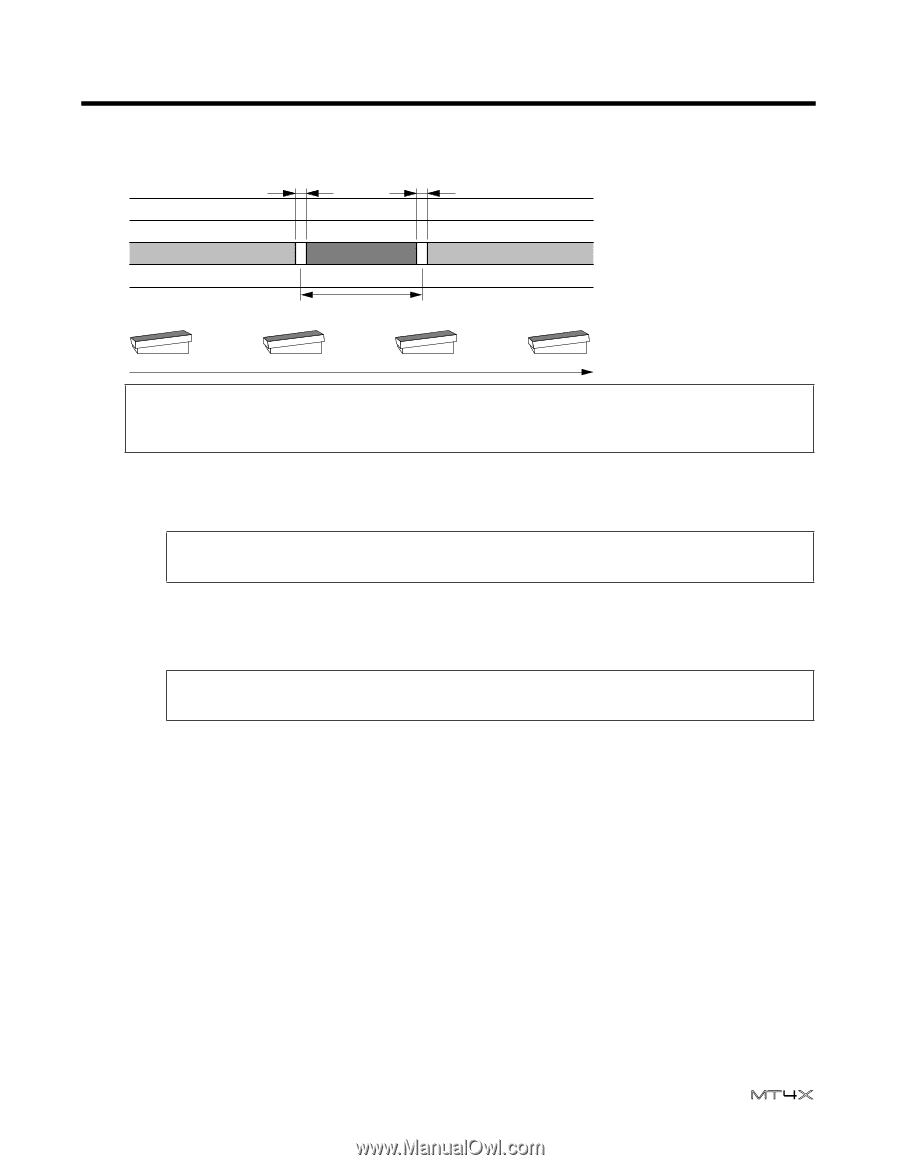
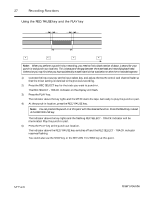
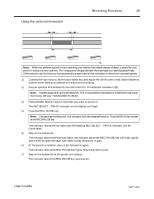
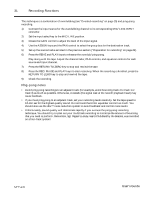
Recording Functions 28 Using the optional footswitch Blank space Blank space Track to be re-recorded Punch-in Segment to be Punch-out point re-recorded point Play Record Play Stop Note: When you perform a punch-in/out recording, you need to find a blank section of about 1 second for your punch-in and punch-out locations. This is because of the gap between the erase head and record/playback head. Otherwise you may find that you have accidentally erased material that was before or after the re-recorded segment. 1) Connect the input source, set the input select key, and adjust the GAIN control and channel fader so that the mixer setting is identical to the previous recording. 2) Plug an optional FC5 footswitch into the PUNCH I/O footswitch connector (e). Note: Yamaha supplies an optional footswitch, FC5. Using another manufacturer's footswitch may cause mis-timing. See your Yamaha dealer for details. 3) Press the REC SELECT key for the track you want to punch-in. The REC SELECT - TRACK indicator on the display will flash. 4) Press the REC/PAUSE key. Note: You can practice the punch-in at this point with the rehearsal function. Press the REHE key instead of the REC/PAUSE key. The indicator above the key lights and the flashing REC SELECT - TRACK indicator will be illuminated. 5) Step on the footswitch. The indicator above the PLAY key lights, the indicator above the REC/PAUSE key will flash rapidly, and the MT4X starts the tape. Get ready to play the punch-in part. 6) At the punch-in location, step on the footswitch again. The indicator above the REC/PAUSE key lights. Play the punch-in part. 7) Step on the footswitch at the punch-out location. The indicator above the REC/PAUSE key switches off. User's Guide
-
 1
1 -
2
-
3
-
4
-
5
-
6
-
7
-
8
-
9
-
10
-
11
-
12
-
13
-
14
-
15
-
16
-
17
-
18
-
19
-
20
-
21
-
22
-
23
-
24
-
 25
25 -
 26
26 -
 27
27 -
 28
28 -
 29
29 -
 30
30 -
 31
31 -
 32
32 -
 33
33 -
 34
34 -
 35
35 -
36
-
37
-
38
-
39
-
40
-
41
-
42
-
43
-
44
-
45
-
46
-
47
-
48
-
49
-
50
-
51
-
52
-
53
-
54
-
55
-
56
 |
 |