Yamaha RX-V4A RX-V4A User Guide - Page 65
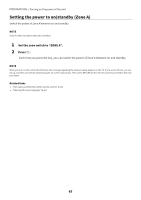
Setting the power to on/standby (Zone A), Set the zone switch to ZONE A., Press
 |
View all Yamaha RX-V4A manuals
Add to My Manuals
Save this manual to your list of manuals |
Page 65 highlights
PREPARATIONS > Turning on the power of the unit Setting the power to on/standby (Zone A) Switch the power of Zone A between on and standby. NOTE Zone A is the room where the unit is installed. 1 Set the zone switch to "ZONE A". 2 Press z. Each time you press the key, you can switch the power of Zone A between on and standby. NOTE When you turn on the unit for the first time, the message regarding the network setup appears on the TV. If you use an iPhone, you can set up a wireless connection by following the on-screen instructions. Here, press RETURN on the remote control to proceed to the next procedure. Related links ( "Part names and functions of the remote control" (p.31) ( "Selecting the menu language" (p.66) 65
-
 1
1 -
2
-
3
-
4
-
5
-
6
-
7
-
8
-
9
-
10
-
11
-
12
-
13
-
14
-
15
-
16
-
17
-
18
-
19
-
20
-
21
-
22
-
23
-
24
-
25
-
26
-
27
-
28
-
29
-
30
-
31
-
32
-
33
-
34
-
35
-
36
-
37
-
38
-
39
-
40
-
41
-
42
-
43
-
44
-
45
-
46
-
47
-
48
-
49
-
50
-
51
-
52
-
53
-
54
-
55
-
56
-
57
-
58
-
59
-
 60
60 -
 61
61 -
 62
62 -
 63
63 -
 64
64 -
 65
65 -
 66
66 -
 67
67 -
 68
68 -
 69
69 -
 70
70 -
71
-
72
-
73
-
74
-
75
-
76
-
77
-
78
-
79
-
80
-
81
-
82
-
83
-
84
-
85
-
86
-
87
-
88
-
89
-
90
-
91
-
92
-
93
-
94
-
95
-
96
-
97
-
98
-
99
-
100
-
101
-
102
-
103
-
104
-
105
-
106
-
107
-
108
-
109
-
110
-
111
-
112
-
113
-
114
-
115
-
116
-
117
-
118
-
119
-
120
-
121
-
122
-
123
-
124
-
125
-
126
-
127
-
128
-
129
-
130
-
131
-
132
-
133
-
134
-
135
-
136
-
137
-
138
-
139
-
140
-
141
-
142
-
143
-
144
-
145
-
146
-
147
-
148
-
149
-
150
-
151
-
152
-
153
-
154
-
155
-
156
-
157
-
158
-
159
-
160
-
161
-
162
-
163
-
164
-
165
-
166
-
167
-
168
-
169
-
170
-
171
-
172
-
173
-
174
-
175
-
176
-
177
-
178
-
179
-
180
-
181
-
182
-
183
-
184
-
185
-
186
-
187
-
188
-
189
-
190
-
191
-
192
-
193
-
194
-
195
-
196
-
197
-
198
-
199
-
200
-
201
-
202
-
203
-
204
-
205
-
206
-
207
-
208
-
209
-
210
-
211
-
212
-
213
-
214
-
215
-
216
-
217
-
218
-
219
-
220
-
221
-
222
-
223
-
224
-
225
-
226
-
227
-
228
-
229
-
230
-
231
-
232
-
233
-
234
-
235
-
236
-
237
-
238
-
239
-
240
-
241
-
242
-
243
-
244
-
245
-
246
-
247
-
248
-
249
-
250
-
251
-
252
-
253
-
254
-
255
-
256
-
257
-
258
-
259
-
260
-
261
-
262
-
263
-
264
-
265
-
266
-
267
-
268
-
269
-
270
-
271
-
272
-
273
-
274
-
275
-
276
-
277
-
278
-
279
-
280
-
281
-
282
-
283
-
284
-
285
-
286
-
287
-
288
-
289
-
290
-
291
-
292
-
293
-
294
-
295
-
296
-
297
-
298
-
299
-
300
-
301
-
302
-
303
-
304
-
305
-
306
-
307
-
308
-
309
-
310
-
311
-
312
-
313
-
314
-
315
-
316
-
317
-
318
-
319
-
320
-
321
-
322
-
323
-
324
 |
 |

Setting the power to on/standby (Zone A)
Switch the power of Zone A between on and standby.
NOTE
Zone A is the room where the unit is installed.
1
Set the zone switch to “ZONE A”.
2
Press
z
.
Each time you press the key, you can switch the power of Zone A between on and standby.
NOTE
When you turn on the unit for the first time, the message regarding the network setup appears on the TV. If you use an iPhone, you can
set up a wireless connection by following the on-screen instructions. Here, press RETURN on the remote control to proceed to the next
procedure.
Related links
(
“Part names and functions of the remote control” (p.31)
(
“Selecting the menu language” (p.66)
65
PREPARATIONS > Turning on the power of the unit