1994 Chevrolet Cavalier Owner's Manual - Page 101
1994 Chevrolet Cavalier Manual
Page 101 highlights
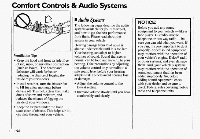
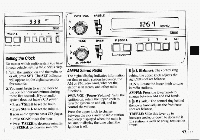
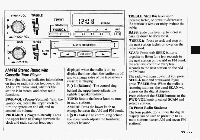
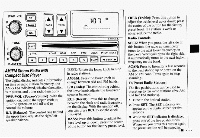
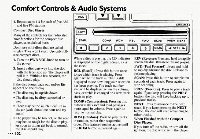
Comfort Controls & Audio Systems 1. Tune in the desired station. 2. Press SET. The word SET will appear on the digital display for five seconds. 3 While SET is displayed, press of . one the four pushbuttons. Whenever you press thisbutton again, the preset station will be tuned in. 4. Repeat steps 1-3 for eachof the four AM and four FM stations. Up to three additional stations on each band may be preset by "pairing" pushbuttons: 1. Tune in the desired station. 2. Press SET, and within five seconds press any two adjacent pushbuttons at the same time. Whenever press you these buttons again, the preset station will be tuned in. AUTO DNR: This unit is equipped with an automatic Dynamic Noise Reduction systemthat reduces AM background hiss on or FM radio broadcasts, as well as on cassette tapes. Cassette Tape Player With the power on, insert a tape into the cassette door. Do not use tapes that are longer than 45 minutes on each side. When the left arrowis lit, selections listed on the topside of the cassette are playing. Whenthe right indicator arrow is lit, selections listedon the bottom side of the cassette are playing. To change sidesof the tape, press the upper control knob (PROG) while the cassette is playing.The tape player automatically begins playing other the side when it reaches the end of the tape. Fast Forward Press the button with the arrow pointing inthe same direction that the tape is playing. To stop fast forward, pressthe STOP-EJECT button. Reverse: Press the button with the arrow pointingin the opposite direction that thetape is playing. To stop reverse, press the STOP-EJECTbutton. STOP-EJECT:To stop playing atape, fully pressthis button (the cassette will be partially ejected,and the radio will begin playing).
-
 1
1 -
2
-
3
-
4
-
5
-
6
-
7
-
8
-
9
-
10
-
11
-
12
-
13
-
14
-
15
-
16
-
17
-
18
-
19
-
20
-
21
-
22
-
23
-
24
-
25
-
26
-
27
-
28
-
29
-
30
-
31
-
32
-
33
-
34
-
35
-
36
-
37
-
38
-
39
-
40
-
41
-
42
-
43
-
44
-
45
-
46
-
47
-
48
-
49
-
50
-
51
-
52
-
53
-
54
-
55
-
56
-
57
-
58
-
59
-
60
-
61
-
62
-
63
-
64
-
65
-
66
-
67
-
68
-
69
-
70
-
71
-
72
-
73
-
74
-
75
-
76
-
77
-
78
-
79
-
80
-
81
-
82
-
83
-
84
-
85
-
86
-
87
-
88
-
89
-
90
-
91
-
92
-
93
-
94
-
95
-
 96
96 -
 97
97 -
 98
98 -
 99
99 -
 100
100 -
 101
101 -
 102
102 -
 103
103 -
 104
104 -
 105
105 -
 106
106 -
107
-
108
-
109
-
110
-
111
-
112
-
113
-
114
-
115
-
116
-
117
-
118
-
119
-
120
-
121
-
122
-
123
-
124
-
125
-
126
-
127
-
128
-
129
-
130
-
131
-
132
-
133
-
134
-
135
-
136
-
137
-
138
-
139
-
140
-
141
-
142
-
143
-
144
-
145
-
146
-
147
-
148
-
149
-
150
-
151
-
152
-
153
-
154
-
155
-
156
-
157
-
158
-
159
-
160
-
161
-
162
-
163
-
164
-
165
-
166
-
167
-
168
-
169
-
170
-
171
-
172
-
173
-
174
-
175
-
176
-
177
-
178
-
179
-
180
-
181
-
182
-
183
-
184
-
185
-
186
-
187
-
188
-
189
-
190
-
191
-
192
-
193
-
194
-
195
-
196
-
197
-
198
-
199
-
200
-
201
-
202
-
203
-
204
-
205
-
206
-
207
-
208
-
209
-
210
-
211
-
212
-
213
-
214
-
215
-
216
-
217
-
218
-
219
-
220
-
221
-
222
-
223
-
224
-
225
-
226
-
227
-
228
-
229
-
230
-
231
-
232
-
233
-
234
-
235
-
236
-
237
-
238
-
239
-
240
-
241
-
242
-
243
 |
 |