2004 Chrysler Concorde Owner Manual - Page 19
2004 Chrysler Concorde Manual
Page 19 highlights
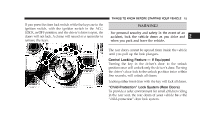
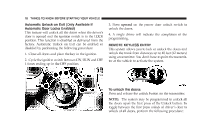
THINGS TO KNOW BEFORE STARTING YOUR VEHICLE 19 1. Press and hold the Unlock button on the transmitter. 2. Continue to hold the Unlock button, wait at least 4 but no longer than 10 seconds, then press the Lock button. 3. Release both buttons. Enable/Disable Lamp Flash: The Lamp Flash can be enabled or disabled by performing the following procedure: 1. Press and hold the Lock button on the transmitter. 2. Continue to hold the Lock button, wait at least 4 but no longer than 10 seconds, then press the Trunk button. 3. Release both buttons. To lock the doors: Press and release the LOCK button to lock all doors. Enable/Disable Horn chirp: The horn chirp feature can be enabled or disabled by performing the following procedure: 1. Press and hold the Lock button on the transmitter. 2. Continue to hold the Lock button, wait at least 4 but no longer than 10 seconds, then press the Unlock button. 3. Release both buttons. NOTE: To enable/disable the Lamp Flash, see procedure described above. To unlock the trunk: Press and hold the trunk button on the transmitter to unlatch the trunk. Enable/Disable Trunk Press and Hold: The transmitter can be programmed to unlatch the trunk immediately upon activation of the Trunk button (without pressing and holding) by performing the following procedure: 1. Press and hold the Unlock button on the transmitter. 2. Continue to hold the Unlock button, wait at least 4 but no longer than 10 seconds, then press the Trunk button. 3. Release both buttons. 2
-
 1
1 -
2
-
3
-
4
-
5
-
6
-
7
-
8
-
9
-
10
-
11
-
12
-
13
-
 14
14 -
 15
15 -
 16
16 -
 17
17 -
 18
18 -
 19
19 -
 20
20 -
 21
21 -
 22
22 -
 23
23 -
 24
24 -
25
-
26
-
27
-
28
-
29
-
30
-
31
-
32
-
33
-
34
-
35
-
36
-
37
-
38
-
39
-
40
-
41
-
42
-
43
-
44
-
45
-
46
-
47
-
48
-
49
-
50
-
51
-
52
-
53
-
54
-
55
-
56
-
57
-
58
-
59
-
60
-
61
-
62
-
63
-
64
-
65
-
66
-
67
-
68
-
69
-
70
-
71
-
72
-
73
-
74
-
75
-
76
-
77
-
78
-
79
-
80
-
81
-
82
-
83
-
84
-
85
-
86
-
87
-
88
-
89
-
90
-
91
-
92
-
93
-
94
-
95
-
96
-
97
-
98
-
99
-
100
-
101
-
102
-
103
-
104
-
105
-
106
-
107
-
108
-
109
-
110
-
111
-
112
-
113
-
114
-
115
-
116
-
117
-
118
-
119
-
120
-
121
-
122
-
123
-
124
-
125
-
126
-
127
-
128
-
129
-
130
-
131
-
132
-
133
-
134
-
135
-
136
-
137
-
138
-
139
-
140
-
141
-
142
-
143
-
144
-
145
-
146
-
147
-
148
-
149
-
150
-
151
-
152
-
153
-
154
-
155
-
156
-
157
-
158
-
159
-
160
-
161
-
162
-
163
-
164
-
165
-
166
-
167
-
168
-
169
-
170
-
171
-
172
-
173
-
174
-
175
-
176
-
177
-
178
-
179
-
180
-
181
-
182
-
183
-
184
-
185
-
186
-
187
-
188
-
189
-
190
-
191
-
192
-
193
-
194
-
195
-
196
-
197
-
198
-
199
-
200
-
201
-
202
-
203
-
204
-
205
-
206
-
207
-
208
-
209
-
210
-
211
-
212
-
213
-
214
-
215
-
216
-
217
-
218
-
219
-
220
-
221
-
222
-
223
-
224
-
225
-
226
-
227
-
228
-
229
-
230
-
231
-
232
-
233
-
234
-
235
-
236
-
237
-
238
-
239
-
240
-
241
-
242
-
243
-
244
-
245
-
246
-
247
-
248
-
249
-
250
-
251
-
252
-
253
-
254
-
255
-
256
-
257
-
258
-
259
-
260
-
261
-
262
-
263
-
264
-
265
-
266
-
267
-
268
-
269
-
270
-
271
-
272
-
273
 |
 |