2004 Mazda Tribute Owner's Manual - Page 23
2004 Mazda Tribute Manual
Page 23 highlights
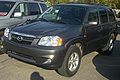
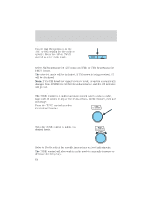
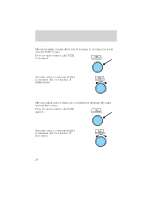
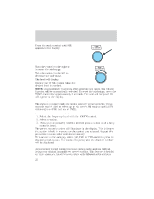
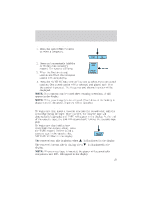
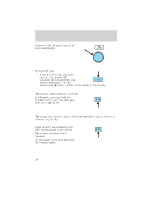
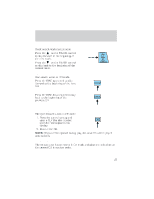
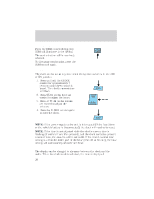
Entertainment Systems Starting autoset memory preset 1. Press the AM or FM1/2 control to select a frequency. 2. Press and momentarily hold the AUTO-M (Auto memory) control. The system will beep. 3. When the first six strong stations are filled, the strongest station will start playing. 4. Press the AUTO-M (Auto memory) control to select from the stored stations. One stored station will be selected and played each time the control is pressed. The frequency and channel number will be displayed. NOTE: If no stations can be tuned after scanning operations, A will appear in the display. NOTE: If the power supply is interrupted, (fuse blows or the battery is disconnected), the preset channels will be canceled. Tape select (if equipped) To begin tape play, insert a cassette tape into the cassette slot, with the open edge facing the right. Once inserted, the cassette tape will automatically begin play and TAPE will appear in the display. At the end of the cassette tape, the unit will automatically reverse the cassette tape play. To begin tape play (with a tape loaded into the audio system), press the TAPE control. If there is not a cassette tape in the cassette slot, NO TAPE will flash in the display. The cassette's top side is playing when is illuminated in the display. The cassette's bottom side is playing when is illuminated in the display. NOTE: When a metal tape is inserted, the player will automatically compensate and MTL will appear in the display. 23
-
 1
1 -
2
-
3
-
4
-
5
-
6
-
7
-
8
-
9
-
10
-
11
-
12
-
13
-
14
-
15
-
16
-
17
-
 18
18 -
 19
19 -
 20
20 -
 21
21 -
 22
22 -
 23
23 -
 24
24 -
 25
25 -
 26
26 -
 27
27 -
 28
28 -
29
-
30
-
31
-
32
-
33
-
34
-
35
-
36
-
37
-
38
-
39
-
40
-
41
-
42
-
43
-
44
-
45
-
46
-
47
-
48
-
49
-
50
-
51
-
52
-
53
-
54
-
55
-
56
-
57
-
58
-
59
-
60
-
61
-
62
-
63
-
64
-
65
-
66
-
67
-
68
-
69
-
70
-
71
-
72
-
73
-
74
-
75
-
76
-
77
-
78
-
79
-
80
-
81
-
82
-
83
-
84
-
85
-
86
-
87
-
88
-
89
-
90
-
91
-
92
-
93
-
94
-
95
-
96
-
97
-
98
-
99
-
100
-
101
-
102
-
103
-
104
-
105
-
106
-
107
-
108
-
109
-
110
-
111
-
112
-
113
-
114
-
115
-
116
-
117
-
118
-
119
-
120
-
121
-
122
-
123
-
124
-
125
-
126
-
127
-
128
-
129
-
130
-
131
-
132
-
133
-
134
-
135
-
136
-
137
-
138
-
139
-
140
-
141
-
142
-
143
-
144
-
145
-
146
-
147
-
148
-
149
-
150
-
151
-
152
-
153
-
154
-
155
-
156
-
157
-
158
-
159
-
160
-
161
-
162
-
163
-
164
-
165
-
166
-
167
-
168
-
169
-
170
-
171
-
172
-
173
-
174
-
175
-
176
-
177
-
178
-
179
-
180
-
181
-
182
-
183
-
184
-
185
-
186
-
187
-
188
-
189
-
190
-
191
-
192
-
193
-
194
-
195
-
196
-
197
-
198
-
199
-
200
-
201
-
202
-
203
-
204
-
205
-
206
-
207
-
208
-
209
-
210
-
211
-
212
-
213
-
214
-
215
-
216
-
217
-
218
-
219
-
220
-
221
-
222
-
223
-
224
-
225
-
226
-
227
-
228
-
229
-
230
-
231
-
232
-
233
-
234
-
235
-
236
-
237
-
238
-
239
-
240
-
241
-
242
-
243
-
244
-
245
-
246
-
247
-
248
-
249
-
250
-
251
-
252
-
253
-
254
-
255
-
256
 |
 |