3Com 3CRWER100-75 User Guide
3Com 3CRWER100-75 - OfficeConnect Wireless 54 Mbps 11g Cable/DSL Router Manual
 |
UPC - 662705500089
View all 3Com 3CRWER100-75 manuals
Add to My Manuals
Save this manual to your list of manuals |
3Com 3CRWER100-75 manual content summary:
- 3Com 3CRWER100-75 | User Guide - Page 1
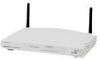
OfficeConnect® Wireless 54Mbps/108Mbps 11g Cable/DSL Router User Guide 3CRWER100-75(Model:WL-537) 3CRWER200-75(Model:WL-537S) http://www.3com.com/ - 3Com 3CRWER100-75 | User Guide - Page 2
to you in conjunction with, this User Guide. Unless otherwise indicated, 3Com registered trademarks are registered in the United States and may or may not be registered in other countries. 3Com, OfficeConnect and the 3Com logo are registered trademarks of 3Com Corporation. Intel and Pentium are - 3Com 3CRWER100-75 | User Guide - Page 3
describes how to install and configure the OfficeConnect Wireless 54Mbps/108Mbps 11g cable/DSL Router(3CRWER100-75 and 3CRWER200-75). This guide is intended for use by those responsible for installing and setting up network equipment; consequently, it assumes a basic working knowledge of LANs (Local - 3Com 3CRWER100-75 | User Guide - Page 4
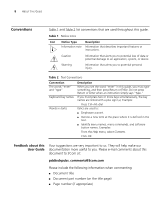
software button names. Examples: From the Help menu, select Contents. Click OK. Feedback about this Your suggestions are very important to us. They will help make our User Guide documentation more useful to you. Please e-mail comments about this document to 3Com at: [email protected] - 3Com 3CRWER100-75 | User Guide - Page 5
Conventions 9 Example: ■ OfficeConnect Wireless 54Mbps/108Mbps 11g cable/DSL Router User Guide ■ Part Number DUA0554-TAAA02 ■ Page 24 Do not use this e-mail address for technical support questions. For information about contacting Technical Support, please refer to the Support and Safety Information - 3Com 3CRWER100-75 | User Guide - Page 6
10 ABOUT THIS GUIDE - 3Com 3CRWER100-75 | User Guide - Page 7
connection amongst several wired and wireless computers. The Router also provides protection in the form of an electronic "firewall", preventing anyone outside of your network from seeing your files or damaging your computers. The Router can also prevent your users from accessing Web sites which you - 3Com 3CRWER100-75 | User Guide - Page 8
you use the Router in your network (Figure 2), it becomes your connection to the Internet. Connections can be made directly to the Router, or to an OfficeConnect Switch or Hub, expanding the number of computers you can have in your network. Figure 2 Example Network Using a Wireless 11g Cable/DSL - 3Com 3CRWER100-75 | User Guide - Page 9
the following items: ■ One OfficeConnect Wireless 54Mbps/108Mbps 11g cable/DSL Router ■ One power adapter for use with the Router ■ Four rubber feet ■ One Ethernet cable ■ One CD-ROM containing the Quick Installation Guide!and this User Guide ■ Installation Guide ■ One Support and Safety Information - 3Com 3CRWER100-75 | User Guide - Page 10
an operating system that supports TCP/IP networking protocols (for example Windows 95/98/NT/Me/2000/XP, Unix, Mac OS 8.5 or higher). ■ An Ethernet 10Mbps or 10/100 Mbps NIC for each computer to be connected to the four-port switch on your Router. ■ An 802.11b or 802.11g wireless NIC. ■ A cable modem - 3Com 3CRWER100-75 | User Guide - Page 11
Reset to Factory Defaults command, or ■ The system software is in the process of being upgraded In each of these cases, wait until the Router If the LED is off, the Wireless LAN has been disabled in the Router, or there is a problem. Refer to Chapter 6 "Troubleshooting". 4 Four LAN Status LEDs Green - 3Com 3CRWER100-75 | User Guide - Page 12
switched off or there is a problem (refer to Chapter 6 "Troubleshooting"). The rear panel (Figure 4) of the Router contains four LAN ports, one Ethernet Cable/DSL port, a power adapter OK LED, and a power adapter socket. Figure 4 Router - Rear Panel 6 Wireless Antennae The antennae on the product - 3Com 3CRWER100-75 | User Guide - Page 13
MDIX depending on the device to which they are connected and the type of cable used. 10 Four 10/100 LAN ports Using suitable RJ-45 cable, you can connect your Router to a computer, or to any other piece of equipment that has an Ethernet connection (for example, a hub or a switch). The - 3Com 3CRWER100-75 | User Guide - Page 14
18 CHAPTER 1: INTRODUCING THE ROUTER - 3Com 3CRWER100-75 | User Guide - Page 15
to the Router. A suitable location might be on top of a high shelf or similar furniture to optimize wireless connections to computers in both horizontal and vertical directions, allowing wider coverage. ■ allows convenient connection to the computers that will be connected to the four LAN ports on - 3Com 3CRWER100-75 | User Guide - Page 16
side of the case is not restricted. 3Com recommends you provide a minimum of 25 mm (1 in.) clearance. Using the Rubber Feet Use the four self-adhesive rubber feet to prevent your Router from moving around on your desk or when stacking with other flat top OfficeConnect units. Only stick the feet to - 3Com 3CRWER100-75 | User Guide - Page 17
only need a PPPoE Service Name if your ISP requires one. Do not enter anything if your ISP does not require this information. If you have a DSL connection and your ISP allocates IP information dynamically over PPTP, you need a User Name, Password and PPTP Server Address: PPTP User Name PPTP - 3Com 3CRWER100-75 | User Guide - Page 18
IP information, you need the following information: IP Address Subnet Mask Default Router address DNS address If your ISP allocates IP the Router. 2 Plug the power adapter into a standard electrical wall socket. Connecting the Router The first step for installing your Router is - 3Com 3CRWER100-75 | User Guide - Page 19
so that they can make use of the Router to communicate with the Internet. 3Com recommends that you perform the initial Router configuration from a computer that is directly connected to one of the LAN ports. If you configure the Router from a wireless computer, note that you may lose contact with - 3Com 3CRWER100-75 | User Guide - Page 20
24 CHAPTER 2: HARDWARE INSTALLATION To communicate wirelessly with your Router, your wireless NIC should be set as follows: ■ Encryption - none ■ Service Area Name/SSID - 3Com ■ Channel - 11 - 3Com 3CRWER100-75 | User Guide - Page 21
computers to allow this, follow the instructions in this chapter. If your computers are configured with fixed or static addresses and you do not wish to Router CD-ROM to detect and configure your Router. Refer to Appendix A for information on using the Discovery program. Obtaining an IP Address - 3Com 3CRWER100-75 | User Guide - Page 22
SETTING UP YOUR COMPUTERS Figure 6 Local Area Properties Screen 6 Ensure that the options Obtain an IP Address automatically, and Obtain DNS server address automatically are both selected as shown in Figure 7. Click OK. Figure 7 Internet Protocol (TCP/IP) Properties Screen 7 Restart your computer. - 3Com 3CRWER100-75 | User Guide - Page 23
select Settings > Control Panel. 2 Double click on Network. Select the TCP/IP item for your network card and click on Properties. 3 In the TCP/IP dialog, select the IP Address tab, and ensure that Obtain IP address automatically is selected. Click OK. Macintosh If you are using a Macintosh computer - 3Com 3CRWER100-75 | User Guide - Page 24
Connection option. Figure 8 Internet Properties Screen Disabling Web Proxy You may wish to remove the PPPoE client software from your computer to free resources, as it is not required for use with the Router. Ensure that you do not have a web proxy enabled on your computer. Go to the Control Panel - 3Com 3CRWER100-75 | User Guide - Page 25
URL in the location or address field of your browser: http://192.168.1.1 (Figure 9). The Login screen displays. Figure 9 Web Browser Location Field (Factory Default) 4 To log in as an administrator, enter the password (the default setting is admin) in the System Password field and click Log in - 3Com 3CRWER100-75 | User Guide - Page 26
30 CHAPTER 4: RUNNING THE SETUP WIZARD Figure 10 Router Login Screen 5 If the password is correct, the Country Selection screen will appear. Select the country you wish to configure the Router for, then click Apply. (Figure 11) If your purchased your Router in the United States, you do not see this - 3Com 3CRWER100-75 | User Guide - Page 27
Accessing the Wizard 31 6 When you have selected a country either: ■ The Welcome screen will appear (Figure 12). Select the Wizard tab and click Wizard. or ■ If your Router has not been configured before, the Wizard will launch automatically (refer to Figure 13). 7 Click Next. 8 You will be guided - 3Com 3CRWER100-75 | User Guide - Page 28
(Figure 14) appears, type the Old Password, then a new password in both the New Password and Confirm Password boxes. 3Com recommends entering a new password when setting up the Router for the first time. The Router is shipped from the factory with a default password, admin. 1. Password is case - 3Com 3CRWER100-75 | User Guide - Page 29
clock by one hour. It does not cause the system clock to be updated for daylight savings time automatically. WAN Settings Figure 16 Internet Settings Screen This Internet Addressing Mode window allows you to set up the Router for the type of Internet connection you have. Before setting up your - 3Com 3CRWER100-75 | User Guide - Page 30
) ■ ISP provides configuration dynamically (via DHCP) ■ ISP has provided a static IP address ■ PPTP is required (some DSL users in Europe) and click Next. PPPoE Mode Figure 17 PPPoE Screen To setup the Router for use with a PPP over Ethernet (PPPoE) connection, use the following procedure: 1 Enter - 3Com 3CRWER100-75 | User Guide - Page 31
default is 1454. 5 Select an idle time from the Maximum Idle Time drop down list. This is the amount of time without Internet activity that you want to allow before the Router ends the PPPoE session. 6 Check all of your settings, and then click Next. Dynamic IP Address Mode To setup the Router for - 3Com 3CRWER100-75 | User Guide - Page 32
a MAC address manually and enter the values for a MAC address if required (Figure 19). If the computer you are now using is the one that was previously connected directly to the cable modem, choose Yes, please clone the MAC address from the PC I'm currently using. Static IP Mode To setup the Router - 3Com 3CRWER100-75 | User Guide - Page 33
Screen Accessing the Wizard 37 To setup the Router for use with a PPTP connection, use the following procedure: 1 Enter your PPTP server address in the PPTP Server Address text box. 2 Enter your PPTP user name in the PPTP User Name text box. 3 Enter your PPTP password in the PPTP Password text - 3Com 3CRWER100-75 | User Guide - Page 34
38 CHAPTER 4: RUNNING THE SETUP WIZARD Figure 22 PPTP IP Settings 8 IP settings must be used when establishing a PPTP connection. Fill in the Initial IP Address and the Initial Subnet Mask fields if your ISP has provided you with these settings. Alternatively, if the PPTP server is located in your - 3Com 3CRWER100-75 | User Guide - Page 35
Screen To set up the Router for use with an L2TP connection, use the following procedure: 1 IT is a service used in Australia only. If you are using Heart Beat Signal connection, check with your ISP for the necessary setup information. 2 Enter the User Name and Password you use when logging nonto - 3Com 3CRWER100-75 | User Guide - Page 36
40 CHAPTER 4: RUNNING THE SETUP WIZARD LAN Settings Figure 24 LAN IP Address Screen This screen displays a suggested LAN IP address and subnet mask of the Router. It also allows you to change the IP address and subnet mask. DHCP The Router contains a Dynamic Host Configuration (DHCP) server that can - 3Com 3CRWER100-75 | User Guide - Page 37
be entered for the Service Area Name. 3Com strongly recommends that you change the SSID to something other than the default. Click Next when you have finished. If you are configuring the Router from a wireless computer any changes you make to the wireless configuration will result in communication - 3Com 3CRWER100-75 | User Guide - Page 38
as this may be useful if you experience problems with your clients. Summary Figure 27 Configuration Summary Screen When you complete the Setup Wizard, a configuration summary will display. 3Com recommends that you verify the configuration information of the Router and then print this page for your - 3Com 3CRWER100-75 | User Guide - Page 39
Figure 28 Wizard Completed Screen Accessing the Wizard 43 If you have made changes to the LAN Settings or wireless configuration options, you may need to reconfigure the computer you are using in order to make contact with the Router again. Your Router is now configured and ready for use. See - 3Com 3CRWER100-75 | User Guide - Page 40
44 CHAPTER 4: RUNNING THE SETUP WIZARD - 3Com 3CRWER100-75 | User Guide - Page 41
the firmware version of the Router, allows you to change your password, and launch the Wizard ■ LAN Settings - allows you to configure IP address and subnet mask information, set up DHCP server parameters, and display the DHCP client list. ■ Wireless Settings - enables /disables access from wireless - 3Com 3CRWER100-75 | User Guide - Page 42
Router. ■ Support/Feedback - contains a comprehensive online help system and allows you to provide 3Com with feedback on your Router. Option Tabs Each corresponding menu page may also provide sub-sections which are accessed Password. You can also gain access to the Configuration Wizard. Notice Board - 3Com 3CRWER100-75 | User Guide - Page 43
messages. For example, you would be warned if you had disabled wireless networking or wireless encryption. Password Figure 30 Password Screen Changing the Administration Password You can change the password to prevent unauthorized access to the Administration System. To do this: 1 Enter the current - 3Com 3CRWER100-75 | User Guide - Page 44
48 CHAPTER 5: ROUTER CONFIGURATION Wizard Figure 31 Wizard Screen Click WIZARD... to launch the configuration wizard. Refer to Chapter 4 for information on how to run the wizard. LAN - 3Com 3CRWER100-75 | User Guide - Page 45
LAN Settings screen is used to specify the LAN IP address of your Router, and to configure the DHCP server. 1 Select Unit Configuration and then specify the Router IP Address and Subnet Mask in the LAN Settings section. The default IP address of the Router is 192.168.1.1. 2 If you want to use the - 3Com 3CRWER100-75 | User Guide - Page 46
50 CHAPTER 5: ROUTER CONFIGURATION Wireless Settings The Wireless Settings menu provides options described in the following sections. To improve the security of your wireless network, 3 Com recommends that you: 1.Change the SSID from its default value 2.Enable Encryption 3.Enable Connection - 3Com 3CRWER100-75 | User Guide - Page 47
to either the internet or other PCs on your Wired or Wireless LAN through this Router. Channel Selection Select a number from the drip-down list to specify which Channel the Router will transmit and receive on. If another access point or Router nearby is using the same Channel as you, there will be - 3Com 3CRWER100-75 | User Guide - Page 48
your networking vendor. By default the Router uses the name "3Com". 3Com recommends that you change the default name. In order that your wireless computers can connect to the Router, you must: ■ Use Infrastructure Mode not Ad hoc Mode ■ Have the same Service Area Name as the Router. ■ Have the same - 3Com 3CRWER100-75 | User Guide - Page 49
with user configurable fixed keys. WPA provides a higher level of security, provided by its longer key and dynamic changes made to the key over time. 3Com recommends that you use WPA with any clients which support it. If you enable encryption on the Router, you must reconfigure your wireless PCs - 3Com 3CRWER100-75 | User Guide - Page 50
the Security Mode. Encryption: Choose from 64 bits or 128 bits Passphrase:You can enter a passphrase and click on the Generate button and the router will automatically generate four WEP keys for you. WEP Key1-4:Manaually assign a passphrase for each key. If you selected 64 bits encryption, enter 10 - 3Com 3CRWER100-75 | User Guide - Page 51
LAN Settings 55 WPA To enable WPA, select WPA-PSK or WPA2-PSK from the Security Mode. Encryption Methods: Select either TKIP or AES as the encryption method. Passphrase:Enter a passphrase between 8 to 63 characters long. Key Renewal:Enter the desired key renewal time in seconds. Click Save to save - 3Com 3CRWER100-75 | User Guide - Page 52
ROUTER CONFIGURATION WPA!with RADIUS If you are using a RADIUS server in your network for authentication, you may choose WPA or!WPA2 from the Security Mode. Encryption Methods: Select either TKIP or AES as the encryption method. RADIUS Server:Enter the IP Address of your RADIUS server. RADIUS Port - 3Com 3CRWER100-75 | User Guide - Page 53
certain wireless clients from accessing the router by specifying their MAC address and enabling access restrictn. Select Enabled from the drop-down menu and choose whether the specified wireless clients will be prevented or permitted to access the wireless network. Enter their MAC address in - 3Com 3CRWER100-75 | User Guide - Page 54
is enabled. For each device that is connected to the Wireless Lan, the MAC address and Connection Speed of that device is displayed. As you connect more devices to the Wireless LAN, the client list will grow to a maximum of 32 (the maximum number of wireless devices that the Router can support). - 3Com 3CRWER100-75 | User Guide - Page 55
information for you to enter manually. To configure the Router you will need to know the following: ■ IP Address ■ Subnet Mask ■ ISP Router ■ DNS address(es) 2 Dynamic IP Address (DSL or Cable) Dynamic IP addressing (or DHCP) automatically assigns the Router IP information. This method is popular - 3Com 3CRWER100-75 | User Guide - Page 56
60 CHAPTER 5: ROUTER CONFIGURATION Router you will need to know the following: ■ User name ■ Password ■ Service Name(ifrequired by your ISP) When you install the Router, you will not need to use the PPPoE software on your PC. - 3Com 3CRWER100-75 | User Guide - Page 57
European providers. If the installation instructions that accompany your modern ask you to setup a dialup connection using a PPTP VPN tunnel then select this option. To configure the Router you will need to know the following: ■ User name ■ Password ■ VPN Server address(usually your moderm) When you - 3Com 3CRWER100-75 | User Guide - Page 58
62 CHAPTER 5: ROUTER CONFIGURATION Static IP Address Connection Parameters Screen - Static IP To setup the Router for use with a Static IP address connection: 1 Select Static IP Address (to be specified manually) in the IP Allocation Mode field. 2 Enter your IP Address in the IP Address text box. - 3Com 3CRWER100-75 | User Guide - Page 59
on the Status screen (click on Status and Logs on the left hand menu bar). To setup the Router for use with a dynamic IP address connection: 1 Select Dynamic IP Address (automatically allocated) in the IP Allocation Mode field. 2 Enter the Host Name(optional). Some ISP srequire a host name. If your - 3Com 3CRWER100-75 | User Guide - Page 60
manually - Use this option if you want to specify a new MAC address. Enter the new MAC address. 4 Check all settings and click Save. PPP over Ethernet PPPoE Setup Screen To setup the Router for use with a PPP over Ethernet connection, use the following procedure: 1 Select PPP over Ethernet in the IP - 3Com 3CRWER100-75 | User Guide - Page 61
to the amount of idle time (no Internet activity) that will pass before the Router automatically ends your PPP over Ethernet session. Since the Router contains its own PPPoE client, you no longer need to run PPPoE client software on your computer to access the Internet. PPTP PPTP Setup Screen - 3Com 3CRWER100-75 | User Guide - Page 62
To setup the Router for use with a PPTP connection, use the following procedure: 1 Select PPTP (used by some European providers) in the IP Allocation Mode field. 2 Enter your PPTP server address in the PPTP Server Address text box (this is typically the address of your modem). 3 Enter your PPTP user - 3Com 3CRWER100-75 | User Guide - Page 63
in the Heart Beat Signal User Name text box. 4 Enter your Heart Beat Signal password in the Heart Beat Signal Password text box. 5 Enter the MTU value supplied by your ISP. If you do not know this, leave it at the default value. The default is 1440. 6 Select an idle time from the Maximum Idle - 3Com 3CRWER100-75 | User Guide - Page 64
used only if the Virtual Server or Special Applications options do not provide the level of access needed for certain applications. To configure one of your computers as a DMZ host, enter the last digit(s) of the IP address of the computer in the IP Address of DMZ Host text box, and then click Save. - 3Com 3CRWER100-75 | User Guide - Page 65
your Web site. If you want to host ftp server or online gaming, you must open up ports on the router. This page allows you to setup port forwarding for the specified applications. Before using forwarding, you should assian static IP addresses to the designated PCs. Click Save to save the settings. - 3Com 3CRWER100-75 | User Guide - Page 66
Application allows the router to keep track of outgoing data for specific port numbers. The router remembers which computer sends out what data, so when the requested data returns through the router, the data is sent back to the proper computer by way of IP address and port mapping rules. Click - 3Com 3CRWER100-75 | User Guide - Page 67
Firewall 71 Only one computer on your network can use the special application at any one time. SPI Select Firewall from the main menu, then select the SPI to display the SPI screen.!SPI Screen Check the Enable SPI and Anti-Dos Firewall protection check box to enable SPI.!When this feature is enabled - 3Com 3CRWER100-75 | User Guide - Page 68
ROUTER CONFIGURATION QOS QoS(Quality of Service) manages information as it is transmitted and received. It ensures better service to those application with a higher priority. Click Save to save the setting. Internet Access Policy You can setup policies that deny or allow specific clients to access - 3Com 3CRWER100-75 | User Guide - Page 69
by its MAC Addressor IP Address. You can also specify a group of clients by entering their IP Address Range. Once you have specified all the clients, click Save. Access Restrictions: Select to Deny or Allow the specified clients to access the Internet by Day and Time. Blocked Application Port Select - 3Com 3CRWER100-75 | User Guide - Page 70
74 CHAPTER 5: ROUTER CONFIGURATION Website Blocking You can block the specified clients from accessing certain websites by URL or Keyword. Enter the URL or the Keyword you wish to block. Click Save to save the setting. To view all the policies, click the Summary button. - 3Com 3CRWER100-75 | User Guide - Page 71
Firewall 75 Contnet!Filter You can subscribe to the 3Com Content Filter Service, which enables you to block or allow the URL of a number of pre-defined categories. The Router comes with a 14-day free trial of the 3Com Content Filter Service. To activate the 14-day free trial of the service, you must - 3Com 3CRWER100-75 | User Guide - Page 72
76 CHAPTER 5: ROUTER CONFIGURATION To activate Content Filtering: 1 Select Firewall form the down list. If you select custom entry, enter the server IP address in the text box. 4 Select the Server Timeout value in milliseconds. The default is 3000 milliseconds (3 seconds). 5 Select Allow or Deny - 3Com 3CRWER100-75 | User Guide - Page 73
the Router, simulating the effect of power cycling the unit. No configuration information will be lost but the log files will be erased. this function may be of use if you are experiencing problems and you wish to re-establish your Internet connection. Any network users who are currently accessing - 3Com 3CRWER100-75 | User Guide - Page 74
78 CHAPTER 5: ROUTER CONFIGURATION Time Zone Time Zone Screen Choose the time zone that . If you use Daylight saving tick the Enable Day Light savings box, and then click Save. The Router reads the correct time from NTP servers on the Internet and sets its system clock accordingly. The Daylight - 3Com 3CRWER100-75 | User Guide - Page 75
copy the data into the Router's memory. The password will remain unchanged. Reset to Factory Default If you want to reset the settings on your Router to those that were loaded at the factory, click RESET. You will lose all your configuration changes. The Router LAN IP address will revert to 192.168 - 3Com 3CRWER100-75 | User Guide - Page 76
80 CHAPTER 5: ROUTER CONFIGURATION Upgrade Upgrade Screen The Upgrade facility allows you to install on the Router any new releases of system software that 3Com may make available. To install new software, you first need to download the software from the 3Com support web site to a folder on your - 3Com 3CRWER100-75 | User Guide - Page 77
not interrupt power to the Router during the upgrade procedure; if you do, the software may be corrupted and the Router may not start up static route ■ Network Address - the network address of the route. If network address and subnet mask are both set to 0.0.0.0, this is the default route. ■ Subnet - 3Com 3CRWER100-75 | User Guide - Page 78
82 CHAPTER 5: ROUTER CONFIGURATION RIP The Router supports the Routing Information Protocol (RIP). RIP allows you to set up routing information on one RIP enabled device, and have that the RIP tab to display the screen/ RIP screen Check the Enable RIP Mode check box to configure RIP on the Router. - 3Com 3CRWER100-75 | User Guide - Page 79
to map a static domain name to a dynamic IP address. The Router supports two DDNS providers, TZO.com and DYNDNS.org. Before you can set up DDNS, you must obtain an account, password and static domain name from your DDNS provider. DDNS is disabled by default. To set up DDNS: 1 Select Advanced from - 3Com 3CRWER100-75 | User Guide - Page 80
84 CHAPTER 5: ROUTER CONFIGURATION 2 Select a DDNS Service provider from the drop-down list. This mail text box, enter the account name. 3 In the Key text box, enter the account password. 4 Click Save to make this service active. DynDNS.org If you select DYNDNS.org: 1 In the Host Name text box, - 3Com 3CRWER100-75 | User Guide - Page 81
Internet connects millions of computer users throughout the world. The vast majority of the computer users on the Internet are friendly compatible software to read and change some the Router's firewall settings. This reduces the configuration required but lessens your control of the Router's - 3Com 3CRWER100-75 | User Guide - Page 82
for remote administration: ■ Disable Remote Administration - This option is set as default. ■ Enable administration from a single Internet Host - Only the specified Host IP Address can manage the Router. Any other users will be rejected. ■ Enable administration from a whole subnet - This option - 3Com 3CRWER100-75 | User Guide - Page 83
the location bar of the browser running on the remote computer, where xxx.xxx.xxx.xxx is the Internet IP address of the Router. You may then login using the administration password. Your Internet IP address can be found at the bottom of the screen. . Syslog Select Syslog to display the syslog screen - 3Com 3CRWER100-75 | User Guide - Page 84
88 CHAPTER 5: ROUTER CONFIGURATION Status and Logs Selecting Status and Logs from the main menu displays the Status,! Logs-and Routing Table in yur Web browser window. Status The Status screen displays a tabular representation of your network and Internet connection. Status Screen - 3Com 3CRWER100-75 | User Guide - Page 85
the Refresh button to update the log. click the Clean button to clear all the information that is displayed. The Outgoing Log will display a temporary log of the LAN IP Addresses, Destination URLs or IP Addresses, Destination URLs or IP Address, and Service or Port Numbers for the outgoing Internet - 3Com 3CRWER100-75 | User Guide - Page 86
to display routing information used by the Router. The information is displayed in the form at shown as below. Support/Feedback Selecting Support/Feedback from the main menu displays the Support and Feedback screens. Support Support Screen Selecting the Support option on the main menu displays the - 3Com 3CRWER100-75 | User Guide - Page 87
Feedback Feedback Screen Status and Logs 91 Selecting the Feedback option displays the Feedback screen and allows you to provide feedback to 3Com on the operation of your Router . This screen should not be used to obtain technical support. - 3Com 3CRWER100-75 | User Guide - Page 88
92 CHAPTER 5: ROUTER CONFIGURATION - 3Com 3CRWER100-75 | User Guide - Page 89
described in Chapter 3, Setting Up Your Computers. Restart your computer while it is connected to the Router to ensure that your computer receives an IP address. ■ When entering the address of the Router into your web browser, ensure that you use the full URL including the http:// prefix (e.g. http - 3Com 3CRWER100-75 | User Guide - Page 90
PPPoE or PPTP user name, password and service name are correct, if these are required. Only enter a PPPoE service name if your ISP requires one. ■ For cable users, check whether your ISP requires a fixed MAC (Ethernet) address. If so, use the Clone MAC Address feature in the Router to ensure that - 3Com 3CRWER100-75 | User Guide - Page 91
Wireless computer has either Windows 95 or higher or MAC OS 8.5 or higher. ■ Verify that your wireless computers are configured to work in Infrastructure mode and not Ad Hoc mode. The Router contains an Access Point that is designed to operate in Infrastructure mode. Ad Hoc mode is not supported - 3Com 3CRWER100-75 | User Guide - Page 92
both the wireless computers and the Router to establish whether this problem exists. ■ Most wireless computer Adapters will scan the channels for the wireless Router. If a wireless computer has not located the Router then try initiating a search manually if the client software supports this feature - 3Com 3CRWER100-75 | User Guide - Page 93
LED is unlit then there may be a fault with your unit. Contact 3Com Technical Support. ■ Check that you are using the correct power adapter for your Router. You should only use the power adapter supplied with your Router. Replacement Power Adapters If both the Power Adapter OK LED and Power LED - 3Com 3CRWER100-75 | User Guide - Page 94
detected. Locate the copy of the Router software on the accompanying CD-ROM or 3Com web site (http://www.3com.com) and upload it to the Router to see if this clears the fault (refer to "Recovering from Corrupted Software" below). If this does not fix the problem, contact your supplier for further - 3Com 3CRWER100-75 | User Guide - Page 95
"recovery" state; DHCP is disabled, and the LAN IP address is set to 192.168.1.1. Follow the instructions below to upload a new copy of the system software to a Router unit in this state. Ensure that one of your computers has a copy of the new software image file stored on its hard disk or available - 3Com 3CRWER100-75 | User Guide - Page 96
Router. 3Com wireless access points and OfficeConnect hubs and switches provide a simple, reliable means of expanding your network; contact your supplier for more information, or visit: http://www.3com.com/ Does the Router support virtual private networks (VPNs)? The Router supports VPN passthrough - 3Com 3CRWER100-75 | User Guide - Page 97
Running the Discovery Application 3Com provides a user friendly Discovery application for detecting the Router on the network. Windows Installation (95/98/2000/Me/NT) 1 Insert the Router CD-ROM in the CD-ROM drive on your computer. A menu will appear; select Router Discovery. Discovery will find - 3Com 3CRWER100-75 | User Guide - Page 98
112 APPENDIX A: USING DISCOVERY Discovered Router Screen 3 Highlight the Cable/DSL Router by clicking on it, and press Next. Discovered Finish!Screen 4 Click on Finish to launch a web browser and display the login page for the Router. - 3Com 3CRWER100-75 | User Guide - Page 99
over the network, the Router must be correctly configured with the following IP information: ■ An IP address ■ A Subnet Mask IP Addresses and Subnet Masks Each device on your network must have a unique IP address to operate correctly. An IP address identifies the address of the device to which - 3Com 3CRWER100-75 | User Guide - Page 100
operates on a subnet mask of '255.255.255.0'. See an example about how a network with three computers and a Router might be configured. Table 4 IP Addressing and Subnet Masking Device PC 1 PC 2 PC 3 Router IP Address 192.168.100.8 192.168.100.33 192.168.100.188 192.168.100.72 Subnet Mask 255 - 3Com 3CRWER100-75 | User Guide - Page 101
networks with large numbers of users on them. Static Addressing You must enter an IP Address and the subnet mask manually on every device. Using a static IP and subnet mask means the address is permanently fixed. Auto-IP Addressing Network devices use automatic IP addressing if they are configured - 3Com 3CRWER100-75 | User Guide - Page 102
subnet of 169.254.x.x (with a subnet mask of 255.255.0.0). If two devices allocate themselves the same address, the conflict is detected and one of the devices allocates itself a new address. Automatic IP addressing support was introduced by Microsoft in the Windows 98 operating system and is also - 3Com 3CRWER100-75 | User Guide - Page 103
OfficeConnect Wireless 11g Cable/DSL Router. Wireless 11g Cable/DSL Router Interfaces Cable/DSL modem connection - 10Mbps/100Mbps dual speed Ethernet port fallback to 5.5, 2, or 1 Mbps Maximum channels: 14 Range up to 304.8m (1000ft) Frequency: (US/Canada/Europe) 2.400-2.4835 GHz Sensitivity: 1, 2, - 3Com 3CRWER100-75 | User Guide - Page 104
118 APPENDIX C: TECHNICAL SPECIFICATIONS Encryption: 40/64 bit WEP, 128 bit WEP, WPA Maximum clients: 128 O/P Power 18dBm Operating Temperature 0 °C to 40 °C (32 °F to 105 °F) Power 7VA, 23.9 BThU/hr Humidity 0% to 90% (non-condensing) humidity Dimensions ■ Width = 220 mm (8.7 in.) ■ Depth = 135 mm - 3Com 3CRWER100-75 | User Guide - Page 105
■ Windows XP ■ Mac OS 8.5 or higher ■ Unix Ethernet Performance The Router complies to the IEEE 802.3i, u and x specifications. Wireless Performance The Router has been designed to conform to the Wi-Fi interoperability test standard. Cable Specifications The Router supports the following cable - 3Com 3CRWER100-75 | User Guide - Page 106
120 APPENDIX C: TECHNICAL SPECIFICATIONS - 3Com 3CRWER100-75 | User Guide - Page 107
the equipment to which it is connected also operates under SELV conditions. WARNING: There are no user-replaceable fuses or user-serviceable parts inside the Router. If you have a physical problem with the unit that cannot be solved with problem solving actions in this guide, contact your supplier. - 3Com 3CRWER100-75 | User Guide - Page 108
before moving the unit. WARNING: RJ-45 ports. These are shielded RJ-45 data sockets. Access Point eingesetzt werden soll, erlaubt ist. VORSICHT: Bei der Installation und beim Ausbau des Geräts ist mit höchster Vorsicht vorzugehen. VORTSICHT: Stapeln Sie das Geräts nur mit anderen OfficeConnect - 3Com 3CRWER100-75 | User Guide - Page 109
zu wartende Teile in dem Gerät vorhanden. Wenn Sie ein Problem mit dem Router haben, das nicht mittels der Fehleranalyse in dieser Anleitung behoben werden : Seulement entasser le moyer avec les autres moyeux OfficeConnects. AVERTISSEMENT: Pour garantir le respect des normes internationales - 3Com 3CRWER100-75 | User Guide - Page 110
qui ne peut pas être résolu avec les actions de la résolution des problèmes dans ce guide, contacter votre fournisseur. AVERTISSEMENT: Débranchez l'adaptateur électrique avant de retirer cet appareil. AVERTISSEMENT: Ports RJ-45. Il s'agit de prises femelles blindées de données RJ-45. Vous ne pouvez - 3Com 3CRWER100-75 | User Guide - Page 111
AGREEMENT IMPORTANT: READ BEFORE INSTALLING THE SOFTWARE 3Com END USER SOFTWARE LICENSE AGREEMENT YOU SHOULD CAREFULLY READ THE FOLLOWING TERMS AND CONDITIONS BEFORE DOWNLOADING, INSTALLING AND USING THIS PRODUCT, THE USE OF WHICH IS LICENSED BY 3COM CORPORATION (ì3COMî) TO ITS CUSTOMERS FOR THEIR - 3Com 3CRWER100-75 | User Guide - Page 112
E: END USER SOFTWARE LICENSE AGREEMENT 3Com and its suppliers. You agree to hold such trade secrets in confidence. You further acknowledge and agree that ownership of, and title to, the Software and Documentation and all subsequent copies thereof regardless of the form or media are held by 3Com and - 3Com 3CRWER100-75 | User Guide - Page 113
installed on PC, MacPOET/WinPOET, EnterNet 300. The Router has this software built in and you can remove it from your PC. You will need to enter the user name and password that your ISP provided to you in the PPPoE page of the Router. Leave the service name blank unless your ISP requires it. Bell - 3Com 3CRWER100-75 | User Guide - Page 114
IP information from ISP in the Static IP address section of the Internet Settings page. CableSpeed, Cnet, Direct Link, Drizzle, DSL Extreme, Earthlink Wireless, Fast Point assigns specific IP information which needs to be entered on the "Fixed IP" page of the Router. Cox Cable, Sprint, US Cable, - 3Com 3CRWER100-75 | User Guide - Page 115
most wireless clients. It is used to connect a peer to peer network together without the use of an access point. It offers lower performance than infrastructure mode, which is the mode the Router uses. (see also Infrastructure mode.) Auto-negotiation Some devices in the OfficeConnect range support - 3Com 3CRWER100-75 | User Guide - Page 116
for network cabling than Category 3, because it supports both Ethernet (10 Mbps) and Fast Ethernet (100 Mbps) speeds. Channel Similar to any radio device, the OfficeConnect Cable/DSL Router allows you to choose different radio channels in the wireless spectrum. A channel is a particular frequency - 3Com 3CRWER100-75 | User Guide - Page 117
a database of host computers and their respective domain names and IP addresses, so that when a domain name is requested (as in typing "3com.com" into your Internet browser), the user is sent to the proper IP address. The DNS server address used by the computers on your home network is the location - 3Com 3CRWER100-75 | User Guide - Page 118
mode is the wireless configuration supported by the Router. You will need to ensure all of your clients are set up to use infrastructure mode in order for them to communicate with the Access Point built into your Router. (see also Ad Hoc mode) IP Internet Protocol. IP is a layer 3 network - 3Com 3CRWER100-75 | User Guide - Page 119
Service MAC addresses are 6 bytes long. NAT Network Address Translation. NAT enables all the computers on your network to share one IP address. The NAT capability of the Router allows you to access error control. PPPoE Point-to-Point Protocol over Ethernet. Point-to-Point Protocol is a method - 3Com 3CRWER100-75 | User Guide - Page 120
134 GLOSSARY PPTP Point-to-Point Tunneling Protocol access the network will be denied. SSID Service Set Identifier. Some vendors of wireless products use SSID interchangeably with ESSID. Subnet Address An extension of the IP addressing scheme that allows a site to use a single IP network address - 3Com 3CRWER100-75 | User Guide - Page 121
with each other to bridge together two separate networks. In wireless repeating, APs rebroadcast received signals to extend reach and range, at the expense of throughput. The Router uses wireless repeating. WECA Wireless Ethernet Compatibility Alliance. An industry group formed to certify cross - 3Com 3CRWER100-75 | User Guide - Page 122
Client The term used to describe a desktop or mobile PC that is wirelessly connected to your wireless network Wireless LAN Service Another term for ESSID (Extended Service Set Identifier) Area Wizard A Windows application that automates a procedure such as installation or configuration. WLAN - 3Com 3CRWER100-75 | User Guide - Page 123
3Com OfficeConnect Wireless 54Mbps/108Mbps 11g Cable/DSL Router (WL-537, WL-537S) must be installed and used in strict accordance with the manufacturer's instructions as described in the user user serviceable components. Any unauthorized product changes or modifications will invalidate 3Com pointed - 3Com 3CRWER100-75 | User Guide - Page 124
installed and used in accordance with the instructions, it may cause harmful interference to radio determined by tuning the equipment off and on, the user is encouraged to try and correct the interference by included with this 3Com OfficeConnect Wireless 54Mbps/108Mbps 11g Cable/DSL Router (WL-537, - 3Com 3CRWER100-75 | User Guide - Page 125
3064, USA (800) 527-8677 Date: 03,20 2006 Declares that the Product: Brand Name: 3Com Corporation Model Number: WL-537, WL-537S Equipment Type: 3Com OfficeConnect Wireless 54Mbps/108Mbps 11g Cable/DSL Router Complies with Part 15 of the FCC rules. Operation is subject to the following two conditions - 3Com 3CRWER100-75 | User Guide - Page 126
technical specifications were met. To reduce potential radio interference to other users, the antenna type and its gain should be so chosen that is subject to licensing. Pour empecher que cet appareil cause du brouillage au service faisant l'objet d'une licence, il doit etre utilize a l'interieur et - 3Com 3CRWER100-75 | User Guide - Page 127
is in compliance with local regulations, select the country in which the product is installed. Refer to 3Com OfficeConnect Wireless 54Mbps/108Mbps 11g Cable/DSL Router User Guide. EUROPE - DECLARATION OF CONFORMITY IN LANGUAGES OF THE EUROPEAN COMMUNITY English Finnish Dutch French Swedish Danish - 3Com 3CRWER100-75 | User Guide - Page 128
.com/doc/WL-537_EU_DOC.pdf A copy of the signed Declaration of Conformity can be downloaded from the Product Support web page for the 3CRWER200-75(WL-537S) at http://www.3com.com. Also available at http://support.3com.com/doc/WL-537S_EU_DOC.pdf EUROPE - RESTRICTIONS FOR USE OF 2.4GHZ FREQUENCIES IN
-
 1
1 -
 2
2 -
 3
3 -
 4
4 -
 5
5 -
 6
6 -
 7
7 -
8
-
9
-
10
-
11
-
12
-
13
-
14
-
15
-
16
-
17
-
18
-
19
-
20
-
21
-
22
-
23
-
24
-
25
-
26
-
27
-
28
-
29
-
30
-
31
-
32
-
33
-
34
-
35
-
36
-
37
-
38
-
39
-
40
-
41
-
42
-
43
-
44
-
45
-
46
-
47
-
48
-
49
-
50
-
51
-
52
-
53
-
54
-
55
-
56
-
57
-
58
-
59
-
60
-
61
-
62
-
63
-
64
-
65
-
66
-
67
-
68
-
69
-
70
-
71
-
72
-
73
-
74
-
75
-
76
-
77
-
78
-
79
-
80
-
81
-
82
-
83
-
84
-
85
-
86
-
87
-
88
-
89
-
90
-
91
-
92
-
93
-
94
-
95
-
96
-
97
-
98
-
99
-
100
-
101
-
102
-
103
-
104
-
105
-
106
-
107
-
108
-
109
-
110
-
111
-
112
-
113
-
114
-
115
-
116
-
117
-
118
-
119
-
120
-
121
-
122
-
123
-
124
-
125
-
126
-
127
-
128
 |
 |

OfficeConnect
®
Wireless 54Mbps/108Mbps 11g Cable/DSL
Router User Guide
3CRWER100-75(Model:WL-537)
3
CRWER200-75(Model:WL-537S)