AIWA CX-NHMT75 Operating Instructions
AIWA CX-NHMT75 Manual
 |
View all AIWA CX-NHMT75 manuals
Add to My Manuals
Save this manual to your list of manuals |
AIWA CX-NHMT75 manual content summary:
- AIWA CX-NHMT75 | Operating Instructions - Page 1
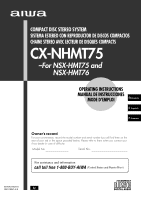
COMPACT DISC STEREO SYSTEM SISTEMA ESTEREO CON REPRODUCTOR DE DISCOS COMPACTOS CHAINE STEREO AVEC LECTEUR DE DISQUES COMPACTS CX-NHMT75 -For NSX-HMT75 and NSX-HMT76 OPERATING INSTRUCTIONS MANUAL DE INSTRUCCIONES MODE D'EMPLOI En (English) E (Español) F (Français) Owner's record For your - AIWA CX-NHMT75 | Operating Instructions - Page 2
user to the presence of important operating and maintenance (servicing) instructions in the literature accompanying the appliance. NOTE This equipment has been tested and found to comply with the limits for a Class B digital device, pursuant to Part spot - The heating system has just been turned - AIWA CX-NHMT75 | Operating Instructions - Page 3
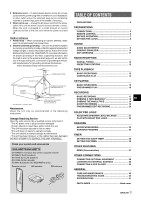
DO NOT ATTEMPT TO SERVICE THE UNIT YOURSELF. Check your system and accessories NSX-HMT75/NSX-HMT76 CX-NHMT75 Compact disc stereo cassette receiver SX-NAJ72 Front speakers SX-R275 Surround speakers SX-C605 Center speaker TS-W45 Subwoofer (for NSX-HMT76 only) Remote control AM antenna FM antenna - AIWA CX-NHMT75 | Operating Instructions - Page 4
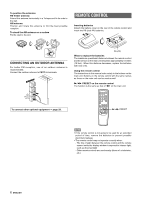
PREPARATIONS CONNECTIONS Before connecting the AC cord The rated voltage of your unit shown on the rear panel is 120 V AC. Check that the rated voltage matches your local voltage. IMPORTANT Connect the speakers, antennas, and all optional equipment first. Then connect the AC cord. 1 Connect the - AIWA CX-NHMT75 | Operating Instructions - Page 5
audio output jack of the video equipment with an optional audio connecting cord. 8 Connect the television to the video equipment. Refer to the Operating Instructions the AM antenna near other optional equipment, the stereo system itself, the AC cord or speaker cords, since noise will be picked - AIWA CX-NHMT75 | Operating Instructions - Page 6
5 meters (16 feet). When this distance decreases, replace the batteries with new ones. Using the remote control The instructions in this manual refer mainly to the buttons on the main unit. Buttons on the remote control with the same names as those on the main unit can be used as well. c/d PRESET - AIWA CX-NHMT75 | Operating Instructions - Page 7
PREPARATIONS BEFORE OPERATION 1 Press ECO. "ECO MODE" will be displayed. 2 Press ENTER within 4 seconds. The current power-economizing mode status will be displayed. 3 Turn MULTI JOG within 4 seconds to select one of the power-economizing modes. Example : When "ECO ON" is selected. To turn the - AIWA CX-NHMT75 | Operating Instructions - Page 8
SETTING THE CLOCK To switch to the 24-hour standard Press CLOCK and then press s within 4 seconds. Repeat the same procedure to restore the 12-hour standard. In the 12-hour standard, "AM 12:00" indicates midnight and "PM 12:00" indicates noon. If the clock display flashes If the display flashes - AIWA CX-NHMT75 | Operating Instructions - Page 9
MANUAL SELECT on the remote control. "L/R" is displayed for 4 seconds. Press r DOWN or t UP on the remote control within these 4 seconds. • The DOLBY PRO LOGIC and the DOLBY DIGITAL En BBE SYSTEM The BBE system enhances the clarity of high-frequency sound. It also enriches the Karaoke function to - AIWA CX-NHMT75 | Operating Instructions - Page 10
Manual mode To display the current GEQ mode Press GEQ. The current mode is displayed for 4 seconds. To cancel the selected mode Press GEQ twice. "GEQ OFF" appears and "GRAPHIC EQUALIZER" disappears. To select with the remote control the PHONES jack with a standard stereo plug (ø6.3 mm, 1/4 inch). - AIWA CX-NHMT75 | Operating Instructions - Page 11
MANUAL SELECT twice or three times on the remote control. "S-L" or "S-R" is displayed for 4 seconds. Press f DOWN or g UP on the remote control within these 4 seconds. • The DOLBY PRO LOGIC (page 21) and the DOLBY DIGITAL or "STADIUM" to obtain a simulated stereo effect. When "DISCO" or "HALL" is - AIWA CX-NHMT75 | Operating Instructions - Page 12
in to a station, the search stops. To stop the Auto Search manually, press f DOWN or g UP. • The Auto Search may not stop at stations with very weak signals. When an FM stereo broadcast contains noise Press MONO TUNER on the remote control so that "MONO" appears on the display. Noise is reduced - AIWA CX-NHMT75 | Operating Instructions - Page 13
TAPE PLAYBACK RADIO RECEPTION TAPE PLAYBACK BASIC OPERATIONS To select a reverse mode (deck 2 only) Each time REV MODE is pressed, the reverse mode changes. • On deck 1, tapes are always played back on both sides. On deck 2, you can select a reverse mode to play back one or both sides. • Use Type - AIWA CX-NHMT75 | Operating Instructions - Page 14
MUSIC SENSOR If there is a 4-second or longer blank between each track, a search for the beginning of the current or next track during playback can be done easily. Press f or g during playback referring to the playback side indicator (x or c) on the display. For example, when g is pressed while c is - AIWA CX-NHMT75 | Operating Instructions - Page 15
remaining until all tracks finish playing is displayed. To restore the playing time display, repeat the above. Selecting a track with the remote control 1 Press DISC DIRECT PLAY and within 3 seconds press 1, 2 or 3 to select a disc. 2 Press numbered buttons 0-9 and +10 to select a track. Example - AIWA CX-NHMT75 | Operating Instructions - Page 16
30 tracks can be programmed from any of the inserted discs. Use the remote control. 1 Press PRGM twice in stop mode. "PRGM" is displayed . PRGM • When PRGM is pressed once in step 1, the unit enters the KARAOKE PROGRAM (page 24). 2 Press DISC DIRECT PLAY and within 3 seconds press 1, 2 or 3 to - AIWA CX-NHMT75 | Operating Instructions - Page 17
press it again. To start recording with the remote control First press q REC/REC MUTE, and then press c/d within 2 seconds. Sound adjustment during recording The VOLUME control has no effect on recording, while the BBE affects recording. Preparation - AIWA CX-NHMT75 | Operating Instructions - Page 18
DUBBING A TAPE MANUALLY DUBBING THE WHOLE TAPE • Set the tape to the point where recording will start. • The reverse mode is automatically set to p. Note that recording will - AIWA CX-NHMT75 | Operating Instructions - Page 19
the minus mark). • When "PRGM" is displayed, press CD EDIT/CHECK. 4 Press DISC DIRECT PLAY 1-3 to select a disc. 5 Press numbered buttons 0-9 on the remote control to designate the tape length. 10 to 99 minutes can be specified. Example: When using a 60-minute tape, press 6 and 0. In a few seconds - AIWA CX-NHMT75 | Operating Instructions - Page 20
3 Press CD EDIT/CHECK twice. "EDIT" and "PRGM" are displayed. • When "AI" is displayed, press CD EDIT/CHECK again. 4 Press numbered buttons on the remote control to designate the tape length. 10 to 99 minutes can be specified. • The f, g or MULTI JOG are also available to designate the tape length - AIWA CX-NHMT75 | Operating Instructions - Page 21
STEREO" is displayed, press DOLBY PRO LOGIC repeatedly until "NORMAL" is selected. • If the surround speakers or the center speaker level of the En DOLBY PRO LOGIC is changed, that of the DSP SURROUND system (page 11) and the DOLBY DIGITAL , press MANUAL SELECT on the remote control repeatedly until - AIWA CX-NHMT75 | Operating Instructions - Page 22
or video software. 1 Press MANUAL SELECT on the remote control repeatedly to select "CEN" ( the left and right speakers. 3 STEREO mode: Use this mode when no surround changed. - the DSP SURROUND system or the BBE is turned on. - the headphones are plugged in. - the Karaoke function is turned on. - AIWA CX-NHMT75 | Operating Instructions - Page 23
function for multi audio discs or tapes. Press KARAOKE repeatedly to select the vocal fader or multiplex function. Each time KARAOKE is pressed, with strong echoes - Those with the vocal part recorded on the right or left side of the sound width • While the Karaoke function is on, the sound is output - AIWA CX-NHMT75 | Operating Instructions - Page 24
remote control . 1 Press CD and load the discs. 2 Press PRGM once. 3 Press DISC DIRECT PLAY and within 3 seconds press 1, 2 or 3 to select a disc . Then, press numbered buttons 0-9 and +10 to program a track. Reserved disc number Reserved track number Press it once more to cancel the Karaoke - AIWA CX-NHMT75 | Operating Instructions - Page 25
THE SLEEP TIMER SETTING THE TIMER KARAOKE TIMER The unit can be turned off automatically at a specified time. Use the remote control. 1 Press SLEEP. 2 . 2 Press TIMER repeatedly until appears on the display. Time and audio source name flash alternately. En To check the time remaining until the - AIWA CX-NHMT75 | Operating Instructions - Page 26
5 Adjust the volume. The source sound will play at the volume level set in this step when the power is turned on by the timer. If the volume level is set to 21 or higher, however, it will automatically be set to 20 when the power is turned on. 6 Prepare the source. To listen to a CD, load the disc - AIWA CX-NHMT75 | Operating Instructions - Page 27
OTHER FEATURES DEMO (Demonstration) To change the probability of equalizing the three numbers Press f or g repeatedly to select one of the three probability levels when playing the game Demo. The tray number indicator in the display changes between 1 and 3. As the tray number increases from 1 to 3, - AIWA CX-NHMT75 | Operating Instructions - Page 28
JACKS This unit can input sound signals from the audio equipment (DVD player, LD player, etc.) that contains a Dolby Digital decoder with the 5.1 ch output terminals. Refer to "CONNECTING A DVD PLAYER" on page 29. Refer to the operating instructions of the connected equipment for details. • The - AIWA CX-NHMT75 | Operating Instructions - Page 29
instructions of the DVD player. • DOLBY DIGITAL SURROUND support the DOLBY DIGITAL SURROUND. En • The function is changed from the 5.1 CH to the VIDEO when; - the headphones are plugged in. - the MIC or ECHO level is changed. - the DSP SURROUND system, the DOLBY PRO LOGIC or the Karaoke - AIWA CX-NHMT75 | Operating Instructions - Page 30
TROUBLESHOOTING GUIDE fails to perform as described in these Operating Instructions, check the following guide. GENERAL There is no sound. • ? The output sound is not stereo. • Is the Karaoke function turned on? (© page sound is distorted. • Is the system picking up external noise or multipath - AIWA CX-NHMT75 | Operating Instructions - Page 31
SPECIFICATIONS Main unit CX-NHMT75 kHz, THD less than 1%, 8 ohms) 0.1 % (40 W, 1 kHz, 6 ohms, DIN AUDIO/Front) VIDEO/AUX: 316 mV (adjustable) MD: 316 mV (adjustable) MIC 1, MIC 2: 1 section Track format Frequency response Recording system Heads 4 tracks, 2 channels stereo CrO2 tape: 50 Hz - 16000 - AIWA CX-NHMT75 | Operating Instructions - Page 32
PARTES (DECK 2 13,17 CD EDIT/CHECK 15,19,20 KARAOKE 23 DOLBY PRO LOGIC 21,22 8 TIMER 25 SLEEP ,20 ! DISC DIRECT PLAY 15,19,20 @ T-BASS 9 GEQ 10 KARAOKE 23 z OPEN/CLOSE 15 # r/f DOWN 8,11-16,19-22,24,25 MANUAL SELECT 9,21,22,29 DOLBY PRO LOGIC 21,22 For assistance and information call - AIWA CX-NHMT75 | Operating Instructions - Page 33
la ventilación apropiada quede asegurada. Deje un espacio libre de 10 cm por la parte posterior y superior de la unidad, y 5 cm por cada lado. - No Conecte solamente esta unidad a las fuentes de alimentación especificadas en el manual de instrucciones, y como está marcado en la unidad. 2 Polarizaci - AIWA CX-NHMT75 | Operating Instructions - Page 34
-HMT76 CX-NHMT75 Sintonizador, CONTROL REMOTO 6 ANTES DE LA OPERACION 7 PUESTA EN HORA DEL RELOJ 8 SONIDO AJUSTES DE AUDIO 9 ECUALIZADOR GRAFICO 10 DSP SURROUND 11 RECEPCION DE LA RADIO SINTONIZACION MANUAL KARAOKE MEZCLA MICROFONICA 23 PROGRAMA DE KARAOKE PARTES Cubierta trasera 3 ESPAÑOL - AIWA CX-NHMT75 | Operating Instructions - Page 35
PREPARATIVOS CONEXIONES Antes de conectar el cable de CA La tensión nominal de su unidad, mostrada en el panel trasero, es de 120 V CA. Compruebe que esta tensión nominal concuerde con la tensión de su localidad. IMPORTANTE Conecte primero los altavoces, las antenas y todos los demás equipos - AIWA CX-NHMT75 | Operating Instructions - Page 36
. E Conecte la toma VIDEO/AUX de esta unidad a la toma de salida de audio del equipo de vídeo empleando un cable de conexión de audio opcional. 8 Conecte el televisor al equipo de vídeo. Consulte el manual de instrucciones del equipo conectado para tener más detalles. 9 Conecte el cable de CA - AIWA CX-NHMT75 | Operating Instructions - Page 37
el gancho en la ranura. CONTROL REMOTO Inserción de las pilas Quite la tapa de las pilas, ubicada en la parte trasera del control remoto, e inserte dos control remoto Las instrucciones descritas en este manual se refieren principalmente a los botones de la unidad principal. Los botones del control - AIWA CX-NHMT75 | Operating Instructions - Page 38
superior de la unidad y la iluminación de los botones se apagarán. VENTANILLA PARPADEANTE La ventanilla de la parte superior de la unidad se encenderá o parpadeará y el interior del portacasetes se iluminará mientras la unidad está siendo encendida. Para apagar la luz de la - AIWA CX-NHMT75 | Operating Instructions - Page 39
PUESTA EN HORA DEL RELOJ Para cambiar al modo de 24 horas Pulse CLOCK y luego pulse s antes de que pasen 4 segundos. Repita el mismo procedimiento para reponer el modo de 12 horas. En el modo estándar de 12 horas, "AM 12:00" indica la medianoche y "PM 12:00" indica el mediodía. Si parpadea la - AIWA CX-NHMT75 | Operating Instructions - Page 40
el equilibrio de los canales derecho/ izquierdo Pulse MANUAL SELECT del control remoto. "L/R" se visualizará durante 4 segundos. Pulse r DOWN o t UP del control remoto antes de que pasen estos 4 segundos. • El nivel DOLBY PRO LOGIC y DOLBY DIGITAL SURROUND de los altavoces delanteros cambiará tambi - AIWA CX-NHMT75 | Operating Instructions - Page 41
ROCK M5 POP LATIN CLASSIC Modo programado M4 M3 M2 JAZZ M1 Modo manual Para visualizar el modo GEQ actual Pulse GEQ. El modo actual se "GEQ OFF" aparece y "GRAPHIC EQUALIZER" desaparece. Para seleccionar con el control remoto Pulse GEQ y antes de que pasen 4 segundos, pulse repetidamente f - AIWA CX-NHMT75 | Operating Instructions - Page 42
de sonido ambiental Pulse dos o tres veces MANUAL SELECT del control remoto. "S-L" o "S-R" se visualizará durante 4 segundos. Pulse f DOWN o g UP del control remoto antes de que pasen estos 4 segundos. • El nivel DOLBY PRO LOGIC (página 21) y DOLBY DIGITAL SURROUND (página 29) de los altavoces de - AIWA CX-NHMT75 | Operating Instructions - Page 43
RECEPCION DE LA RADIO SINTONIZACION MANUAL PREAJUSTE DE EMISORAS 1 Pulse repetidamente TUNER/BAND ales sean muy débiles. Cuando una radiodifusión estéreo por FM tenga ruido Pulse MONO TUNER del control remoto para que "MONO" aparezca en el visualizador. El ruido se reducirá, pero la recepción será - AIWA CX-NHMT75 | Operating Instructions - Page 44
REPRODUCCION DE CINTAS RECEPCION DE LA RADIO REPRODUCCION DE CINTAS OPERACIONES BASICAS Para seleccionar un modo de inversión (platina 2 solamente) Cada vez que pulse REV MODE, el modo de inversión cambiará. • En la platina 1, las cintas se reproducen siempre por ambas caras. En la platina 2, - AIWA CX-NHMT75 | Operating Instructions - Page 45
SENSOR MUSICAL Si hay un espacio sin grabar de 4 segundos o más entre cada canción, la búsqueda del principio de la canción que esté siendo reproducida o de la siguiente canción podrá realizarse fácilmente. Pulse f o g durante la reproducción observando el indicador de la cara de reproducción (x o - AIWA CX-NHMT75 | Operating Instructions - Page 46
de reproducirse se visualizará. Para reponer la visualización del tiempo de reproducción, repita este procedimiento. Selección de una canción con el control remoto 1 Pulse DISC DIRECT PLAY y, antes de que pasen 3 segundos, pulse 1, 2 ó 3. 2 Pulse los botones numerados 0-9 y +10 para seleccionar una - AIWA CX-NHMT75 | Operating Instructions - Page 47
canciones de cualquiera de los discos introducidos. Utilice el control remoto. 1 Pulse PRGM dos veces en el modo paso 1, la unidad se pondrá en el modo PROGRAMA DE KARAOKE (página 24). 2 Pulse DISC DIRECT PLAY y, antes de que va disminuyendo gradualmente), la parte con desvanecimiento también se - AIWA CX-NHMT75 | Operating Instructions - Page 48
ón, pulse a. (Aplicable cuando la fuente es TUNER, VIDEO/AUX/5.1CH o MD.) Para reanudar la grabación, vuelva a pulsar el botón. Para iniciar la grabación con el control remoto Pulse primero q REC/REC MUTE y luego pulse c/d antes de que pasen 2 segundos. Ajuste de sonido durante la grabación El - AIWA CX-NHMT75 | Operating Instructions - Page 49
COPIADO MANUAL DE UNA CINTA COPIADO DE TODA LA CINTA • Ponga la cinta en el punto donde vaya a empezar la grabación. • El modo de inversión se ajusta - AIWA CX-NHMT75 | Operating Instructions - Page 50
CD EDIT/CHECK para seleccionar la cara A o la B. 2 Pulse DISC DIRECT PLAY 1-3 para seleccionar un disco. 3 Pulse los botones numerados del control remoto para seleccionar canciones. E Una canción cuyo tiempo de reproducción sea superior al tiempo restante no podrá ser programada. 4 Repita los - AIWA CX-NHMT75 | Operating Instructions - Page 51
veces CD EDIT/CHECK. "EDIT" y "PRGM" se visualizarán. • Cuando se visualice "AI", pulse de nuevo CD EDIT/CHECK. 4 Pulse los botones numerados del control remoto para designar la duración de la cinta. Se puede especificar una duración de 10 a 99 minutos. • f, g o MULTI JOG también se encuentran - AIWA CX-NHMT75 | Operating Instructions - Page 52
de audio/ vídeo STEREO" se visualiza, pulse repetidamente DOLBY PRO LOGIC hasta seleccionar "NORMAL". • Si se cambia el nivel de los altavoces de sonido ambiental o del altavoz central de DOLBY PRO LOGIC, el del sistema DSP SURROUND (página 11) y el de DOLBY DIGITAL parte MANUAL SELECT del control - AIWA CX-NHMT75 | Operating Instructions - Page 53
vídeo. 1 Pulse repetidamente MANUAL SELECT del control remoto para seleccionar "CEN los altavoces derecho e izquierdo. Modo 3 STEREO: Utilice este modo cuando no estén conectados BBE. - Se conectan auriculares. - Se activa la función de Karaoke. - Se selecciona 5.1 CH (página 29). • Ponga el volumen - AIWA CX-NHMT75 | Operating Instructions - Page 54
para evitar el aullido. Póngase en contacto con su concesionario Aiwa para que le dé los detalles. FUNCIONES DE DESVANECIMIENTO DE VOZ o cintas de audio múltiplex. Pulse repetidamente KARAOKE para seleccionar la función de desvanecimiento de voz o de múltiplex. Cada vez que se pulse KARAOKE, una de - AIWA CX-NHMT75 | Operating Instructions - Page 55
- Discos o cintas con la parte vocal grabada en el lado derecho o izquierdo del sonido • Mientras la función de Karaoke esté activada, la salida de Cada reserva se borrará cuando termine de reproducirse la canción. Utilice el control remoto. 1 Pulse CD e introduzca los discos. 2 Pulse PRGM una vez - AIWA CX-NHMT75 | Operating Instructions - Page 56
TEMPORIZADOR AJUSTE DEL TEMPORIZADOR PARA DORMIR AJUSTE DEL TEMPORIZADOR TEMPORIZADOR KARAOKE La unidad se podrá apagar automáticamente después de transcurrido un tiempo especificado. Utilice el control remoto. 1 Pulse SLEEP. 2 Antes de que pasen 4 segundos, pulse f DOWN o g UP para especificar - AIWA CX-NHMT75 | Operating Instructions - Page 57
5 Ajuste el volumen. El sonido de la fuente se reproducirá al nivel de sonido ajustado en este paso cuando la alimentación sea conectada por el temporizador. Sin embargo, si el nivel del sonido se ajusta a 21 o más, éste se ajustará automáticamente a 20 cuando se conecte la alimentación. 6 Prepare - AIWA CX-NHMT75 | Operating Instructions - Page 58
OTRAS CARACTERISTICAS TEMPORIZADOR OTRAS CARACTERISTICAS DEMO (Demostración) Para cambiar las probabilidades de igualación de los tres números Pulse repetidamente f o g para seleccionar uno de los tres niveles de probabilidad cuando juegue con la demostración del juego. El indicador del número de - AIWA CX-NHMT75 | Operating Instructions - Page 59
SUBWOOFERS. TOMAS 5.1 CH INPUT Esta unidad puede introducir señales de sonido procedentes del equipo de audio (reproductor DVD, reproductor de discos láser, etc.) que contenga un descodificador Dolby Digital con terminales de salida de canal 5.1 CH. Consulte "CONEXIÓN DE UN REPRODUCTOR DVD" en la - AIWA CX-NHMT75 | Operating Instructions - Page 60
se haga la grabación. Consulte el manual de instrucciones del reproductor DVD. • El sonido DOLBY DIGITAL SURROUND no puede grabarse de ninguna la función de Karaoke. Para ajustar los niveles del sonido del altavoz central y de los altavoces de sonido ambiental en DOLBY DIGITAL SURROUND. 1 Pulse - AIWA CX-NHMT75 | Operating Instructions - Page 61
DE PROBLEMAS Si la unidad no funciona como se describe en este manual de instrucciones, compruebe la guía siguiente: GENERALIDADES No hay sonido. La salida de sonido no es estéreo. • ¿Está activada la función de Karaoke? (© página 23) Se produce una visualización errónea o un mal funcionamiento. - AIWA CX-NHMT75 | Operating Instructions - Page 62
ESPECIFICACIONES Unidad principal CX-NHMT75 Sección del sintonizador de FM Gama de sintonización 87,5 kHz, distorsión armónica total inferior al 1%, 8 ohmios) 0,1 % (40 W, 1 kHz, 6 ohmios, DIN AUDIO/Delantero) VIDEO/AUX: 316 mV (ajustable) MD: 316 mV (ajustable) MIC 1, MIC 2: 1 mV (10 kohmios) - AIWA CX-NHMT75 | Operating Instructions - Page 63
ral sert à prévenir l'utilisateur de la présence d'instructions importantes concernant l'utilisation et l'entretien (ou la réparation) de appareil pas les orifices de ventilation. 6 Chariot et support - Si l'appareil est posé ou monté sur un support ou un chariot, déplacer ce dernier avec précaution - AIWA CX-NHMT75 | Operating Instructions - Page 64
terre du mât, de la structure de support et du conducteur arrivant à l'unité NSX-HMT75/NSX-HMT76 CX-NHMT75 Récepteur magnétocassette AUDIO SYSTEME DOLBY PRO LOGIC ........ 22 KARAOKE MIXAGE AVEC MICROPHONE 23 PROGRAMME DE KARAOKE PROBLEME 30 SPECIFICATIONS 31 NOMENCLATURE Couverture du dos 3 FRANÇ - AIWA CX-NHMT75 | Operating Instructions - Page 65
PREPARATIONS CONNEXIONS Avant de brancher le cordon secteur La tension nominale d'alimentation de l'appareil, indiquée au dos de ce dernier, est de 120 V. S'assurer que cette tension nominale correspond à celle du secteur local. IMPORTANT Commencer par connecter les enceintes, les antennes et tout - AIWA CX-NHMT75 | Operating Instructions - Page 66
29) sont est en service. Pour fixer les enceintes surround à un mur Fixer chaque enceinte à un endroit qui peut supporter son poids. L&R: Enceintes l'aide d'un cordon de raccordement audio optionnel, connecter la prise VIDEO/AUX de cet appareil à la prise de sortie audio de l'appareil vidéo. F 8 - AIWA CX-NHMT75 | Operating Instructions - Page 67
principal doit être d'environ cinq mètres. Lorsque cette distance diminue, remplacer les piles par des neuves. Utilisation de la télécommande Les instructions données dans ce manuel concernent principalement les touches de l'appareil principal. Les touches de la télécommande portant les mêmes noms - AIWA CX-NHMT75 | Operating Instructions - Page 68
affichée à la place du mode DEMO. Appuyer sur DEMO pour activer. (Pour plus de détails au sujet du mode DEMO, voir page 27.) MISE EN SERVICE DU MODE ECONOMIE D'ENERGIE Quand on règle le mode économie d'énergie sur "ECO ON" ou "ECO AUTO", l'appareil diminue sa consommation électrique en effectuant - AIWA CX-NHMT75 | Operating Instructions - Page 69
CLOCK. L'horloge est affichée. (Le signe ":" entre les heures et les minutes clignote.) Si le mode économie d'énergie (page 7) est en service, l'appareil s'éteint quand l'alimentation est coupée. Pour faire apparaître l'horloge, appuyer sur CLOCK; l'heure est alors affichée pendant quatre secondes - AIWA CX-NHMT75 | Operating Instructions - Page 70
AUDIO SYSTEME gauche/droite Appuyer sur MANUAL SELECT de la télé DIGITAL SURROUND est aussi changé. (Voir pages 21 et 29) SYSTEME BBE Le système BBE augmente la clarté du son aux fréquences élevées. Il enrichit aussi la fonction Karaoke le système BBE hors service pour éviter une distorsion du - AIWA CX-NHMT75 | Operating Instructions - Page 71
EGALISEUR GRAPHIQUE REGLAGE MANUEL D'UNE NOUVELLE COURBE D'EGALISATION SELECTION D'UNE COURBE D'EGALISATION PROGRAMMEE Cet appareil possède les cinq courbes d'égalisation programmées différentes suivantes. ROCK: Son puissant accentuant les aigus et les graves. POP: Présence accrue des parties - AIWA CX-NHMT75 | Operating Instructions - Page 72
enceintes surround Appuyer deux ou trois fois sur MANUAL SELECT de la télécommande. "S-L" ou surround DOLBY PRO LOGIC (Voir page 21) et DOLBY DIGITAL SURROUND (Voir page 29) est aussi changé. Le mode - le système DOLBY PRO LOGIC est mis en service. - un casque est branché. - l'entrée 5.1 CH - AIWA CX-NHMT75 | Operating Instructions - Page 73
RECEPTION RADIO ACCORD MANUEL MEMORISATION DE STATIONS 1 Appuyer sur TUNER/BAND à plusieurs reprises pour sélectionner la gamme souhaitée. FM AM Quand on appuie sur TUNER/BAND alors que l'alimentation est coupée, l'appareil est mis sous tension directement. 2 Appuyer sur f DOWN ou g UP pour sé - AIWA CX-NHMT75 | Operating Instructions - Page 74
LECTURE DE CASSETTES RECEPTION RADIO LECTURE DE CASSETTES OPERATIONS DE BASE Pour sélectionner un mode d'inversion (platine 2 seulement) A chaque pression sur REV MODE, le mode d'inversion change. • Avec la platine 1, les cassettes sont toujours lues sur les deux faces. Avec la platine 2, on peut - AIWA CX-NHMT75 | Operating Instructions - Page 75
SENSEUR DE MUSIQUE S'il y a un blanc de quatre secondes ou plus entre les plages, on peut retrouver facilement le début de la plage courante ou suivante pendant la lecture. Appuyer sur f ou g pendant la lecture en vérifiant l'indicateur de face lue (x ou c) affiché. Par exemple, si on appuie sur g - AIWA CX-NHMT75 | Operating Instructions - Page 76
LECTURE DE DISQUES COMPACTS LECTURE DE CASSETTES LECTURE DE DISQUES COMPACTS OPERATIONS DE BASE MISE EN PLACE DE DISQUES Appuyer sur CD, puis appuyer sur z OPEN/CLOSE pour ouvrir le compartiment à disques. Mettre le(s) disque(s) en place avec le côté portant l'étiquette en haut. Pour lire un ou - AIWA CX-NHMT75 | Operating Instructions - Page 77
CD BLANK SKIP ON" est affiché et " l'affichage. " apparaît sur • Quand on appuie une fois sur PRGM à l'étape 1, l'appareil passe au PROGRAMME DE KARAOKE (voir page 24). 2 Appuyer sur DISC DIRECT PLAY et, dans les trois secondes, appuyer sur 1, 2 ou 3 pour sélectionner un disque. Passer à l'étape - AIWA CX-NHMT75 | Operating Instructions - Page 78
ENREGISTREMENT LECTURE DE DISQUES COMPACTS ENREGISTREMENT ENREGISTREMENT DE BASE Cette partie explique comment enregistrer à partir du tuner, du lecteur de disques compacts ou d'un appareil externe. Pour arrêter l'enregistrement, appuyer sur s. Pour mettre l'enregistrement en pause, appuyer sur a. - AIWA CX-NHMT75 | Operating Instructions - Page 79
DUPLICATION MANUELLE D'UNE CASSETTE DUPLICATION DE LA TOTALITE D'UNE CASSETTE • Bobiner la cassette jusqu'à l'endroit où on veut démarrer l'enregistrement. • Le mode d'inversion est automatiquement réglé sur p. Remarquer que l'enregistrement ne sera fait que sur une face de la cassette. 1 Appuyer - AIWA CX-NHMT75 | Operating Instructions - Page 80
ENREGISTREMENT ENREGISTREMENT AVEC MONTAGE ET CALCUL DU TEMPS 6 Appuyer sur w REC/REC MUTE pour démarrer l'enregistrement sur la première face. La cassette est rembobinée jusqu'au début de la face avant, l'amorce est lue pendant dix secondes, puis l'enregistrement démarre. Une fois que l' - AIWA CX-NHMT75 | Operating Instructions - Page 81
ENREGISTREMENT AVEC MONTAGE PROGRAMME 6 Répéter l'étape 5 pour le reste des plages de la face A. Une plage dont la durée de lecture est supérieure au temps restant ne peut pas être programmée. 7 Appuyer sur CD EDIT/CHECK pour sélectionner la face B, puis programmer les plages pour cette face. Après - AIWA CX-NHMT75 | Operating Instructions - Page 82
de disques laser ou de supports vidéo qui ont été pour une expérience audio/vidéo pleine de réalisme STEREO" est affiché, appuyer sur DOLBY PRO LOGIC à plusieurs reprises jusqu'à ce que "NORMAL" soit sélectionné. 2 Appuyer sur MANUAL et celui du système DOLBY DIGITAL SURROUND (Voir page 29) le sont - AIWA CX-NHMT75 | Operating Instructions - Page 83
3 STEREO OFF support ne portant pas la marque H . Dans ce cas, utiliser le système DSP SURROUND à la place. (Voir page 11.) • Le système DOLBY PRO LOGIC est annulé quand: - le niveau d'écho est changé. - le système DSP SURROUND ou BBE est mis en service. - un casque est branché. - la fonction Karaoke - AIWA CX-NHMT75 | Operating Instructions - Page 84
contacter le distributeur Aiwa local Pour chanter avec audio. Appuyer sur KARAOKE à plusieurs reprises pour sélectionner la fonction Vocal Fader ou Multiplex. A chaque pression sur KARAOKE annulés. • Quand le microphone ou l'écho est mis en service alors que l'entrée 5.1CH (Voir page 29) est sé - AIWA CX-NHMT75 | Operating Instructions - Page 85
enregistrée sur la droite ou la gauche du spectre sonore • Quand la fonction Karaoke est en service, le son est sorti en monophonie. • Quand la fonction est changée, la fonction Karaoke est annulée. PROGRAMME DE KARAOKE Avant ou pendant la lecture de disque compact, on peut réserver jusqu'à quinze - AIWA CX-NHMT75 | Operating Instructions - Page 86
DE LA MINUTERIE D'ARRET REGLAGE DE LA MINUTERIE MINUTERIE KARAOKE L'appareil peut être mis hors tension automatiquement au bout jusqu'à ce que apparaisse sur l'affichage. L'heure et le nom de la source audio clignotent alternativement. 3 Dans les six secondes, tourner MULTI JOG pour spécifier l' - AIWA CX-NHMT75 | Operating Instructions - Page 87
5 Régler le volume. Lors de la mise sous tension par la minuterie, le son de la source sera reproduit au niveau du volume réglé à cette étape. Toutefois, si le niveau du volume est réglé à 21 ou plus, il sera automatiquement réglé à 20 lors de la mise sous tension. 6 Préparer la source. Pour écouter - AIWA CX-NHMT75 | Operating Instructions - Page 88
AUTRES CARACTERISTIQUES MINUTERIE AUTRES CARACTERISTIQUES DEMO (Démonstration) Pour changer la probabilité d'égalisation des trois chiffres Appuyer sur f ou g à plusieurs reprises pour sélectionner un des trois niveaux de probabilité lors de l'utilisation du jeu Demo. L'indicateur de numéro de - AIWA CX-NHMT75 | Operating Instructions - Page 89
des signaux sonores de l'appareil audio (lectur de DVD, lectur de disque laser,etc.) qui contient un décodeur Dolby Digital muni de bornes de sortie prise VIDEO/AUX L. Pour connecter un tourne-disque Utiliser un tourne-disque Aiwa muni d'un amplificateur à égaliseur intégré. PRISES MD Ces prises sont - AIWA CX-NHMT75 | Operating Instructions - Page 90
ée. • S'assurer que le support utilisé avec le lecteur de DVD connecté est compatible avec le système DOLBY DIGITAL SURROUND. • La fonction passe LOGIC ou la fonction Karaoke en service. F Pour régler les niveaux sonores des enceintes centrale et surround en mode DOLBY DIGITAL SURROUND 1 Appuyer sur - AIWA CX-NHMT75 | Operating Instructions - Page 91
DE PROBLEME Un l'appareil ne fonctionne pas comme décrit dans ce mode d'emploi, contlôler le guide suivant. GENERALITES Il n'y a pas de son. • Le cordon secteur est-il son sorti n'est pas stéréo. • La fonction Karaoke n'est-elle pas en service? (© page 23) Un affichage ou un fonctionnement erron - AIWA CX-NHMT75 | Operating Instructions - Page 92
GENERALITES SPECIFICATIONS Appareil principal CX-NHMT75 Partie tuner FM Plage d'accord Sensibilité 1%, 8 ohms) Centre 34 W (1 kHz, D.H.T. inférieure à 1%, 8 ohms) 0,1 % (40 W, 1 kHz, 6 ohms, AUDIO DIN/Avant) VIDEO/AUX: 316 mV (réglable) MD: 316 mV (réglable) MIC 1, MIC 2: 1 mV (10 kohms) 5.1 CH
-
 1
1 -
 2
2 -
 3
3 -
 4
4 -
 5
5 -
 6
6 -
 7
7 -
8
-
9
-
10
-
11
-
12
-
13
-
14
-
15
-
16
-
17
-
18
-
19
-
20
-
21
-
22
-
23
-
24
-
25
-
26
-
27
-
28
-
29
-
30
-
31
-
32
-
33
-
34
-
35
-
36
-
37
-
38
-
39
-
40
-
41
-
42
-
43
-
44
-
45
-
46
-
47
-
48
-
49
-
50
-
51
-
52
-
53
-
54
-
55
-
56
-
57
-
58
-
59
-
60
-
61
-
62
-
63
-
64
-
65
-
66
-
67
-
68
-
69
-
70
-
71
-
72
-
73
-
74
-
75
-
76
-
77
-
78
-
79
-
80
-
81
-
82
-
83
-
84
-
85
-
86
-
87
-
88
-
89
-
90
-
91
-
92
 |
 |

COMPACT DISC STEREO SYSTEM
SISTEMA ESTEREO CON REPRODUCTOR DE DISCOS COMPACTOS
CHAINE STEREO AVEC LECTEUR DE DISQUES COMPACTS
OPERATING INSTRUCTIONS
MANUAL DE INSTRUCCIONES
MODE D’EMPLOI
U
En
(English)
E
(Español)
8A-NFU-903-01
000115AYI-U-9
F
(Français)
Owner’s record
For your convenience, record the model number and serial number (you will find them on the
rear of your set) in the space provided below. Please refer to them when you contact your
Aiwa dealer in case of difficulty.
Serial No.
Model No.
For assistance and information
(United States and Puerto Rico)
CX-NHMT75
–For NSX-HMT75 and
NSX-HMT76