ASRock 4CoreDual-SATA2 RAID Installation Guide - Page 11
Delete Disk Array
 |
View all ASRock 4CoreDual-SATA2 manuals
Add to My Manuals
Save this manual to your list of manuals |
Page 11 highlights
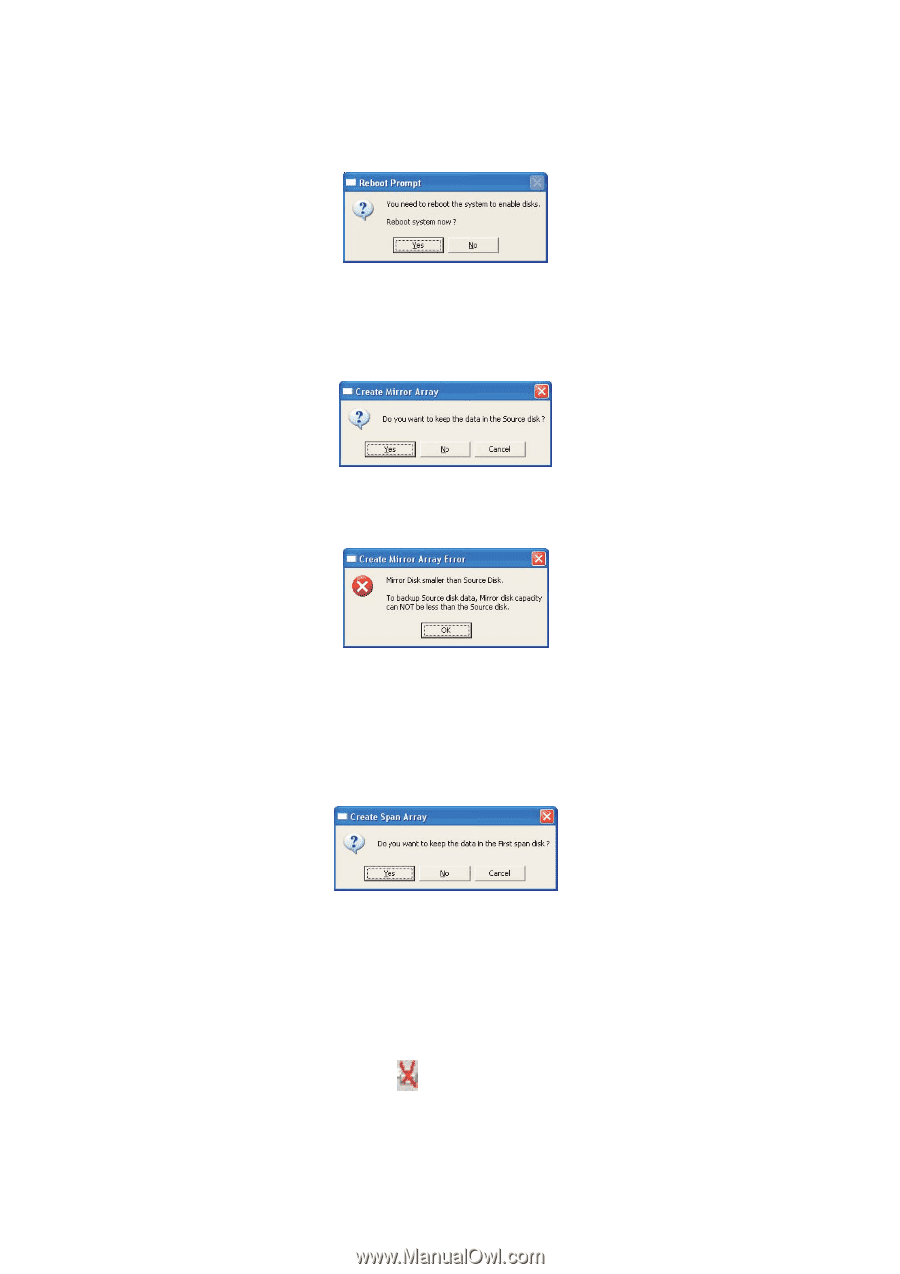
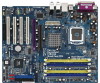
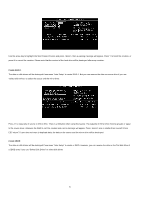
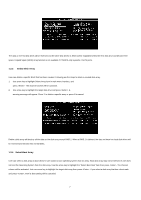
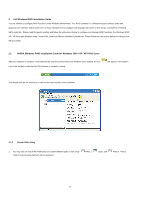
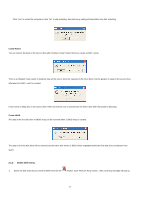
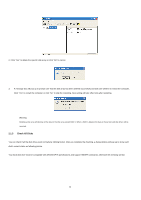
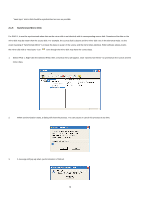
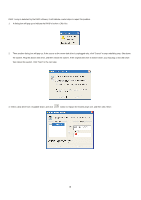
Click "Yes" to restart the computer or click "No" to skip restarting. New disk array setting will take effect only after restarting. Create RAID 1 You can reserve the data on the source drive after clicking "Create" button when you create a RAID 1 array. There is a limitation if user wants to keep the data on the source drive the capacity of the mirror drive must be greater or equal to the source drive, otherwise the RAID 1 can't be created. If user wants to keep data in the source drive, RAID tool will ask user to synchronize the mirror drive after the system's rebooting. Create JBOD The data in the first disk drive of JBOD array can be reserved when a JBOD array is created. The data on the first disk drive will be reserved and the other disk drives in JBOD will be expanded behind the first disk drive and become free space. 2.1.2 Delete Disk Array 1. Select the disk array that you want to delete from the left window. Click "Remove Array" button , then a warning message will pop up. 11
-
 1
1 -
2
-
3
-
4
-
5
-
 6
6 -
 7
7 -
 8
8 -
 9
9 -
 10
10 -
 11
11 -
 12
12 -
 13
13 -
 14
14 -
 15
15 -
 16
16 -
17
-
18
-
19
-
20
-
21
-
22
 |
 |