ASRock 4CoreDual-SATA2 RAID Installation Guide - Page 13
Verify Mirror Disk
 |
View all ASRock 4CoreDual-SATA2 manuals
Add to My Manuals
Save this manual to your list of manuals |
Page 13 highlights
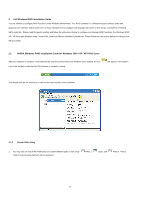
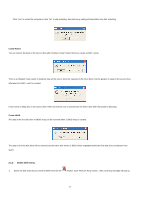
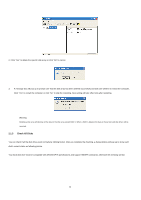
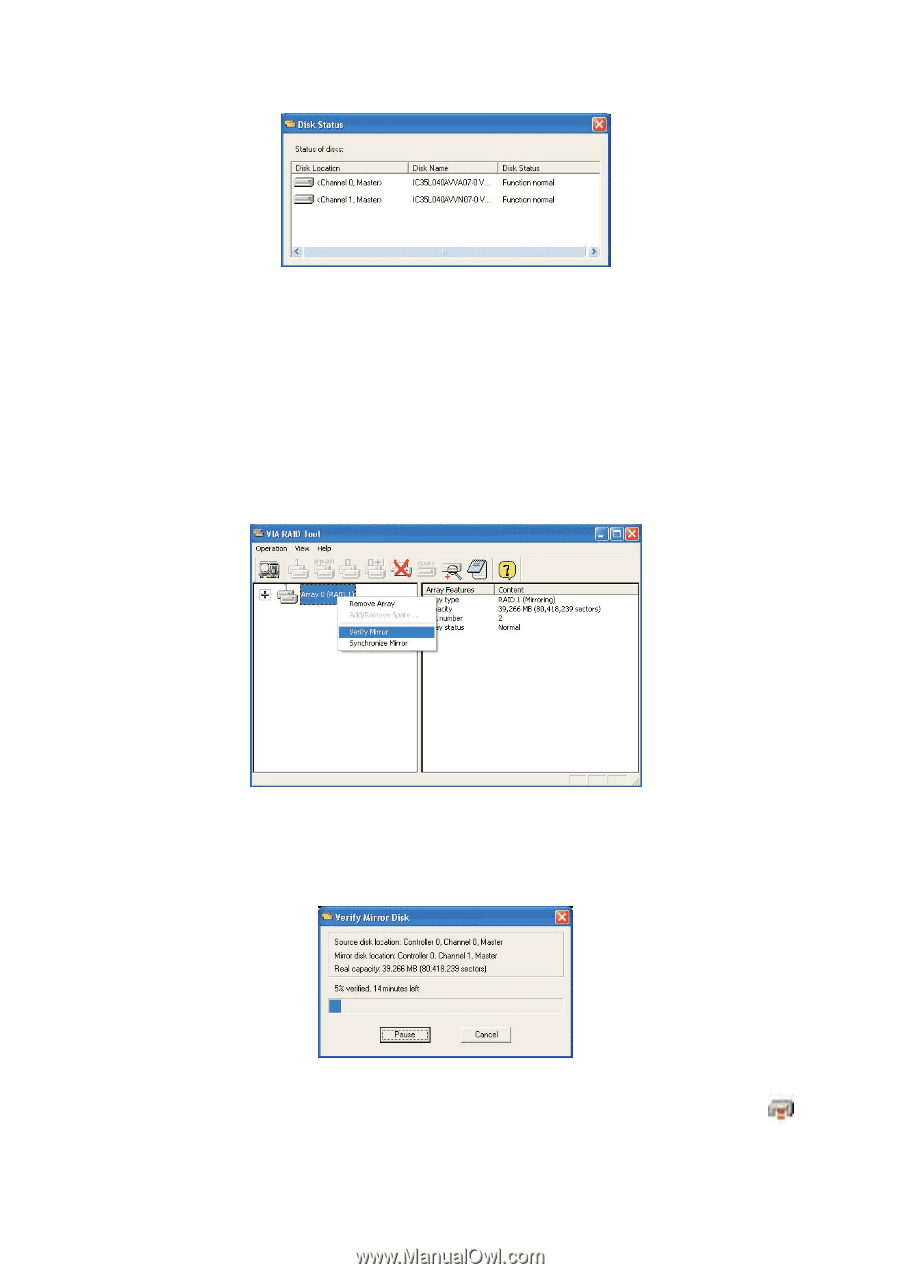
2.1.4 Verify Mirror Disk Data on the mirror disk must be the same as its corresponding source disk to provide fault tolerance for RAID 1. 1. Select a RAID 1. Right-click the selected RAID, and then a shortcut menu will appear. Click "Verify Mirror" to verify whether the source and the mirror disks are identical. 2. After executing "verify mirror" command, a dialog will show the verifying process. You can pause or cancel this process at any time. The process may take a long time if the capacity of RAID is large. 3 When the mirror disk is not identical with the corresponding source disk, the mirror disk will be marked with a "need-sync" icon: . A 13
-
 1
1 -
2
-
3
-
4
-
5
-
6
-
7
-
 8
8 -
 9
9 -
 10
10 -
 11
11 -
 12
12 -
 13
13 -
 14
14 -
 15
15 -
 16
16 -
 17
17 -
 18
18 -
19
-
20
-
21
-
22
 |
 |
13
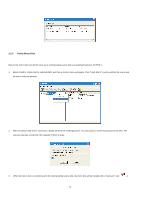
2.1.4
Verify Mirror Disk
Data on the mirror disk must be the same as its corresponding source disk to provide fault tolerance for RAID 1.
1.
Select a RAID 1. Right-click the selected RAID, and then a shortcut menu will appear. Click “Verify Mirror” to verify whether the source and
the mirror disks are identical.
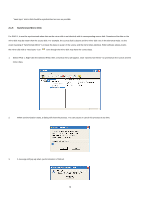
2.
After executing “verify mirror” command, a dialog will show the verifying process. You can pause or cancel this process at any time. The
process may take a long time if the capacity of RAID is large.
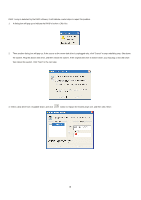
3
When the mirror disk is not identical with the corresponding source disk, the mirror disk will be marked with a “need-sync” icon:
. A