ASRock 4CoreDual-SATA2 RAID Installation Guide - Page 12
Check All Disks
 |
View all ASRock 4CoreDual-SATA2 manuals
Add to My Manuals
Save this manual to your list of manuals |
Page 12 highlights
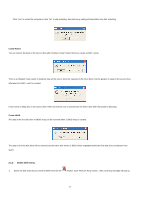
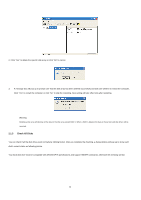
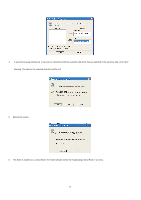
2. Click "Yes" to delete the specific disk array or click "No" to cancel. 3. A message box will pop up to prompt user that the disk array has been deleted successfully and ask user whether to restart the computer. Click "Yes" to restart the computer or click "No" to skip the restarting. New setting will take effect only after restarting. Warning: Deleting a disk array will destroy all the data on the disk array except RAID 1. When a RAID is deleted, the data on these two hard disk drives will be reserved. 2.1.3 Check All Disks You can check if all the disk drives work normally by clicking button. After you complete the checking, a dialog window will pop up to show each disk's current status as following picture. Your hard disk drive must be compatible with ATA/ATAPI-5 specifications and support SMART commands; otherwise the checking will fail. 12
-
 1
1 -
2
-
3
-
4
-
5
-
6
-
 7
7 -
 8
8 -
 9
9 -
 10
10 -
 11
11 -
 12
12 -
 13
13 -
 14
14 -
 15
15 -
 16
16 -
 17
17 -
18
-
19
-
20
-
21
-
22
 |
 |
