ASRock 4CoreDual-SATA2 RAID Installation Guide - Page 7
Delete Disk Array, Select Boot Array
 |
View all ASRock 4CoreDual-SATA2 manuals
Add to My Manuals
Save this manual to your list of manuals |
Page 7 highlights
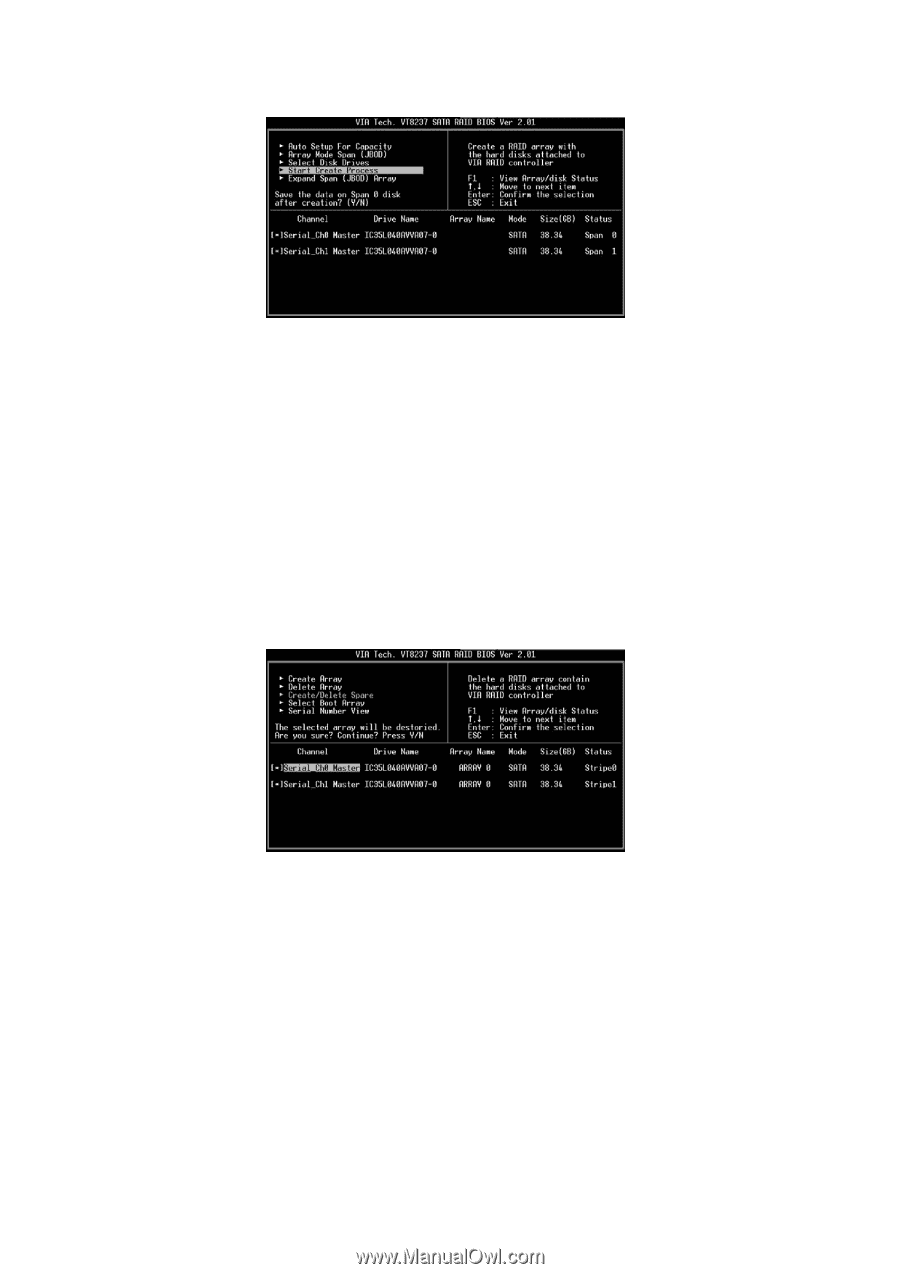
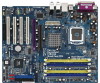
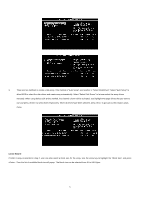
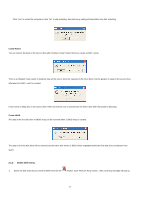
The data on the first disk drive will be reserved and the other disk drives in JBOD will be expanded behind the first disk drive and become free space. Expand Span (JBOD) Array function is not available if VT8237S only supports 2 SATA ports. 1.3.3 Delete Disk Array User can delete a specific RAID that has been created. Following are the steps to delete a created disk array. 1. Use arrow key to highlight Delete Array item in main menu interface, and press . The channel column will be activated. 2. Use arrow key to highlight the target disk drive and press . A warning message will appear. Press Y to delete a specific array or press N to cancel. Delete a disk array will destroy all the data on the disk array except RAID 1. When a RAID 1 is deleted, the data on these two hard disk drives will be reserved and become two normal disks. 1.3.4 Select Boot Array User can select a disk array as boot device if user wants to boot operating system from an array. Boot disk array may not be selected if user does not boot the Operating System from the disk array. Use the arrow key to highlight the "Select Boot Disk" item then press . The channel column will be activated. Just use arrow key to highlight the target disk array then press . If you select a disk array that has a boot mark and press , then its boot setting will be canceled. 7
-
 1
1 -
 2
2 -
 3
3 -
 4
4 -
 5
5 -
 6
6 -
 7
7 -
 8
8 -
 9
9 -
 10
10 -
 11
11 -
 12
12 -
13
-
14
-
15
-
16
-
17
-
18
-
19
-
20
-
21
-
22
 |
 |