Alpine IVA W200 Owners Manual - Page 71
Connection Diagram of SPST Switch Sold Separately - harness
 |
UPC - 793276200532
View all Alpine IVA W200 manuals
Add to My Manuals
Save this manual to your list of manuals |
Page 71 highlights
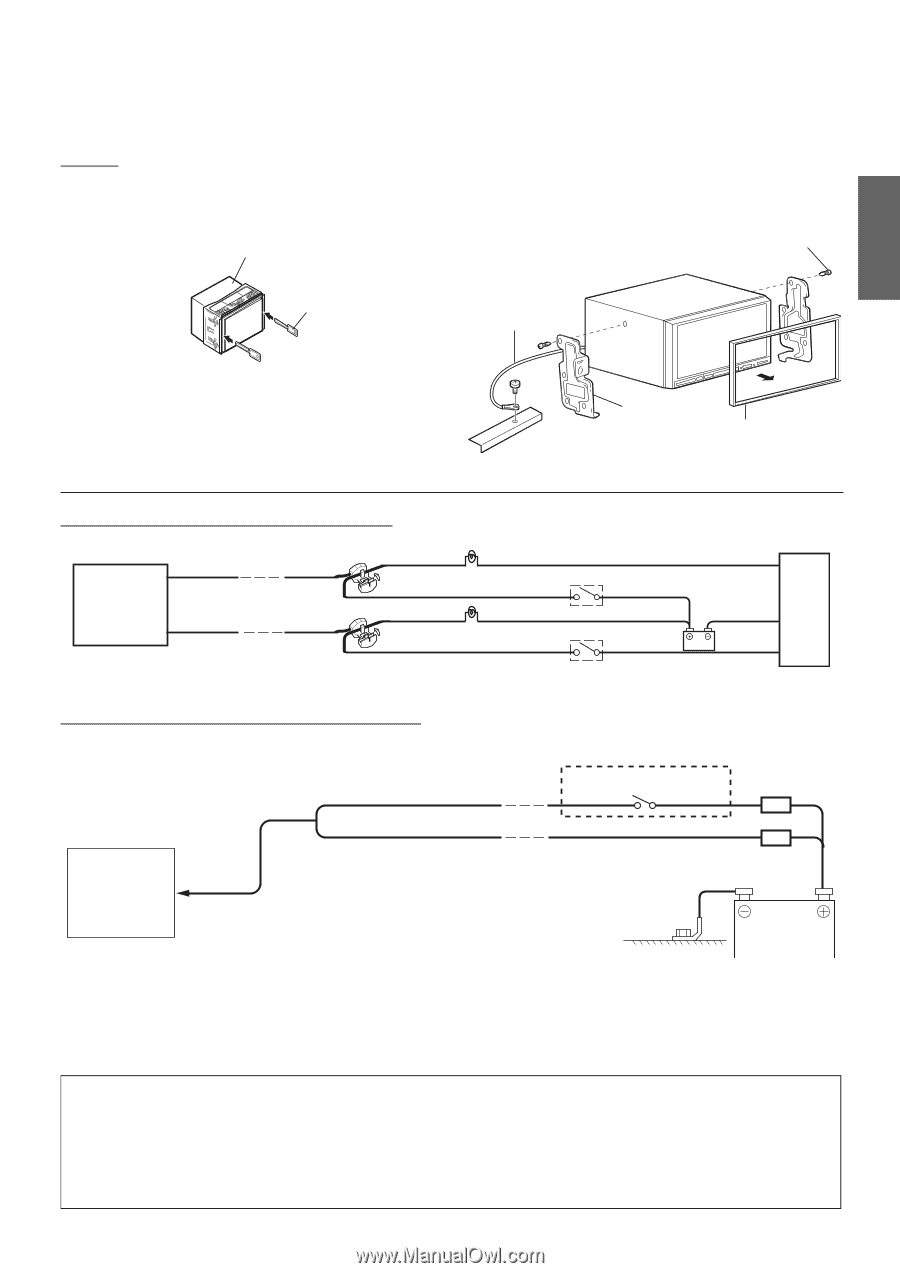
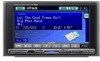
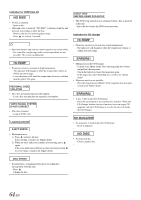
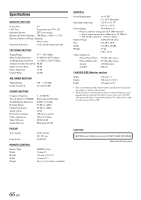
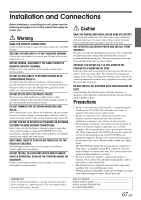
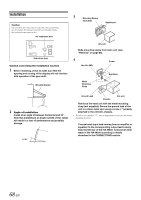
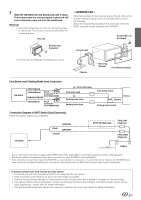
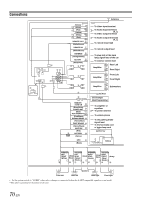
5 Slide the IVA-W200 into the dashboard until it clicks. This ensures that the unit is properly locked and will not accidentally come out from the dashboard. Removal 1. Insert the bracket keys into the unit, along the guides on either side. The unit can now be removed from the mounting sleeve. This unit < JAPANESE CAR > Take the face plate off, and secure the ground lead of the unit to a clean metal spot using a screw (*) already attached to the car's chassis. Attach the Original Mounting Bracket to each side of the IVAW200, using the screws supplied with IVA-W200. Screws (M5 × 8) (Included) Bracket keys (Included) Ground Lead 2. Pull the unit out, keeping it unlocked as you do so. * Chassis Mounting Bracket Face Plate (Included) Foot Brake Lead / Parking Brake Lead Connection IVA-W200 FOOT BRAKE (Yellow/Black) Pinch Connector (sold separately) PARKING BRAKE (Yellow/Blue) Pinch Connector (sold separately) Foot brake lamp Foot brake lead Parking brake lamp Parking brake lead Foot brake switch Chassis Battery Parking brake switch Connection Diagram of SPST Switch (Sold Separately) (If the ACC power supply is not available) IVA-W200 IGNITION (Red) BATTERY (Yellow) SPST SW (Optional) FUSE (5A) (Optional) FUSE (20A) (Optional) Battery • If your vehicle has no ACC power supply, add an SPST (Single-Pole, Single-Throw) switch (sold separately) and fuse (sold separately). • The diagram and the fuse amperage shown above are in the case when IVA-W200 is used individually. • If the switched power (ignition) lead of the IVA-W200 is connected directly to the positive (+) post of the vehicle's battery, the IVA-W200 draws some current (several hundred milliamperes) even when its switch is placed in the OFF position and the battery may be discharged. To prevent external noise from entering the audio system. • Locate the unit and route the leads at least 10 cm away from the car harness. • Keep the battery power leads as far away from other leads as possible. • Connect the ground lead securely to a bare metal spot (remove any paint, dirt or grease if necessary) of the car chassis. • If you add an optional noise suppressor, connect it as far away from the unit as possible. Your Alpine dealer carries various noise suppressors, contact them for further information. • Your Alpine dealer knows best about noise prevention measures so consult your dealer for further information. 69-EN
-
 1
1 -
2
-
3
-
4
-
5
-
6
-
7
-
8
-
9
-
10
-
11
-
12
-
13
-
14
-
15
-
16
-
17
-
18
-
19
-
20
-
21
-
22
-
23
-
24
-
25
-
26
-
27
-
28
-
29
-
30
-
31
-
32
-
33
-
34
-
35
-
36
-
37
-
38
-
39
-
40
-
41
-
42
-
43
-
44
-
45
-
46
-
47
-
48
-
49
-
50
-
51
-
52
-
53
-
54
-
55
-
56
-
57
-
58
-
59
-
60
-
61
-
62
-
63
-
64
-
65
-
 66
66 -
 67
67 -
 68
68 -
 69
69 -
 70
70 -
 71
71 -
 72
72 -
 73
73 -
 74
74 -
 75
75 -
 76
76 -
77
 |
 |