Bernina 1008 Owners Manual - Page 14
Satin Stitch - bobbins
 |
View all Bernina 1008 manuals
Add to My Manuals
Save this manual to your list of manuals |
Page 14 highlights
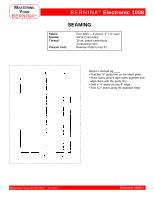
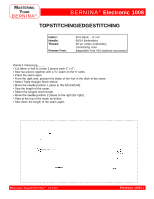
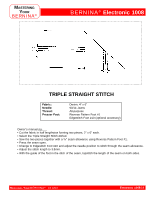
MASTERING YOUR BERNINA® BERNINA® Electronic 1008 SATIN STITCH Fabric: Needle: Thread: Presser Foot: Firm fabric - 2 pieces, 3" x 6" each 90/14 Embroidery 30 wt. Cotton Embroidery Reverse Pattern Foot #1 Owner's manual pg.____ • Fold fabric in half to 3" x 6". Use stabilizer as needed. • Select Zigzag Stitch #2/green. Change the stitch length to satin stitch and the stitch width to 5.5mm. • Thread the bobbin thread through the hole in the finger of the bobbin case. • Move the needle position all the way to the left. • Position the raw edge of the fabric on the 3/8" line (on the right side of the stitch plate). • Sew down this edge about 1". While continuing to sew, turn the stitch width knob to taper the stitch to 0mm. Then widen the stitch back to maximum. Repeat until the stitching reaches the end of the fabric. • Position the fold of the fabric on the 3/8" line (on the left side of the stitch plate). • Move the needle position all the way to the right and stitch along the right side of the fabric, tapering and widening the stitching while sewing. • Move the needle position to the center and stitch down the center of the fabric, tapering and widening the satin stitch while sewing. MASTERING YOUR BERNINA® 1/10/02 Electronic 1008/14
-
 1
1 -
2
-
3
-
4
-
5
-
6
-
7
-
8
-
 9
9 -
 10
10 -
 11
11 -
 12
12 -
 13
13 -
 14
14 -
 15
15 -
 16
16 -
 17
17 -
 18
18 -
 19
19 -
20
-
21
-
22
-
23
-
24
-
25
-
26
-
27
-
28
-
29
-
30
-
31
-
32
-
33
-
34
-
35
-
36
-
37
-
38
-
39
-
40
-
41
-
42
-
43
-
44
-
45
-
46
-
47
-
48
-
49
-
50
-
51
-
52
-
53
-
54
-
55
-
56
-
57
-
58
-
59
-
60
-
61
 |
 |