Bernina 1008 Owners Manual - Page 38
Button Sew-on Stitch
 |
View all Bernina 1008 manuals
Add to My Manuals
Save this manual to your list of manuals |
Page 38 highlights
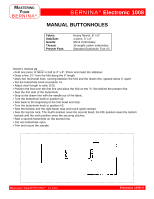
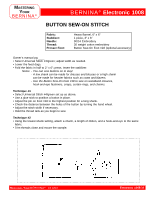
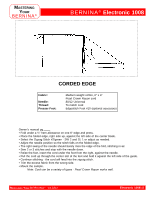
MASTERING YOUR BERNINA® BERNINA® Electronic 1008 BUTTON SEW-ON STITCH Fabric: Stabilizer: Needle: Thread: Presser Foot: Heavy flannel, 6" x 6" 1 piece, 3" x 6" 90/14 Embroidery 30 weight cotton embroidery Button Sew-On Foot #18 (optional accessory) Owner's manual pg.____ • Select Universal Stitch #4/green; adjust width as needed. • Lower the feed dogs. • Fold the fabric in half to 2" x 6"; press. Insert the stabilizer. Notes: - You can sew buttons on to stay! - A low shank can be made for dresses and blouses or a high shank can be made for heavier fabrics such as coats and blazers. - Use the Button Sew-On Foot #18 to sew on waistband closures, hook-and-eye fasteners, snaps, curtain rings, and charms. Technique #1 • Select Universal Stitch #4/green set up as above. • Use a glue stick to position a button in place. • Adjust the pin on Foot #18 to the highest position for a long shank. • Check the distance between the holes of the button by turning the hand wheel. • Adjust the stitch width if necessary. • Hold the thread tails as you begin to sew. Technique #2 • Using the lowest shank setting, attach a charm, a length of ribbon, and a hook-and-eye to the same fabric. • Trim threads close and mount the sample. MASTERING YOUR BERNINA® 1/10/02 Electronic 1008/38
-
 1
1 -
2
-
3
-
4
-
5
-
6
-
7
-
8
-
9
-
10
-
11
-
12
-
13
-
14
-
15
-
16
-
17
-
18
-
19
-
20
-
21
-
22
-
23
-
24
-
25
-
26
-
27
-
28
-
29
-
30
-
31
-
32
-
 33
33 -
 34
34 -
 35
35 -
 36
36 -
 37
37 -
 38
38 -
 39
39 -
 40
40 -
 41
41 -
 42
42 -
 43
43 -
44
-
45
-
46
-
47
-
48
-
49
-
50
-
51
-
52
-
53
-
54
-
55
-
56
-
57
-
58
-
59
-
60
-
61
 |
 |