Bose Lifestyle 5 Owner's guide - Page 14
Australia.
 |
View all Bose Lifestyle 5 manuals
Add to My Manuals
Save this manual to your list of manuals |
Page 14 highlights
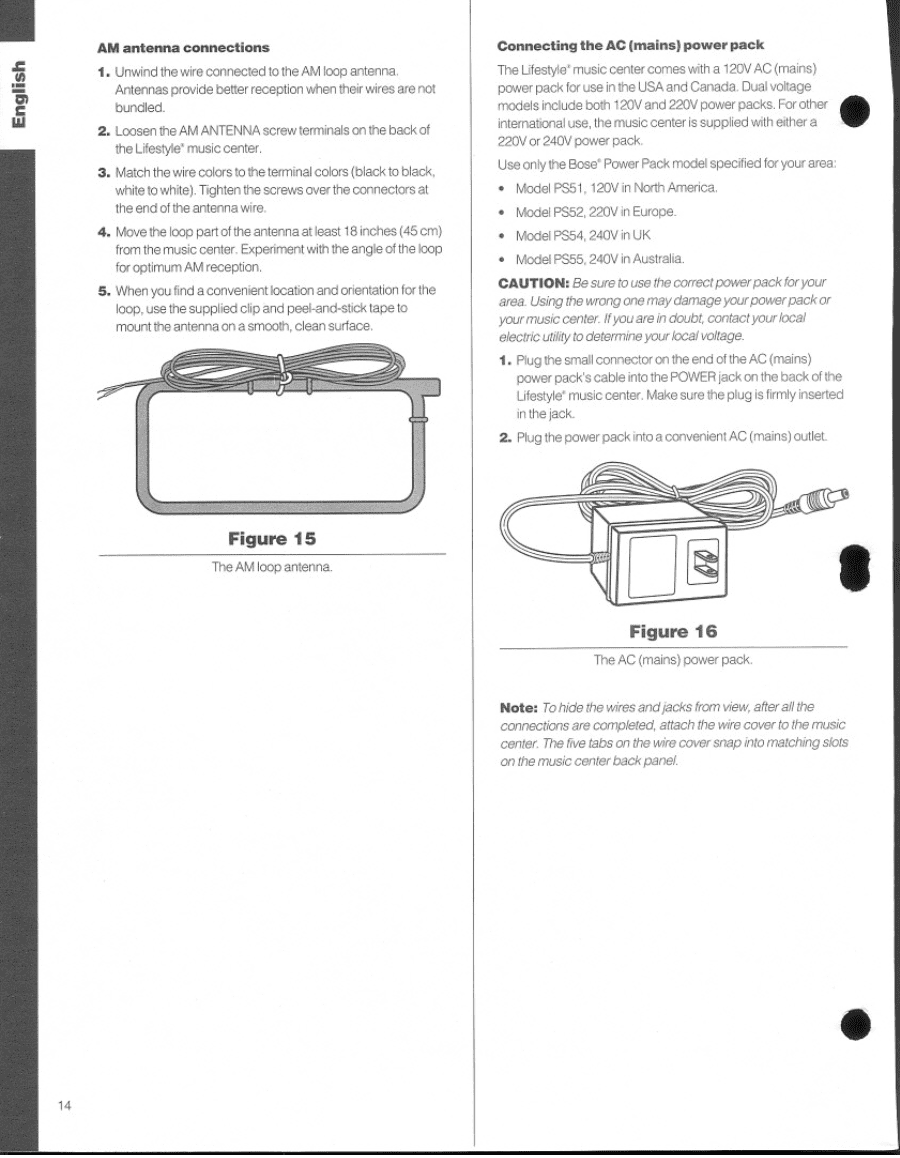
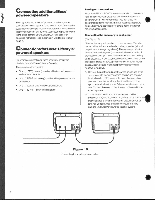
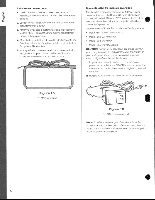
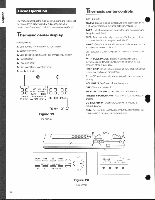
AM antenna connections 1. Unwind the wire connected to the AM loop antenna. Antennas provide better reception when their wires are not bundled. 2. Loosen the AM ANTENNA screw terminals on the back of the Lifestyle' music center. 3. Match the wire colors to the terminal colors (black to black, vrtiite to white). Tighten the screws over the connectors at the end of the antenna wire. 4. Move the loop part of the antenna at least 18 inches (45 cm) from the music center. Experiment with the angle of the bop for optimum AM reception. 5. When you find a convenient location and orientation for the loop. use the supplied clip and peel-and•stick tape to mount the antenna on a smooth, clean surface. Connecting the AC (mains) power pack The Lifestyle' music center comes with a 120V AC (mains) • power pack for use in the USA and Canada. Dual voltage models include both 120V and 220V power packs. For other international use, the music center is supplied with either a 220V or 240V power pack Use only the Bose' Power Pack model specified for your area: • Model PS51, 120V in North America. • Model PS52, 220V in Europe. • Model PS54, 240V in UK • Model PS55. 240V in Australia. CAUTION: Besure touse the correctpowerpack foryour area. Using the wrongonemay damageyourpowerpack or yourmusic center. Ifyouareindoubt, contact yourlocal electric utility to determine your local voltage. 1. Plug the small connector on the end of the AC (mains) power pack's cable into the POWER jack on the back of the Lifestyle' music center. Make sure the plug is firmly inserted in the jack. 2. Plug the power pack into a convenient AC (mains) outlet. Figure 15 The AM loop antenna. Figure 16 The AC (mains) power pack. Note: Tohide the wiresandjacks from view, after all the connections are completed, attach the wire cover to the music center. The five tabs on the wire cover snap into matching slots on the music center back panel.
-
 1
1 -
2
-
3
-
4
-
5
-
6
-
7
-
8
-
 9
9 -
 10
10 -
 11
11 -
 12
12 -
 13
13 -
 14
14 -
 15
15 -
 16
16 -
 17
17 -
 18
18 -
 19
19 -
20
-
21
-
22
-
23
-
24
-
25
-
26
-
27
-
28
-
29
-
30
-
31
-
32
-
33
-
34
-
35
 |
 |