Brother International BM-917B Instruction Manual - English
Brother International BM-917B Manual
 |
View all Brother International BM-917B manuals
Add to My Manuals
Save this manual to your list of manuals |
Brother International BM-917B manual content summary:
- Brother International BM-917B | Instruction Manual - English - Page 1
BM-917B CHAINSTITCH BUTTON SEWER WITH THREAD TRIMMER - Brother International BM-917B | Instruction Manual - English - Page 2
you very much for buying a BROTHER sewing machine. Before using your new machine, please read the safety instructions below and the explanations given in the instruction manual. With industrial sewing machines, it , the symbol at left means "you must make the ground connection".) BM-917B, 917C i - Brother International BM-917B | Instruction Manual - English - Page 3
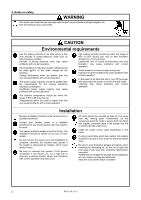
the wall outlet. Lightning may cause problems with correct operation. Installation Machine installation should only be carried out by a qualified technician. Contact your Brother dealer or a qualified electrician for any and diarrhoea. Keep the oil out of the reach of children. ii BM-917B, 917C - Brother International BM-917B | Instruction Manual - English - Page 4
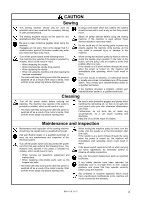
all safety precautions. Use only the proper replacement parts as specified by Brother. If any safety devices have been removed, be absolutely sure to . Any problems in machine operation which result from unauthorized modifications to the machine will not be covered by the warranty. BM-917B, 917C - Brother International BM-917B | Instruction Manual - English - Page 5
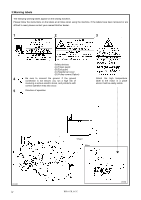
is not secure, you run a high risk of receiving a serious electric shock, and problems with correct operation may also occur. 5 Direction of operation Attach the high temperature label to the motor in a place where it will be easily visible. 1958M iv Motor BM-917B, 917C 1959M - Brother International BM-917B | Instruction Manual - English - Page 6
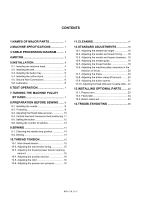
20 12-8. Adjusting the button clamp lift amount..........20 12-9. Adjusting the button opener 21 12-10. Adjusting the fixed knife and movable knife ...22 13.INSTALLING OPTIONAL PARTS........23 13-1. Presser arm 23 13-2. Feed plate 24 13-3. Button clamp set 24 14.TROUBLESHOOTING 25 BM-917B - Brother International BM-917B | Instruction Manual - English - Page 7
stitch get loose as pulling the thread tip.) 6, 12, 24 8, 16, 32 6, 12, 24 8, 16, 32 6, 12, 24 8, 16, 32 6, 12, 24 TQ x 1 #16 10−20 mm (W) (10−30 mm : When using the optional button clamp) 2.0−6.5 mm×0−6.5 mm (X x Y) 14 mm 1,500 rpm 1 BM-917B, 917C - Brother International BM-917B | Instruction Manual - English - Page 8
in the illustration below. For two treadles Machine head fixing hole Motor pulley center Motor mounting holes Table center line 1966M BM-917B, 917C 2 - Brother International BM-917B | Instruction Manual - English - Page 9
applicable motor shown in the table at right. ! Refer to the instruction manual for the motor for details on installing and using the motor. Power with the brake so that it may not be unfixed. (Refer to p.20.) Machine speed 1,500 rpm Frequency 50Hz 60Hz Motor pulley (Outer diameter) BM-917B, 917C - Brother International BM-917B | Instruction Manual - English - Page 10
be installed by a qualified technician. Ask your Brother dealer or a qualified electrician for any electrical work you run a high risk of receiving a serious electric shock, and problems with correct operation may also occur. 5-1. Installing the machine head 1968M (10). 1970M BM-917B, 917C 4 - Brother International BM-917B | Instruction Manual - English - Page 11
as shown in the illustration, and then install it to the far right corner of the table with the two wood screws. Push in 1973M 5 BM-917B, 917C - Brother International BM-917B | Instruction Manual - English - Page 12
ground wire (1) to the motor in accordance with the instructions in the instruction manual for the motor. 5-6. Brother. 1. Open bed cover R (1) and bed cover L (2). 2. Add 1−2 drops of oil in the places indicated by the arrows. 1976M BM-917B - Brother International BM-917B | Instruction Manual - English - Page 13
machine pulley is turning in the opposite direction, change the direction of turning while referring to the instruction manual for the motor. 3. Depress the pedal to start the sewing machine. 4. Release the pedal quickly steps 1 to 4 to carry out the next cycle of operations 1978M 7 BM-917B, 917C - Brother International BM-917B | Instruction Manual - English - Page 14
, making sure that the long groove on the needle is toward the front, and then securely tighten the screw (1). Long groove in needle Front 1979M BM-917B, 917C 8 - Brother International BM-917B | Instruction Manual - English - Page 15
grequently when using extrafine thread (cotton #80/3S or #70/2S) pass the thread through only one thread hook hole. 64-70mm 9 BM-917B, 917C 1981M - Brother International BM-917B | Instruction Manual - English - Page 16
is too loose, move the thread take-up lever (1) down to increase the amount of thread take-up. Reference line 1983M BM-917B, 917C 10 - Brother International BM-917B | Instruction Manual - English - Page 17
machine stopping position, loosen the nut (3) and align the index mark of the transverse feed plate (4) with the button hole spacing (scale indicator). 1986M 11 BM-917B, 917C - Brother International BM-917B | Instruction Manual - English - Page 18
size adjust plate (3) in as far as it will go so that the button is held tightly, and then securely tighten the shoulder screw (4). 1990M BM-917B, 917C 12 - Brother International BM-917B | Instruction Manual - English - Page 19
direction of the arrow. 2. Remove the shoulder screw (2) and roller (3) from the bed base, and then install them to the stitch hanging gear (4). 1993M 13 BM-917B, 917C - Brother International BM-917B | Instruction Manual - English - Page 20
to the machine. 9-1. Checking the needle drop position Before carrying out actual sewing, operate the sewing machine manually and check that the needle drops into the center of the button thread holes. 1. Turn off the the presser arm will lift up and the sewing machine will stop. BM-917B, 917C 14 - Brother International BM-917B | Instruction Manual - English - Page 21
turned by hand). 1. Loosen the nut (2), and then turn the thread presser tension stud (3) to adjust the opening amount. 2. Tighten the nut (2). 0.5-0.8mm 15 1998M BM-917B, 917C - Brother International BM-917B | Instruction Manual - English - Page 22
not slip when it is pulled gently. 1. Loosen the nut (1), and then turn the nut (2) to adjust the pressure. 2. Tighten the nut (1). BsBsterteorcocnonogmgmeeeerrss BwBweeeecacaokokmemereress 2002M BM-917B, 917C 16 - Brother International BM-917B | Instruction Manual - English - Page 23
the perfomance of this machine and to ensure a long service life. Furthermore, if the sewing machine has not been used Use only the lubricating oil (Nisseki Mitsubishi Sewing Lube 10N ; VG10) specified by Brother. 1975M 1976M 1. Open bed cover R (1) BM-917B, 917C - Brother International BM-917B | Instruction Manual - English - Page 24
of the sewing machine should only be carried out by a qualified technician. Ask your Brother dealer or a qualified electrician to carry out any maintenance and inspection of the electrical the looper setting shaft (5) to adjust the timing. 2. Tighten the set screws (4). 2006M BM-917B, 917C 18 - Brother International BM-917B | Instruction Manual - English - Page 25
move the looper (1) to adjust the clearance. 2. Tighten the set screw (2). 12-4. Adjusting the needle guide 2007M Adjust the clearance between the needle and the needle guard (1) to 0.1-0.2 mm. 1. Remove the of the looper setting shaft (4). 3. Tighten the set screws (5). 2010M 19 BM-917B, 917C - Brother International BM-917B | Instruction Manual - English - Page 26
causing the machine to stop before the correct stopping position, it might be caused by one of the following problems. In such cases, raise the position of the brake shoe (5) in step 3. above. ! Work clamp up or down to adjust the distance. 2. Tighten the bolt (3). 13-4mm 2013M BM-917B, 917C 20 - Brother International BM-917B | Instruction Manual - English - Page 27
clamp (8) is 2-3 mm at both left and right. * If the opening amount is not correct, repeat the "Vertical position" adjustment above. 2-3mm 2-3mm 2016M 21 BM-917B, 917C - Brother International BM-917B | Instruction Manual - English - Page 28
.) 2. Loosen the nut (4), and then move the connecting lever (5) to adjust the distance. 3. Tighten the nut (4). 4. Install the feed plate and the needle plate. 2019M BM-917B, 917C 22 - Brother International BM-917B | Instruction Manual - English - Page 29
the holder bar (7), and then tighten the two set screws (6). 3. Insert the spring (3) and the spring guide (2) into the bracket (4), and then push them into the recess in the presser arm (1). 4. While lifting the ) 6. Securely tighten the bolt (12). 7. Install the needle. 2075M 23 BM-917B, 917C - Brother International BM-917B | Instruction Manual - English - Page 30
the centers of the button thread holes, loosen the bolts (1) and adjust the position of the button clamp assembly (3). After adjusting, tighten the bolts (1). 2026M BM-917B, 917C 24 - Brother International BM-917B | Instruction Manual - English - Page 31
solve the problem, turn off the machine power supply and contact your nearest Brother service center. CAUTION Turn off the power switch and disconnect the power cord before carrying out troubleshooting. The . 21 • Insufficient thread remainder. • Stitch is too short. 2060M 25 BM-917B, 917C - Brother International BM-917B | Instruction Manual - English - Page 32
14. TROUBLESHOOTING Problem 4. Thread breaks • Thread frays and breaks. looper. • Is the clearance between the needle and the needle guide too large? Adjust the position of the needle guide. • Is the presser arm pressure too weak? Adjust the presser 16 (4-hole) (2-hole) 2064M BM-917B, 917C 26 - Brother International BM-917B | Instruction Manual - English - Page 33
14. TROUBLESHOOTING Problem 9. Stitch joint is loose. (4-hole) (2-hole) Possible cause • Is the thread take-up amount Adjust the position of the looper. 19 • Is the clearance between the needle and the needle guide too large? ・ Adjust the position of the needle guide. 19 27 BM-917B, 917C - Brother International BM-917B | Instruction Manual - English - Page 34
14. TROUBLESHOOTING Problem 13. Thread winds onto looper size match the button clamp? Use a button clamp that matches the button size. • 10-20 mm buttons: Standard button clamp • 10-30 mm buttons: Optional button clamp • Is the ・ 16 ・ 16 ・・ 16 ・ - ・ ・ 11 ・ 24 ・ - - ・ - ・ 22 2073M BM-917B, 917C 28 - Brother International BM-917B | Instruction Manual - English - Page 35
14. TROUBLESHOOTING Problem 18. Button does not drop at the stop position. 19. Machine makes abnormally loud sound when stopping. 20. Machine stops before the stop position. Button clamp lift braking force too strong? Adjust the brake. Page ・ 12 ・ ・ 21 ・ 3 ・ 20 ・ 3 ・ 20 29 BM-917B, 917C - Brother International BM-917B | Instruction Manual - English - Page 36
INSTRUCTION MANUAL □ MANUAL DE INSTRUCCIONES 878-917 SA0723-001 2002.10.B(1)
-
 1
1 -
 2
2 -
 3
3 -
 4
4 -
 5
5 -
 6
6 -
 7
7 -
8
-
9
-
10
-
11
-
12
-
13
-
14
-
15
-
16
-
17
-
18
-
19
-
20
-
21
-
22
-
23
-
24
-
25
-
26
-
27
-
28
-
29
-
30
-
31
-
32
-
33
-
34
-
35
-
36
 |
 |

BM-917B
CHAINSTITCH BUTTON SEWER WITH THREAD TRIMMER