Brother International BM-917B Instruction Manual - English - Page 30
Feed plate, 3. Button clamp set
 |
View all Brother International BM-917B manuals
Add to My Manuals
Save this manual to your list of manuals |
Page 30 highlights
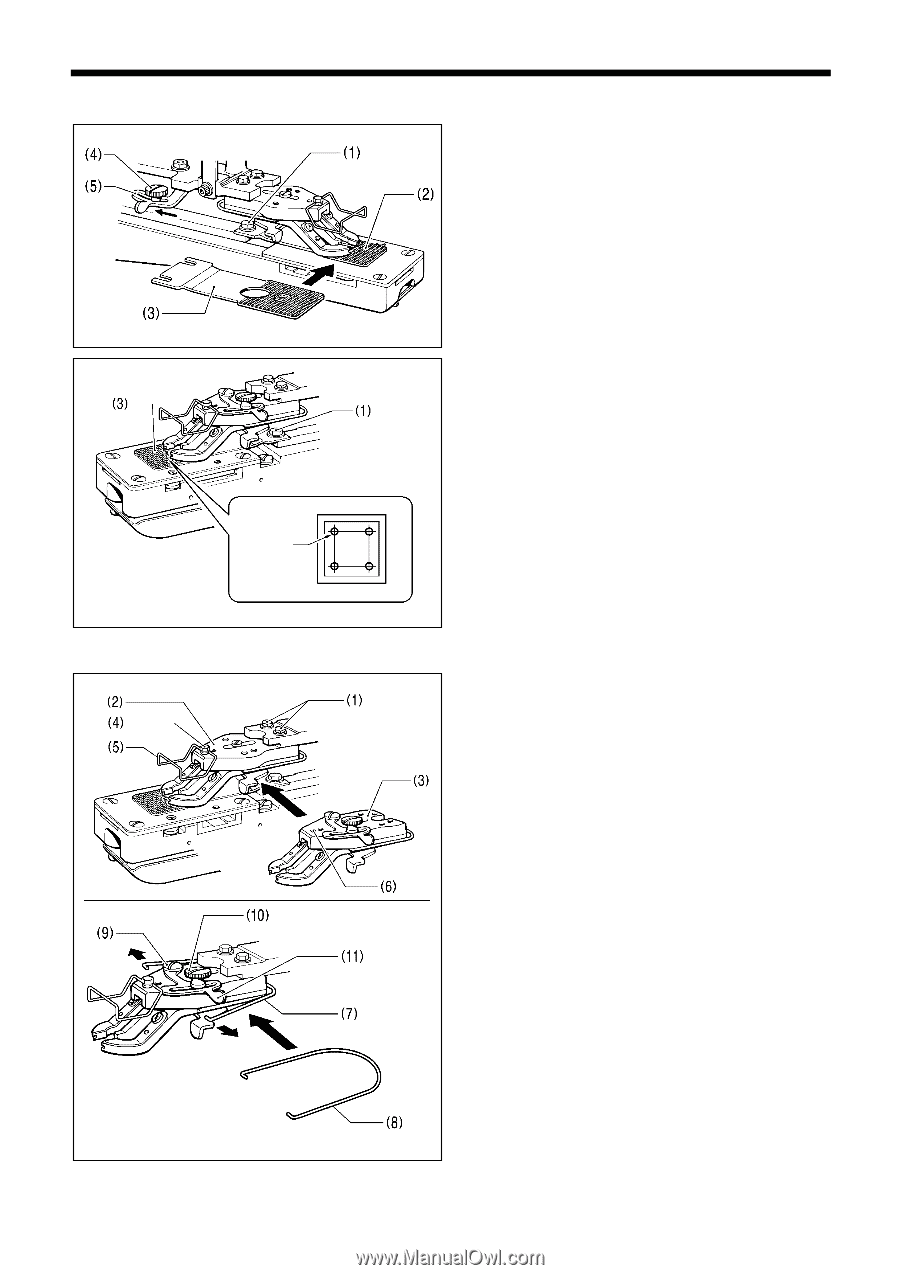
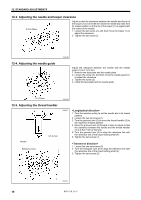
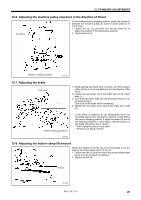
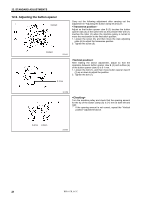
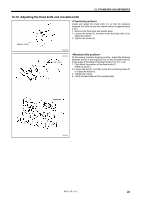
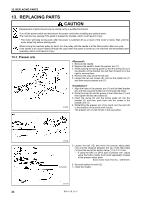
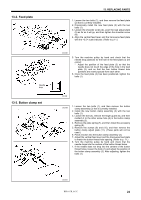
13-2. Feed plate Needle drop 13-3. Button clamp set 13. REPLACING PARTS 1. Loosen the two bolts (1), and then remove the feed plate (2) that is currently installed. 2. Provisionally install the new feed plate (3) with the two bolts (1). 3. Loosen the shoulder screw (4), push the size adjust plate (5) as far as it will go, and then tighten the shoulder screw (4). 4. Align the vertical feed lever and the transverse feed plate with the scale indicator. (Refer to p.11.) 2023M 5. Turn the machine pulley by hand and check that the needle drop positions for the hole in the feed plate (3) are correct. * Adjust the position of the feed plate (3) so that the needle does not touch the edge of the hole in the feed plate (3), and so that the four button thread hole positions are evenly spaced from each other. 6. Once the feed plate (3) has been positioned, tighten the bolts (1). 2024M 2025M 1. Loosen the two bolts (1), and then remove the button clamp assembly (2) that is currently installed. 2. Install the new button clamp assembly (3) with the two bolts (1). 3. Loosen the bolt (4), remove the finger guard (5), and then reattach it to the other screw hole (6) in the button clamp assembly (3). 4. Remove the plate spring (7), and then install the accessory spring (8). 5. Remove the screws (9) and (10), and then remove the button clamp adjust plate (11). (These parts will not be used.) 6. Place a button into the button clamp assembly (3). 7. Adjust the vertical feed lever and the transverse feed plate to match the button thread hole spacing. (Refer to p. 11.) 8. Turn the machine pulley by hand and check that the needle drops into the centers of the button thread holes. 1. If the needle does not drop into the centers of the button thread holes, loosen the bolts (1) and adjust the position of the button clamp assembly (3). After adjusting, tighten the bolts (1). 2026M BM-917B, 917C 24
-
 1
1 -
2
-
3
-
4
-
5
-
6
-
7
-
8
-
9
-
10
-
11
-
12
-
13
-
14
-
15
-
16
-
17
-
18
-
19
-
20
-
21
-
22
-
23
-
24
-
 25
25 -
 26
26 -
 27
27 -
 28
28 -
 29
29 -
 30
30 -
 31
31 -
 32
32 -
 33
33 -
 34
34 -
 35
35 -
36
 |
 |