Brother International BM-917B Instruction Manual - English - Page 26
Adjusting the machine pulley clearance in the direction of thrust, 7. Adjusting the brake, 8.
 |
View all Brother International BM-917B manuals
Add to My Manuals
Save this manual to your list of manuals |
Page 26 highlights
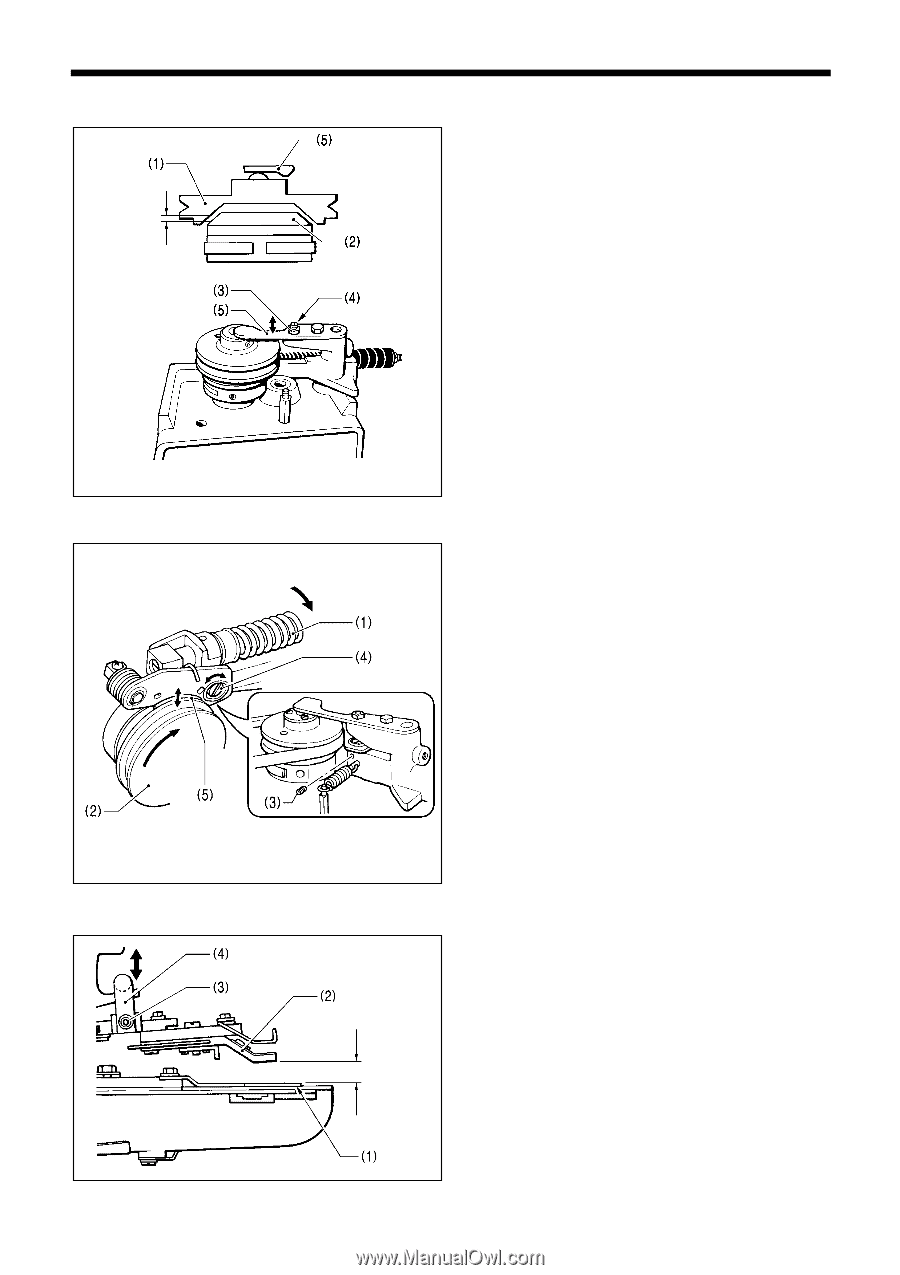
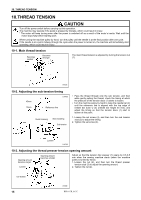
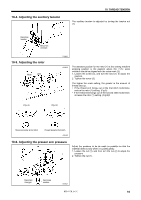
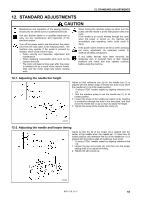
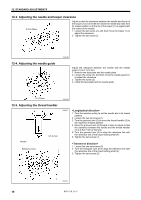
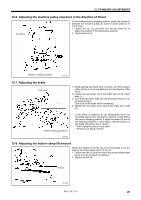
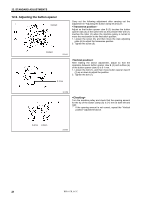
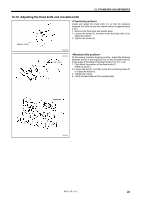
12. STANDARD ADJUSTMENTS 12-6. Adjusting the machine pulley clearance in the direction of thrust 0.5-0.8mm At the sewing machine stopping position, adjust the clearance between the machine pulley (1) and the clutch plate (2) to 0.5-0.8 mm. 1. Loosen the nut (3), and then turn the set screw (4) to adjust the position of the ball presser plate (5). 2. Tighten the nut (3). 2011M 12-7. Adjusting the brake Push down 1. While pushing the clutch body (1) down, turn the machine pulley (2) two or more complete turns in the direction of the arrow. 2. Loosen the set screw (3) at the lower part of the clutch body (1) 3. Turn the brake lever shaft (4) until the brake shoe (5) is at its lowest position. (The force of the brake will be increased.) 4. Tighten the set screw (3) to secure the brake lever shaft (4). * If the brake is grabbing at low temperatures and low operating speeds and causing the machine to stop before the correct stopping position, it might be caused by one of the following problems. In such cases, raise the position of the brake shoe (5) in step 3. above. ! Work clamp lift amount is too small ! Thread is not being trimmed 2012M 12-8. Adjusting the button clamp lift amount Adjust the distance from the top of the feed plate (1) to the edge of the button clamp (2) to 13-14 mm. 1. Loosen the bolt (3), and then move the presser adjust plate (4) up or down to adjust the distance. 2. Tighten the bolt (3). 13-4mm 2013M BM-917B, 917C 20
-
 1
1 -
2
-
3
-
4
-
5
-
6
-
7
-
8
-
9
-
10
-
11
-
12
-
13
-
14
-
15
-
16
-
17
-
18
-
19
-
20
-
 21
21 -
 22
22 -
 23
23 -
 24
24 -
 25
25 -
 26
26 -
 27
27 -
 28
28 -
 29
29 -
 30
30 -
 31
31 -
32
-
33
-
34
-
35
-
36
 |
 |