Brother International KE-436C Inner Clamping Device Instruction Manual - Engli - Page 6
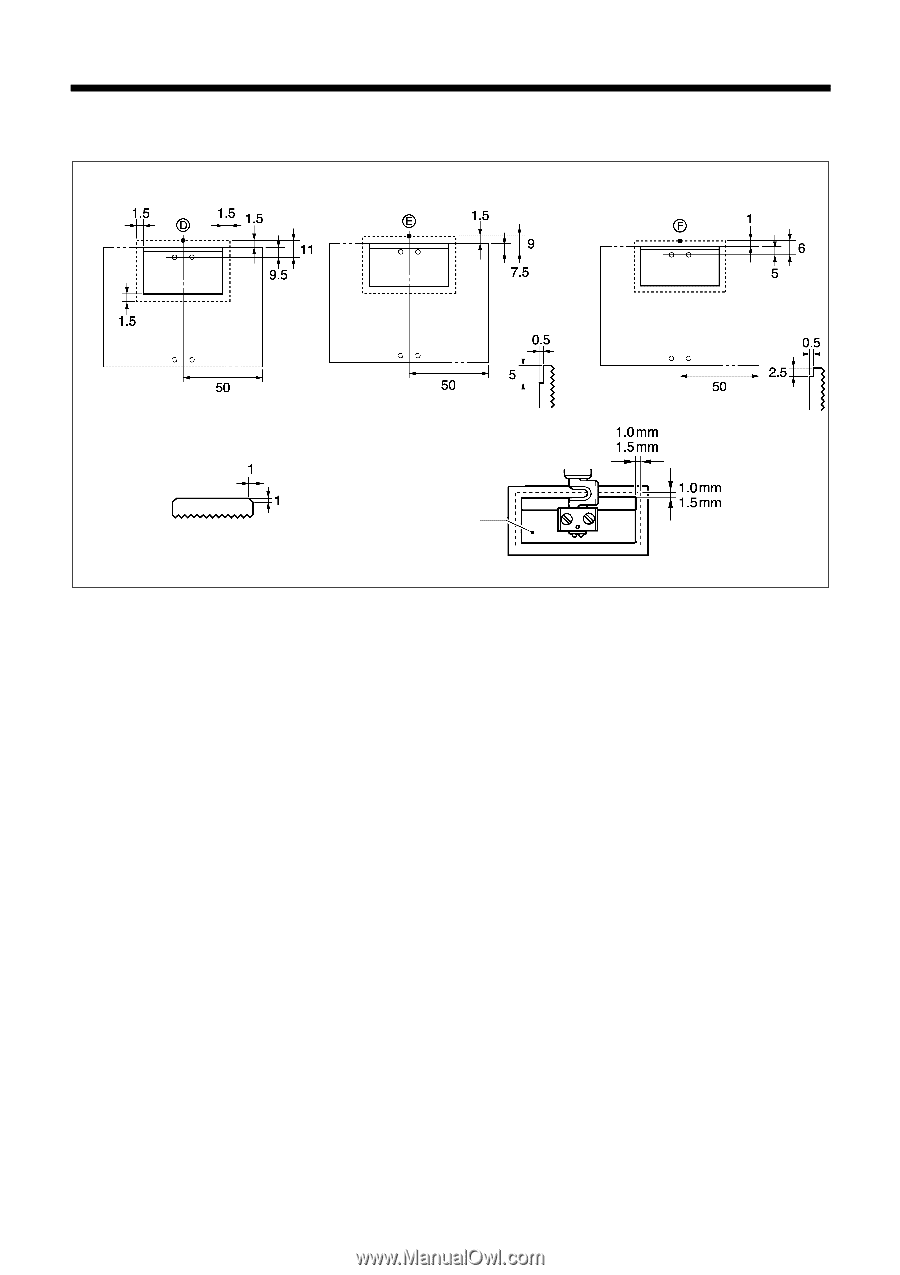
How to make the work clamp plate
 |
View all Brother International KE-436C manuals
Add to My Manuals
Save this manual to your list of manuals |
Page 6 highlights
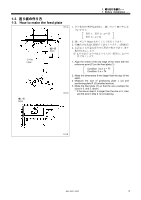
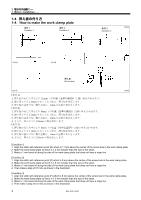
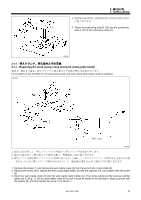
1 1. Before installation...... 1-4 1-4. How to make the work clamp plate 条件 1 Condition 1 条件 2 Condition 2 条件 3 Condition 3 2636Q 2634Q 2635Q 押え板 Work clamp 2637Q [条件 1] 1 11mm D 2 1.5mm 3 1mm 2] 1 9mm E 2 1.5mm 3 1mm 4 0.5mm 3] 1 6mm F 2 1.0mm 3 1mm 4 0.5mm 2638Q [Condition 1] 1. Align the stitch with reference point (D) which is 11 mm above the center of the screw hole in the work clamp plate. 2. Make the work clamp plate so that it is 1.5 mm smaller than the size of the seam. 3. Make a 1 mm bevel all along the side of the work clamp plate that does not have a ridge line. [Condition 2] 1. Align the stitch with reference point (E) which is 9 mm above the center of the screw hole in the work clamp plate. 2. Make the work clamp plate so that it is 1.5 mm smaller than the size of the seam. 3. Make a 1 mm bevel all along the side of the work clamp plate that does not have a ridge line. 4. Then make a step of 0.5 mm as shown in the illustration. [Condition 3] 1. Align the stitch with reference point (F) which is 6 mm above the center of the screw hole in the work clamp plate. 2. Make the work clamp plate so that it is 1.0 mm smaller than the size of the seam. 3. Make a 1 mm bevel all along the side of the work clamp plate that does not have a ridge line. 4. Then make a step of 0.5 mm as shown in the illustration. 3 KE-435C,436C
-
 1
1 -
 2
2 -
 3
3 -
 4
4 -
 5
5 -
 6
6 -
 7
7 -
 8
8 -
 9
9 -
 10
10 -
 11
11 -
 12
12 -
13
-
14
-
15
-
16
-
17
-
18
-
19
-
20
 |
 |