Brother International KE-436C Inner Clamping Device Instruction Manual - Engli - Page 8
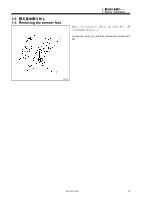
Installation
 |
View all Brother International KE-436C manuals
Add to My Manuals
Save this manual to your list of manuals |
Page 8 highlights
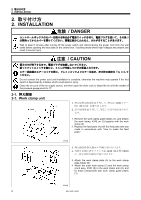
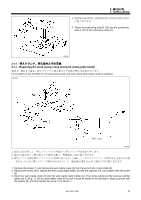
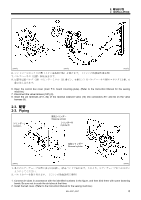
2 2. INSTALLATION 2 2. INSTALLATION 危険 / DANGER 5 Wait at least 5 minutes after turning off the power switch and disconnecting the power cord from the wall outlet before opening the face plate of the control box. Touching areas where high voltages are present can result in severe injury. 注意 / CAUTION 0 Do not connect the power cord until installation is complete, otherwise the machine may operate if the foot switch is depressed by mistake, which could result in injury. Close the air cock of the air supply source, and then open the drain cock to bleed the air until the needle of the pressure gauge points to "0". 2-1 2-1. Work clamp unit 1 1 434E エアー (2)(押え(3 2. 送り板(4 1. Remove the work clamp guide plates (1), and detach the work clamp, 434E air (2) together with the work clamp (3). 2. Replace the feed plate (4) with the feed plate that was made in accordance with "How to make the feed plate." 2959Q 3. 押え板(5 6 4 7 434E (8 9) 1 3. Attach the work clamp plate (5) to the work clamp plate holder (6). 4 Attach the outer work clamp (7) and the work clamp crank assy, 434E (8) to the work clamp arm (9), and fix these components with work clamp guide plates (1). 2960Q 5 KE-435C,436C
-
 1
1 -
2
-
 3
3 -
 4
4 -
 5
5 -
 6
6 -
 7
7 -
 8
8 -
 9
9 -
 10
10 -
 11
11 -
 12
12 -
 13
13 -
14
-
15
-
16
-
17
-
18
-
19
-
20
 |
 |
