Brother International LS-1717B Users Manual - Multi
Brother International LS-1717B Manual
 |
View all Brother International LS-1717B manuals
Add to My Manuals
Save this manual to your list of manuals |
Brother International LS-1717B manual content summary:
- Brother International LS-1717B | Users Manual - Multi - Page 1
Instruction Manual Manuel d'instructions Manual de instrucciones Manual de Instruções - Brother International LS-1717B | Users Manual - Multi - Page 2
changing the needle, threading the bobbin, or changing the presser foot. 15. Always unplug the sewing machine from the electrical outlet when removing covers, lubricating, or when making any other user service adjustments mentioned in this instruction manual. 16. This sewing machine is not intended - Brother International LS-1717B | Users Manual - Multi - Page 3
a été plongée dans du liquide. Retourner la machine à coudre auprès du revendeur autorisé ou du service technique le plus proche afin qu'il puisse l' es. 17. Surveillez les jeunes enfants, afin de vous assurer qu'ils ne jouent pas avec cette machine. "CONSERVER CES INSTRUCTIONS" "Cette machine à - Brother International LS-1717B | Users Manual - Multi - Page 4
manual. Usar únicamente los accesorios recomendados por el fabricante y que vienen especificados en este manual. 10. Mantener los dedos alejados de todas las partes movibles de la máquina. Tener un cuidado tipo de ajuste mecánico mencionado en el manual de instrucciones. 16. Esta máquina de coser - Brother International LS-1717B | Users Manual - Multi - Page 5
lubrificar ou efetuar qualquer outro ajuste de manutenção mencionado neste manual. 16. Esta máquina de costura não é destinada para ser usada por crianças pequenas ou pessoas deficientes sem supervisão. 17. Crianças pequenas devem ser supervisionadas para garantir que não brinquem com - Brother International LS-1717B | Users Manual - Multi - Page 6
the socket outlet. Turn on or off the switch for the main power and sew-light. 1 Turn on 2 Turn off - When servicing the sewing machine, or when removing covers or changing lamps, the machine or the electrical set must be disconnected from the supply by removing the plug from the socket outlet. - Brother International LS-1717B | Users Manual - Multi - Page 7
12 THREADING THE MACHINE 14 Winding the Bobbin 14 Lower (bobbin) Threading 15 Upper (Needle) Threading 16 Drawing Up The Bobbin Thread 18 Twin-Needle Sewing 19 Thread Tension 21 CHART OF SEWING FABRICS, NEEDLES AND THREAD COMBINATIONS 23 STRAIGHT AND ZIGZAG STITCHING Straight Stitching 25 - Brother International LS-1717B | Users Manual - Multi - Page 8
ón de la aguja 12 ENHEBRADO DE LA MÁQUINA 14 Bobinado de la canilla 14 Enhebrado inferior (de la canilla 15 Enhebrado superior (de la aguja 17 Para sacar el hilo de la canilla 18 Costura con aguja doble 20 Tensión de los hilos 21 TABLA DE COMBINACIONES ENTRE TEJIDOS, AGUJAS E HILOS - Brother International LS-1717B | Users Manual - Multi - Page 9
6 Changement de pied-de-biche 7 Couture bras libre 8 Stabiliser la machine 8 DIVERSES COMMANDES 9 Sélecteur de longueur de point 9 Levier de couture de point 11 Sélecteur de position de l'aiguille 12 ENFILAGE DE LA MACHINE 14 Remplissage de la canette 14 Mise en place du fil inférieur - Brother International LS-1717B | Users Manual - Multi - Page 10
ÍNDICE CONHEÇA SUA MÁQUINA DE COSTURA PRINCIPAIS PARTES DA SUA MÁQUINA 1 PARTES PRINCIPAIS 2 ACESSÓRIOS 3 OPERANDO A SUA MÁQUINA DE COSTURA Passagem da Linha Inferior (da Bobina 15 Passagem da Linha Superior (da Agulha 17 Puxando para Cima a Linha da Bobina 18 Costura com Agulha Dupla 20 Tens - Brother International LS-1717B | Users Manual - Multi - Page 11
CONTENTS KNOWING YOUR SEWING MACHINE STRAIGHT AND ZIGZAG BUILT-IN STITCHES STITCHING BUTTONHOLE AND USING ATTACHMENTS BUTTON SEWING AND APPLICATIONS MAINTENANCE INDEX G L PRINCIPAIS PARTES DA SUA MÁQUINA F E C B N IH 5 7 6 MACHINE PIECES PRINCIPALES DE LA 12 J M K 4 8 9 0 D - Brother International LS-1717B | Users Manual - Multi - Page 12
KNOWING YOUR SEWING MACHINE STRAIGHT AND ZIGZAG BUILT-IN STITCHES STITCHING PRINCIPAL PARTS 1 Needle Position Selector 2 Stitch Width knob 3 Thread Take-up Lever 4 Extension Table with Accessory Storage 5 Upper Tension Control Dial 6 Stitch Length Knob 7 Reverse Sewing Lever 8 Thread Cutter - Brother International LS-1717B | Users Manual - Multi - Page 13
YOUR SEWING MACHINE STRAIGHT AND ZIGZAG BUILT-IN STITCHES STITCHING ACCESSORIES 1 Zipper Foot (1 pc.) (See note.) 2 Bobbins (3 pcs.) 3 Needle Set Zelanda) J01367051 (Canadá) J00478051 (zona dual con 110/120V) Código das Partes para o Pé Calcador para Zig-Zag: 131046-051 Para o Reostato : - Brother International LS-1717B | Users Manual - Multi - Page 14
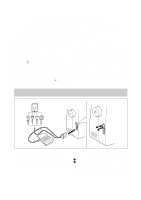
CONTENTS KNOWING YOUR SEWING MACHINE STRAIGHT AND ZIGZAG BUILT-IN STITCHES STITCHING OPERATING YOUR SEWING MACHINE Connecting Plugs FONCTIONNEMENT DE LA MACHINE A COUDRE Branchement des prises 1. Insert the foot controller plug, located between the foot controller and the power supply plug - Brother International LS-1717B | Users Manual - Multi - Page 15
be used for sewing machine model LS-1717. REMARQUE: 1. S'assurer de ne rien placer sur la pédale lorsque la machine n'est pas utilisée. 2. Il est nécessaire d'huiler une nouvelle machine ou une machine n'ayant pas été utilisée pendant une longue période de temps selon les instructions page 54. Apr - Brother International LS-1717B | Users Manual - Multi - Page 16
CONTENTS KNOWING YOUR SEWING MACHINE STRAIGHT AND ZIGZAG BUILT-IN STITCHES STITCHING Inserting the Needle Turn power para un perfecto cosido. 2. Para comprobar que la aguja no está doblada, coloque la parte plana de la aguja hacia abajo como se muestra en el dibujo. (Ver fig. B.) 3. - Brother International LS-1717B | Users Manual - Multi - Page 17
SEWING MACHINE STRAIGHT AND ZIGZAG BUILT-IN STITCHES STITCHING Changing the Presser Foot Changement de pied-de-biche It may be necessary to change the presser foot according to your sewing Moneda 2 Aflojar 3. Coloque la parte del prensatelas con ranura contra la parte llana de la barra de - Brother International LS-1717B | Users Manual - Multi - Page 18
SEWING MACHINE STRAIGHT AND ZIGZAG BUILT-IN STITCHES STITCHING Converting to Free-Arm Style Free-arm sewing is convenient for sewing tubular and hard-to-reach areas on garments. To change your machine cojinete de goma que se encuentra en la parte anterior derecha de la placa de base hasta que - Brother International LS-1717B | Users Manual - Multi - Page 19
. This setting is used for sewing on a button. The F area is used for making a Satin Stitch (a close zigzag stitch), which can be used in making buttonholes and decorative stitches. The position needed for making the Satin Stitch may need to be adjusted according to the fabric and thread being used - Brother International LS-1717B | Users Manual - Multi - Page 20
SEWING MACHINE STRAIGHT AND ZIGZAG BUILT-IN STITCHES STITCHING Reverse Sewing Lever Levier de couture en marche arrière Reverse sewing is generally used for locking and reinforcing seams. To sew in reverse, hold down the reverse sewing lever while slowly sewing. To return to forward sewing - Brother International LS-1717B | Users Manual - Multi - Page 21
SEWING MACHINE STRAIGHT AND ZIGZAG BUILT-IN STITCHES STITCHING Stitch Width Knob Sélecteur de largeur de point The width of the zigzag stitch is regulated by operating the stitch width knob. The numbers above the knob represent the stitch width in millimeters (mm). The larger numbers set - Brother International LS-1717B | Users Manual - Multi - Page 22
SEWING MACHINE STRAIGHT AND ZIGZAG BUILT-IN STITCHES STITCHING Needle Position Selector By shifting this lever to L (left), M (middle) or R (right), you can sew straight and zigzag stitches on the baseline. When you sew needle is in the fabric. 2. Always set the selector to M when using the - Brother International LS-1717B | Users Manual - Multi - Page 23
CONTENTS KNOWING YOUR SEWING MACHINE STRAIGHT AND ZIGZAG BUILT-IN STITCHES STITCHING BUTTONHOLE AND USING ATTACHMENTS BUTTON SEWING AND APPLICATIONS MAINTENANCE INDEX 1 2 3 4 13 - Brother International LS-1717B | Users Manual - Multi - Page 24
KNOWING YOUR SEWING MACHINE STRAIGHT AND ZIGZAG BUILT-IN STITCHES STITCHING THREADING THE MACHINE Winding the Bobbin ENFILAGE DE LA MACHINE Remplissage de la canette 1. Place the spool of thread on the spool pin and pass the thread around the bobbin winding tension disc. 1 Bobbin winding - Brother International LS-1717B | Users Manual - Multi - Page 25
CONTENTS KNOWING YOUR SEWING MACHINE STRAIGHT AND ZIGZAG BUILT-IN STITCHES STITCHING Lower (bobbin) Threading Mise en place du fil inférieur (canette) Turn power switch to "O". Mettre l'interrupteur principal sur "O". 1. Raise the needle to its highest position by turning - Brother International LS-1717B | Users Manual - Multi - Page 26
YOUR SEWING MACHINE STRAIGHT AND ZIGZAG BUILT-IN STITCHES STITCHING 1 2 3 2 1 3 A B 4 5 4 BUTTONHOLE AND USING ATTACHMENTS BUTTON SEWING AND APPLICATIONS 6 C D Upper (Needle) Threading 1 Spool pin 2 Thread guide 3 Thread Take-up Lever 4 Upper (needle) Tension 5 Thread Check - Brother International LS-1717B | Users Manual - Multi - Page 27
a continuación, hacia delante, a través de la ranura derecha situada en la parte anterior de la máquina. 4. Tire del hilo hacia abajo desde la ranura romperse, así como provocar que se salten puntadas o se frunza el tejido. 17 Passagem da Linha Superior (da Agulha) 1 Porta-carretel 2 Guia-fio 3 - Brother International LS-1717B | Users Manual - Multi - Page 28
SEWING MACHINE STRAIGHT AND ZIGZAG BUILT-IN STITCHES STITCHING Drawing Up The Bobbin Thread Remontée du fil inférieur 1. Raise the presser foot and the needle to their highest positions. 2. With your left hand, hold the end of the upper thread colóquelos hacia la parte posterior de la máquina - Brother International LS-1717B | Users Manual - Multi - Page 29
. B. 2 Right needle thread passes through this guide. 3 Left needle thread passes in front of this guide. NOTE: 1. Use the zigzag presser foot. 2. Use a setting of less than 3 on the stitch width knob. 3. Set the needle position selector to M. Couture avec l'aiguille jumelée Cette machine à coudre - Brother International LS-1717B | Users Manual - Multi - Page 30
EXTRA Coloque el portacarretes vertical extra en el orificio previsto en la parte superior derecha de la máquina. Coloque el segundo carrete de hilo en mismas instrucciones que para el enhebrado de una aguja simple. Véase página 17, si se desean más detalles al respecto. 2. Enhebrado de la aguja - Brother International LS-1717B | Users Manual - Multi - Page 31
CONTENTS KNOWING YOUR SEWING MACHINE STRAIGHT AND ZIGZAG BUILT-IN STITCHES STITCHING 32 Thread Tension Tension du fil Thread tension will affect the quality of your stitches. It may need to be adjusted when you change fabric or thread type. La tension du fil aura un effet sur la qualité de - Brother International LS-1717B | Users Manual - Multi - Page 32
KNOWING YOUR SEWING MACHINE STRAIGHT AND ZIGZAG BUILT-IN STITCHES STITCHING NOTE: The bobbin thread tension has already been adjusted at the factory for general use. For most sewing applications, no adjustment is needed. When sewing with thin thread on thin fabrics, the thread tension may - Brother International LS-1717B | Users Manual - Multi - Page 33
CONTENTS KNOWING YOUR SEWING MACHINE STRAIGHT AND ZIGZAG BUILT-IN STITCHES STITCHING CHART OF SEWING FABRICS, NEEDLES AND THREAD COMBINATIONS VERY THIN LIGHTWEIGHT MEDIUM WEIGHT HEAVYWEIGHT KNITS SEWING FABRICS Fine tricot, Fine lace, Thin linen, Silk, Organza, Chiffon Voile, Taffeta, - Brother International LS-1717B | Users Manual - Multi - Page 34
TABLA DE COMBINACIONES ENTRE TEJIDOS, AGUJAS E HILOS MUY FINO LIGERO MEDIO PESADO PRENDAS DE PUNTO TEJIDOS TAMAÑO DE LA AGUJA TAMAÑO DEL HILO Punto fino, Encaje fino, Lino fino, Seda, Organza, Chifón n° 65/9 Algodón: 80 Sintético/ Fibra larga de poliéster Algodón mercerizado fino Velo, - Brother International LS-1717B | Users Manual - Multi - Page 35
Point droit STITCH LENGTH STITCH WIDTH NEEDLE POSITION PRESSER FOOT NEEDLE F-4 0 M, L, R (For twin needle sewing, always set at M.) Zigzag Single or Twin Starting Sewing 1. Raise the needle to its highest position and lift the presser foot lever. 2. Pull up the bobbin thread by turning the - Brother International LS-1717B | Users Manual - Multi - Page 36
CONTENTS KNOWING YOUR SEWING MACHINE STRAIGHT AND ZIGZAG BUILT-IN STITCHES STITCHING Changing Sewing Directions (fig. A) 1. Stop the machine at the point where you wish to change directions with the needle still in the fabric. If the needle ends in the up position turn - Brother International LS-1717B | Users Manual - Multi - Page 37
SEWING MACHINE STRAIGHT AND ZIGZAG BUILT-IN STITCHES STITCHING Sewing Fabric Edges Les bords For sewing thin fabric: While pulling both the needle and bobbin threads toward the back of the machine, start sewing de tela plegada o cartón bajo la parte posterior del prensatelas para elevarlo. 1 - Brother International LS-1717B | Users Manual - Multi - Page 38
STITCHES STITCHING For sewing denim Le denim When sewing more than two layers of denim, help feed the fabric by carefully guiding it over the feed dogs with your hands. (Feeding will be easier if the fabric is slightly stretched, or if the sewing machine bajo la parte posterior del - Brother International LS-1717B | Users Manual - Multi - Page 39
SEWING MACHINE STRAIGHT AND ZIGZAG BUILT-IN STITCHES STITCHING Removing the Fabric from the Machine 1. Stop the machine. 2. Turn the balance wheel toward you (counterclockwise) to bring the needle and thread los salientes del prensatelas hacia la parte posterior de la máquina. Remoção do - Brother International LS-1717B | Users Manual - Multi - Page 40
CONTENTS KNOWING YOUR SEWING MACHINE STRAIGHT AND ZIGZAG BUILT-IN STITCHES STITCHING Guiding the Fabric Guider le tissu Simply guide the fabric with your fingers in front of the presser foot as shown in fig.A. Do not pull the fabric; let the machine do the work. If you pull the fabric, the - Brother International LS-1717B | Users Manual - Multi - Page 41
Twin Simple Zigzag Stitch Set the stitch length between 1 and 4 for a simple zigzag stitch. NOTE: Zigzag stitching requires less upper thread tension than straight stitching. 1. With the stitch length set between 0 and 1, sew 5-6 straight stitches for reinforcement. 2. Set the stitch width to your - Brother International LS-1717B | Users Manual - Multi - Page 42
Puntada zigzag Larga de puntada Ancho de puntada Posición de la aguja Prensatelas Aguja 1-4 (para puntadas de realce, poner en F.) 1-5 (para coser con la aguja doble, utilice siempre un ajuste inferior a 3.) M, L, R (para coser con la aguja doble, ajuste siempre en M.) Zigzag Simple o doble - Brother International LS-1717B | Users Manual - Multi - Page 43
YOUR SEWING MACHINE STRAIGHT AND ZIGZAG BUILT-IN STITCHES STITCHING Decorative Stitches STITCH LENGTH STITCH WIDTH NEEDLE POSITION PRESSER FOOT NEEDLE Set between 0 and 1 (F) for the Satin Stitch. See the table on the next page. M, L, R Zigzag Single or Twin Various decorative stitches can - Brother International LS-1717B | Users Manual - Multi - Page 44
YOUR SEWING MACHINE STRAIGHT AND ZIGZAG BUILT-IN STITCHES STITCHING Needle Needle position L Single needle M R Twin needle M L Single needle M R Twin needle M L Single needle M R Twin needle M Pattern sewn Adjustment of the stitch width Repeatedly move the stitch width - Brother International LS-1717B | Users Manual - Multi - Page 45
Aguja Posición de la aguja L Aguja simple M R Aguja doble M L Aguja simple M R Aguja doble M L Aguja simple M R Aguja doble M Patrón cosido Ajuste del ancho de puntada Mueva repetidamente el selector de ancho de puntada a una velocidad constante entre 0 y 5, y luego entre 5 y - Brother International LS-1717B | Users Manual - Multi - Page 46
CONTENTS KNOWING YOUR SEWING MACHINE STRAIGHT AND ZIGZAG BUILT-IN STITCHES STITCHING Buttonhole Sewing STITCH LENGTH STITCH WIDTH NEEDLE POSITION PRESSER FOOT NEEDLE Set between 0 and 1 (F) for the Satin Stitch. See the instructions below. R (right position) Zigzag Single Making a - Brother International LS-1717B | Users Manual - Multi - Page 47
Para coser ojales Largo de puntada Ancho de puntada Posición de la aguja Prensatelas Aguja Ajustar entre 0 y 1 (F) para puntada de realce. Véanse las instrucciones a continuación. R (a la derecha) Zigzag Simple Para coser un ojal NOTA: 1. Se recomienda practicar la costura de ojales en un - Brother International LS-1717B | Users Manual - Multi - Page 48
CONTENTS KNOWING YOUR SEWING MACHINE STRAIGHT AND ZIGZAG BUILT-IN STITCHES STITCHING OPTIONAL PROCEDURE FOR BUTTONHOLES Step A: Bar Tack 1. Set the needle position at L, stitch width at 5 and stitch length at 0. 2. Lower the presser foot and sew 3 to 4 stitches. 3. Stop the machine when the - Brother International LS-1717B | Users Manual - Multi - Page 49
Método alternativo para coser ojales. Paso A: Remate delantero 1. Ajuste la posición de la aguja en L, el ancho de puntada en 5 y el largo de puntada en 0. 2. Baje el prensatelas y cosa 3 ó 4 puntadas. 3. Pare la máquina cuando la aguja esté picada en el tejido a la izquierda de las puntadas ( - Brother International LS-1717B | Users Manual - Multi - Page 50
CONTENTS KNOWING YOUR SEWING MACHINE STRAIGHT AND ZIGZAG BUILT-IN STITCHES STITCHING Button Sewing STITCH LENGTH STITCH WIDTH NEEDLE POSITION PRESSER FOOT NEEDLE OTHEr 0 Set according to the distance between the holes. L or R Zigzag Single Darning Plate 1. Set the darning plate on the - Brother International LS-1717B | Users Manual - Multi - Page 51
aguja de coser normal, lleve los hilos por el revés del tejido y anúdelos para asegurar el botón. 8. Quite la placa de zurcir levantando la parte delantera, para poder seguir con una costura normal. 1 Ranura delantera de la placa de zurcir Para crear una canilla de hilo en el botón Si - Brother International LS-1717B | Users Manual - Multi - Page 52
CONTENTS KNOWING YOUR SEWING MACHINE STRAIGHT AND ZIGZAG BUILT-IN STITCHES STITCHING Zipper Insertion STITCH LENGTH STITCH WIDTH NEEDLE POSITION PRESSER FOOT NEEDLE 2-3 0 M Zipper Foot Single The zipper foot is used to sew on various types of zippers and can easily be positioned to the - Brother International LS-1717B | Users Manual - Multi - Page 53
para fijarla en la posición correcta. 3. Doble la orilla del tejido 2 cm (3/4") y coloque la cremallera debajo de la parte doblada. Para lograr mejores resultados, se recomienda coser ambas partes de la cremallera de abajo a arriba. 4. Conviene colocar la aguja en el lado de la pata más cercano a la - Brother International LS-1717B | Users Manual - Multi - Page 54
KNOWING YOUR SEWING MACHINE STRAIGHT AND ZIGZAG BUILT-IN STITCHES STITCHING Gathering Fronces STITCH LENGTH STITCH WIDTH NEEDLE trouve du côté envers du tissu. 2. Sew a single row or evenly-spaced multiple rows of Straight Stitches. 3. Pull the lower thread(s) to gather the fabric. 2. Faire - Brother International LS-1717B | Users Manual - Multi - Page 55
CONTENTS KNOWING YOUR SEWING MACHINE STRAIGHT AND ZIGZAG BUILT-IN STITCHES STITCHING Darning Reprisage STITCH LENGTH STITCH WIDTH NEEDLE se controla únicamente con las manos. 5. Repita este movimiento hasta que la parte que va a zurcirse se llene con líneas paralelas de puntadas. Véase - Brother International LS-1717B | Users Manual - Multi - Page 56
CONTENTS KNOWING YOUR SEWING MACHINE STRAIGHT AND ZIGZAG BUILT-IN STITCHES STITCHING Attaching Lace Coudre de la dentelle STITCH LENGTH STITCH WIDTH NEEDLE POSITION PRESSER FOOT NEEDLE 2-4 0 M Zigzag Single Longueur de point Largeur de point Position de l'aiguille Pied-de-biche Aiguille - Brother International LS-1717B | Users Manual - Multi - Page 57
CONTENTS KNOWING YOUR SEWING MACHINE STRAIGHT AND ZIGZAG BUILT-IN STITCHES STITCHING Appliques Appliques STITCH LENGTH STITCH WIDTH NEEDLE POSITION PRESSER FOOT NEEDLE F-2 1-3 M Zigzag Single LONGUEUR DE POINT LARGEUR DE POINT POSITION DE L'AIGUILLE PIED-DE-BICHE AIGUILLE F-2 1-3 M - Brother International LS-1717B | Users Manual - Multi - Page 58
CONTENTS KNOWING YOUR SEWING MACHINE STRAIGHT AND ZIGZAG BUILT-IN STITCHES STITCHING Blind Hem Stitch Point d'ourlet invisible STITCH LENGTH STITCH WIDTH NEEDLE POSITION PRESSER FOOT NEEDLE 2-3 3-5 R Zigzag Single Longueur de point Largeur de point Position de l'aiguille Pied-de-biche - Brother International LS-1717B | Users Manual - Multi - Page 59
YOUR SEWING MACHINE STRAIGHT AND ZIGZAG BUILT-IN STITCHES STITCHING Over Edge Stitch Points sur le bord STITCH LENGTH STITCH WIDTH la aguja penetre el tejido al coser la parte izquierda de la puntada zigzag y sobrepase la orilla al coser la parte derecha. Cosa con la aguja en esta posici - Brother International LS-1717B | Users Manual - Multi - Page 60
SEWING MACHINE STRAIGHT AND ZIGZAG BUILT-IN STITCHES STITCHING Cording Pose de ganses STITCH LENGTH STITCH WIDTH NEEDLE POSITION PRESSER FOOT NEEDLE F-2 Set according to the thickness of the cord being used. M Zigzag Single 1. Set the stitch pase justo por ambas partes del cordón. 2. - Brother International LS-1717B | Users Manual - Multi - Page 61
CONTENTS KNOWING YOUR SEWING MACHINE STRAIGHT AND ZIGZAG BUILT-IN STITCHES STITCHING Monogramming and Embroidering STITCH LENGTH STITCH WIDTH NEEDLE POSITION PRESSER FOOT NEEDLE OTHERS Set at any position. 0-5 M None Single Darning plate Preparing for monogramming and embroidering 1. Place - Brother International LS-1717B | Users Manual - Multi - Page 62
(para bordados) en el derecho del tejido 3. Estire el tejido en un bastidor tan firmemente como pueda con el revés del tejido en la parte inferior del círculo interior. 4. Coloque la tela debajo de la aguja y baje la barra del prensatelas, aunque no haya ninguno puesto. 5. Girando la ruedecilla - Brother International LS-1717B | Users Manual - Multi - Page 63
CONTENTS KNOWING YOUR SEWING MACHINE STRAIGHT AND ZIGZAG BUILT-IN STITCHES STITCHING Changing the Bulb Remplacement de l'ampoule 1. Remove the power supply plug from the outlet. 2. Loosen the face plate screw as shown in fig. A. 3. Remove the face plate from the machine as illustrated in - Brother International LS-1717B | Users Manual - Multi - Page 64
used more than one hour a day. If the machine is used more often, oil every day. Sewing machine oil is available from your local sewing machine dealer or service center. Do not apply too much oil as it may get on your thread and fabric. REMARQUE: La machine doit être huilée une fois par semaine si - Brother International LS-1717B | Users Manual - Multi - Page 65
SEWING MACHINE STRAIGHT AND ZIGZAG BUILT-IN STITCHES STITCHING Cleaning Nettoyage Removing the Shuttle Hook 1. Raise the needle to its highest position. 2. Open the shuttle cover on the front of the free arm. 3. Take out the bobbin the lint from the upper part of the feed dogs and shuttle - Brother International LS-1717B | Users Manual - Multi - Page 66
alimentadores (fig. C) 1. Retire la placa de agujas aflojando los tornillos con una moneda o un destornillador. 2. Con un cepillo, limpie la pelusa de la parte superior de los alimentadores y de la pista de la lanzadera. Remoção do Gancho da Lançadeira 1. Eleve a agulha até a sua posição mais alta - Brother International LS-1717B | Users Manual - Multi - Page 67
YOUR SEWING MACHINE STRAIGHT AND ZIGZAG BUILT-IN STITCHES STITCHING Performance Checklist Whenever sewing difficulties are encountered, review the section in this instruction manual that details the operation you are performing to make sure you are correctly using the machine. If the problem - Brother International LS-1717B | Users Manual - Multi - Page 68
CONTENTS KNOWING YOUR SEWING MACHINE STRAIGHT AND ZIGZAG BUILT-IN STITCHES STITCHING FABRIC DOES NOT FEED PROPERLY NEEDLE BREAKS MACHINE IS NOISY OR SLOW MACHINE DOES NOT START Stitch length dial is set at no feeding. Needle is not correctly inserted. Lint is clinging to the bottom of - Brother International LS-1717B | Users Manual - Multi - Page 69
correctement. Si le problème persiste, la liste de vérifications suivante permettra d'améliorer le fonctionnement de la machine. Si les problèmes persistent, contacter le centre de service le plus proche. LE FIL SUPERIEUR SE CASSE LE FIL INFERIEUR SE CASSE POINTS MANQUES BOUCLE DANS LA COUTURE - Brother International LS-1717B | Users Manual - Multi - Page 70
LE TISSU NE PASSE PAS CORRECTEMENT L'AIGUILLE SE CASSE LA MACHINE FAIT DU BRUIT OU FONCTIONNE LENTEMENT LA MACHINE NE SE MET PAS EN MARCHE Le sélecteur de longueur de point est réglé sur près du butoir de la canette. w Page 14 No No w w w w CONTACTER LE CENTRE DE SERVICE LOCAL 60 - Brother International LS-1717B | Users Manual - Multi - Page 71
con dificultades al coser, vuelva a consultar la parte de este manual de instrucciones que detalla la operación que está No w La combinación tamaño de aguja/ grueso de hilo/tejido no es correcta. w Pagina 17 No w La aguja está doblada o gastada. w Pagina 6 No w La combinación tamaño de - Brother International LS-1717B | Users Manual - Multi - Page 72
de hilo/tejido no es correcta. w Pagina 24 No w Se está usando una aguja dañada o gastada. w Pagina 6 No w El hilo está enredado. w Pagina 17 No w Los alimentadores están bajados. La aguja está mal colocada. Hay pelusa en el fondo de la placa de agujas. w Pagina 6 No w w Pagina 56 No - Brother International LS-1717B | Users Manual - Multi - Page 73
Sempre que encontrar dificuldades durante a costura, reveja a seção neste manual de instruções que detalha a operação em execução, para certificar-se está danificada ou gasta. A passagem da linha não está correta. w Página 17 Não w A linha superior está muito esticada. w Página 21 Não w O - Brother International LS-1717B | Users Manual - Multi - Page 74
/ tecido não está correta. w Página 24 Não w A agulha em uso está danificada ou gasta. w Página 6 Não w A linha está emaranhada. w Página 17 Não w w Página 6 Não w A agulha em uso está danificada ou gasta. w Página 6 Não w A combinação de tamanho da agulha/ espessura da linha - Brother International LS-1717B | Users Manual - Multi - Page 75
BUILT-IN STITCHES STITCHING Repacking the Machine Keep the carton and packing fabrics for future use. It may become necessary to reship the sewing machine. Improper packing or improper packing fabric could result in damage during shipping. Instructions for repacking the machine are illustrated - Brother International LS-1717B | Users Manual - Multi - Page 76
Sewing 8 G Gathering 44 Guiding the Fabric 30 L Light Bulb Replacement 53 Lower (bobbin) Threading Machine 8 Stitch Length Knob 9 Stitch Width Knob 11 Straight Stitching 25 Stretch Fabric Sewing 30 T Threading Bobbin 15 Needle 16 Thread Tension 21 Troubleshooting 57-58 Twin-Needle Sewing - Brother International LS-1717B | Users Manual - Multi - Page 77
de la couture 26 Sélecteur de largeur de point 11 Sélecteur de longueur de point 9 Sélecteur de tension supérieure 21 Stabiliser la machine 8 T Tableau des combinaisons tissus/aiguilles/ fils 23 Tension de fil 21 V Vérification de fonctionnement 59-60 L Lampe Interrupteur 5 Remplacement de - Brother International LS-1717B | Users Manual - Multi - Page 78
Bombilla Cambio de la bombilla 53 Interruptor 5 Bordados 51 C Cambio de la bombilla 53 Cambio del prensatelas 7 Canilla Bobinado 14 Enhebrado 15, 17 Colocación del carrete 17 Cómo coser las orillas de la tela 27 Cómo coser tela muy delgada 29 Cómo guiar la tela 30 Conexión de los enchufes - Brother International LS-1717B | Users Manual - Multi - Page 79
Guiando o Tecido 30 I Inserção de Zíper 42 Instalação do Carretel 17 Interruptor de Força Principal 5 L Limpeza 56 Limpeza da Ranhura-Guia da P Partes Principais 2 Passagem da Linha Agulha 17 Bobina 15 Passagem da Linha Inferior (da Bobina 15 Passagem da Linha Superior 17 Ponto Chuleado - Brother International LS-1717B | Users Manual - Multi - Page 80
CONTENTS KNOWING YOUR SEWING MACHINE STRAIGHT AND ZIGZAG BUILT-IN STITCHES STITCHING BUTTONHOLE AND USING ATTACHMENTS BUTTON SEWING AND APPLICATIONS MAINTENANCE INDEX 70 - Brother International LS-1717B | Users Manual - Multi - Page 81
71 - Brother International LS-1717B | Users Manual - Multi - Page 82
ENGLISH FRANÇAIS ESPAÑOL PORTUGUÊS 194403-011 Printed in China
-
 1
1 -
 2
2 -
 3
3 -
 4
4 -
 5
5 -
 6
6 -
 7
7 -
8
-
9
-
10
-
11
-
12
-
13
-
14
-
15
-
16
-
17
-
18
-
19
-
20
-
21
-
22
-
23
-
24
-
25
-
26
-
27
-
28
-
29
-
30
-
31
-
32
-
33
-
34
-
35
-
36
-
37
-
38
-
39
-
40
-
41
-
42
-
43
-
44
-
45
-
46
-
47
-
48
-
49
-
50
-
51
-
52
-
53
-
54
-
55
-
56
-
57
-
58
-
59
-
60
-
61
-
62
-
63
-
64
-
65
-
66
-
67
-
68
-
69
-
70
-
71
-
72
-
73
-
74
-
75
-
76
-
77
-
78
-
79
-
80
-
81
-
82
 |
 |
Instruction Manual
Manuel d’instructions
Manual de instrucciones
Manual de Instruções