Brother International LS-1717B Users Manual - Multi - Page 55
Darning
 |
View all Brother International LS-1717B manuals
Add to My Manuals
Save this manual to your list of manuals |
Page 55 highlights
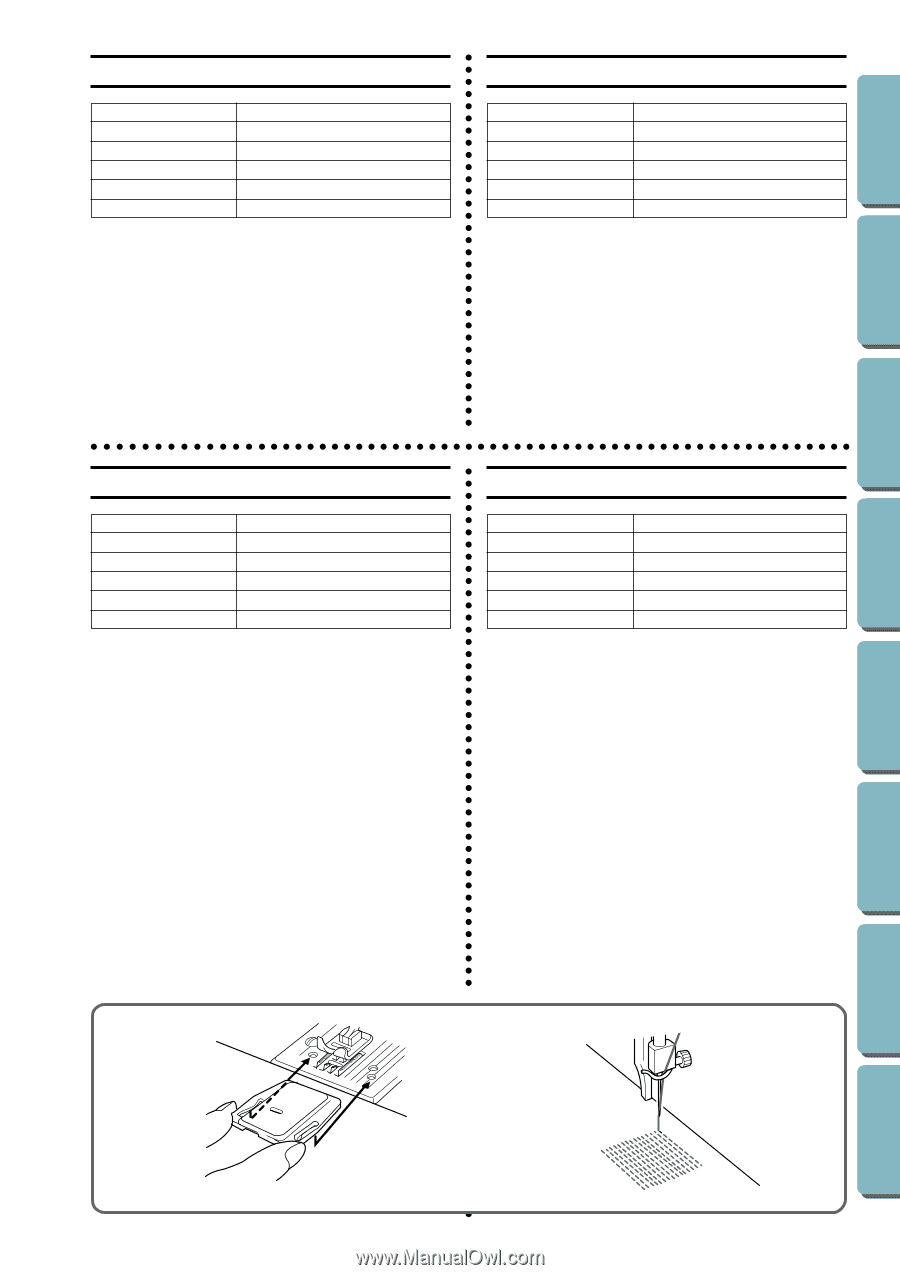
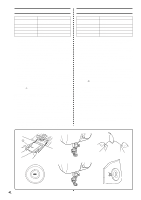
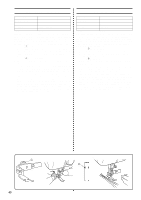
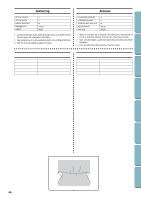
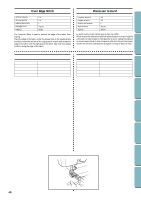
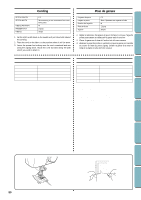
CONTENTS KNOWING YOUR SEWING MACHINE STRAIGHT AND ZIGZAG BUILT-IN STITCHES STITCHING Darning Reprisage STITCH LENGTH STITCH WIDTH NEEDLE POSITION PRESSER FOOT NEEDLE OTHER F-2 0 M None Single Darning plate 1. Place the darning plate on the needle plate and press down into place as shown in fig. A. 2. Place the portion to be darned under the presser foot together with a fabric underlay for reinforcement. 3. Remove the presser foot, then lower the presser foot lifter. 4. Begin sewing alternating between gently drawing the work away from you and pulling it toward you. With the darning plate on the machine, the feed dogs will not move the fabric. You control the fabric movement with your hands. 5. Repeat this motion until the portion to be darned is filled with parallel lines of stitching. See fig. B. LONGUEUR DE POINT LARGEUR DE POINT POSITION DE L'AIGUILLE PIED-DE-BICHE AIGUILLE AUTRE F-2 0 M Aucun Simple Plaque à repriser 1. Placer la plaque à repriser sur la plaque à aiguille et appuyer pour la mettre en place correctement comme l'indique la fig. A. 2. Placer la pièce à repriser et une pièce de renfort sous le pied-debiche. 3. Retirer le pied-de-biche et baisser le levier de pied-de-biche. 4. Commencer à coudre en alternativement tirant et poussant le tissu doucement. La plaque à repriser sur la machine, les griffes d'entraînement n'entraîneront pas le tissu. Le tissu est déplacé manuellement. 5. Continuer jusqu'à que la pièce à repriser soit couverte de lignes parallèles de points. Voir fig. B. Zurcido Remendos LARGO DE LA PUNTADA ANCHO DE LA PUNTADA POSICIÓN DE LA AGUJA PRENSATELAS AGUJA OTROS F-2 0 M Retirado Simple Placa de zurcir 1. Instale la placa de zurcir sobre la placa de agujas y apriete para engancharla como se indica en la fig. A. 2. Ponga el tejido a zurcir debajo del prensatelas con una pieza de tela de refuerzo debajo. 3. Quite el prensatelas, y luego baje el elevador del prensatelas. 4. Empiece a coser empujando y tirando alternativamente del tejido con cuidado. Cuando la placa de zurcir está instalada en la máquina, los alimentadores no mueven el tejido. Su movimiento se controla únicamente con las manos. 5. Repita este movimiento hasta que la parte que va a zurcirse se llene con líneas paralelas de puntadas. Véase fig. B. COMPRIMENTO DO PONTO F-2 LARGURA DO PONTO 0 POSIÇÃO DA AGULHA M PÉ CALCADOR Nenhum AGULHA Simples OUTROS Chapa de Cerzir 1. Coloque a chapa de cerzir na chapa de agulha e pressione-a no lugar como mostra a fig. A. 2. Coloque a porção a ser remendada sob o pé calcador, junto com um tecido de forro para reforço. 3. Remova o pé calcador e então abaixe o ascensor de pé calcador. 4. Comece a costurar, alternando entre afastar e puxar para si o trabalho gentilmente. Com a chapa de cerzir na máquina, os dentes impelentes não moverão o tecido. Você controlará o movimento do tecido com as suas mãos. 5. Repita este movimento até que a porção a ser remendada seja preenchida com linhas paralelas de costura. Veja a fig. B. BUTTONHOLE AND USING ATTACHMENTS BUTTON SEWING AND APPLICATIONS MAINTENANCE INDEX A B 45
-
 1
1 -
2
-
3
-
4
-
5
-
6
-
7
-
8
-
9
-
10
-
11
-
12
-
13
-
14
-
15
-
16
-
17
-
18
-
19
-
20
-
21
-
22
-
23
-
24
-
25
-
26
-
27
-
28
-
29
-
30
-
31
-
32
-
33
-
34
-
35
-
36
-
37
-
38
-
39
-
40
-
41
-
42
-
43
-
44
-
45
-
46
-
47
-
48
-
49
-
 50
50 -
 51
51 -
 52
52 -
 53
53 -
 54
54 -
 55
55 -
 56
56 -
 57
57 -
 58
58 -
 59
59 -
 60
60 -
61
-
62
-
63
-
64
-
65
-
66
-
67
-
68
-
69
-
70
-
71
-
72
-
73
-
74
-
75
-
76
-
77
-
78
-
79
-
80
-
81
-
82
 |
 |