Brother International PR-1000 PE-DESIGN NEXT CW Instruction Manual PRCW1 - Page 15
Net Fill, Pattern, Spacing, 3.0 mm, Direction, Covering Satin Stitch, Width, For this example
 |
View all Brother International PR-1000 manuals
Add to My Manuals
Save this manual to your list of manuals |
Page 15 highlights
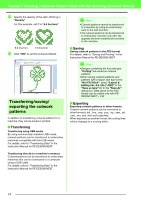
Tutorial 1: Creating a Cutwork Pattern Filled with Net Stitching (Cutwork Wizard) g Specify net fill stitching inside the cutout areas in "Net Fill". By sewing net fill stitching in cutouts, inner cutouts can be reinforced while allowing for a greater design variety. For this example, select "Yes". j Specify the pattern direction of the net fill stitch in "Direction". For this example, set it to "0°". Select the parameters according to the procedure from step h to j, when "Net Fill" is set to "Yes". h Specify the net fill stitch pattern in "Pattern". Three net fill stitch patterns are available. For this example, select "Pattern 2". 0° 90° k Specify satin stitching after cutting in "Covering Satin Stitch". Satin stitching is sewn along the edges of inner cutouts. The zigzag stitch or the stem stitch is used as an underlay for the satin stitching. For this example, select "Yes". Pattern 1 Pattern 2 Select the parameters according to the procedure from step l to m, when "Covering Satin Stitch" is set to "Yes". l Specify the width of the satin stitching in "Width". For this example, set it to "4.0 mm". Pattern 3 i Specify the pattern spacing for the net fill stitch in "Spacing". For this example, set it to "3.0 mm". 3.0 mm 6.0 mm 2.0 mm 10.0 mm 13
-
 1
1 -
2
-
3
-
4
-
5
-
6
-
7
-
8
-
9
-
 10
10 -
 11
11 -
 12
12 -
 13
13 -
 14
14 -
 15
15 -
 16
16 -
 17
17 -
 18
18 -
 19
19 -
 20
20 -
21
-
22
-
23
-
24
-
25
-
26
-
27
-
28
-
29
 |
 |
