Brother International XL-3200 Users Manual - English - Page 24
Onisf
 |
View all Brother International XL-3200 manuals
Add to My Manuals
Save this manual to your list of manuals |
Page 24 highlights
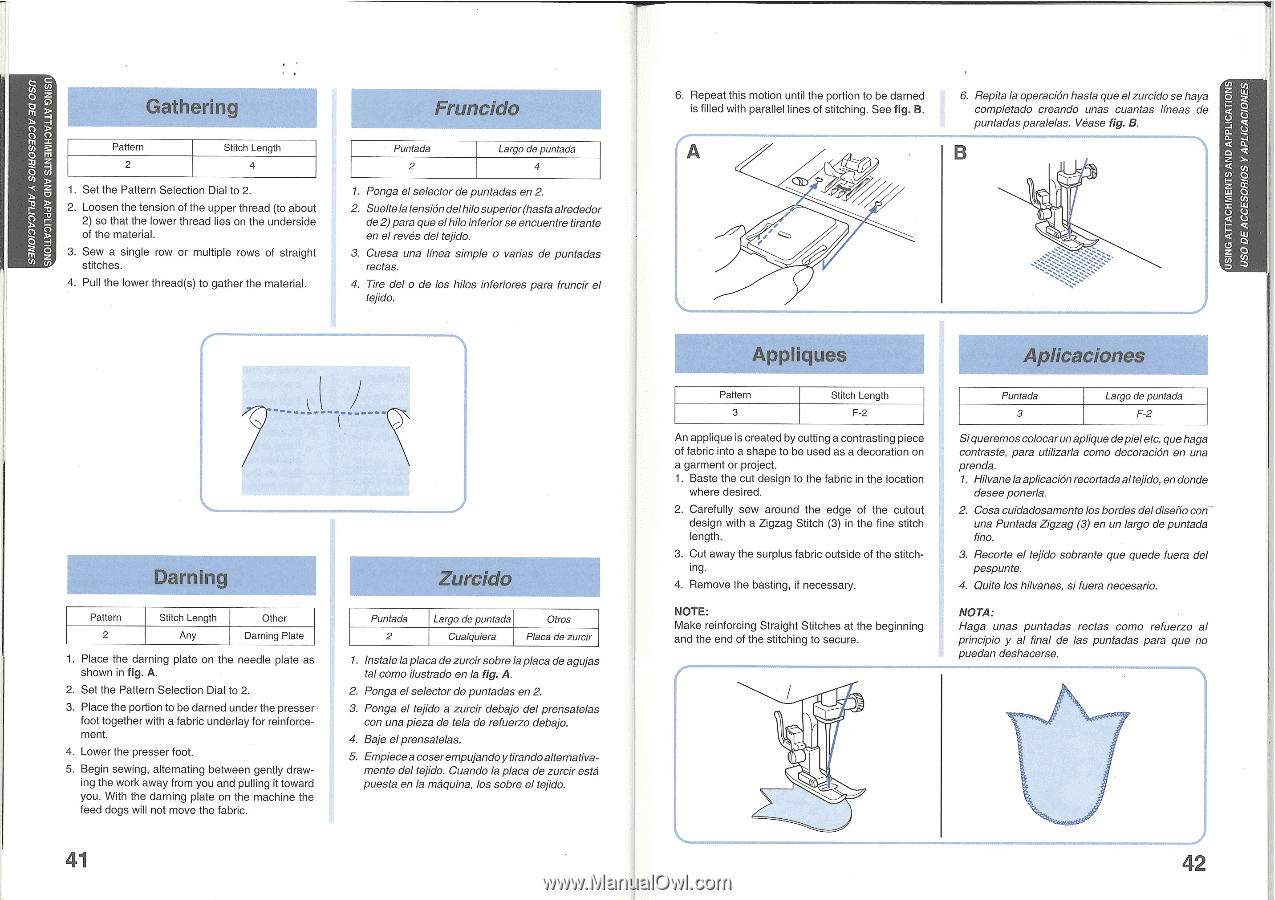
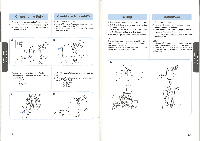
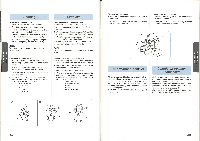
S3N01017'.917dVA SOI110S300V30 OSn SNOI1V3IlddV ONV SIN3INH0Y11d ONISf USING ATTACHMENTS AND APPLICATIONS USO DEACCESORIOS Y APLICACIONES Gathering Pattern 2 Stitch Length 4 1. Set the Pattern Selection Dial to 2. 2. Loosen the tension of the upper thread (to about 2) so that the lower thread lies on the underside of the material. 3. Sew a single row or multiple rows of straight stitches. 4. Pull the lower thread(s) to gather the material. Fruncido Puntada 2 Largo de puntada 4 1. Ponga el selector de puntadas en 2. 2. Sueltela tension delhilosuperior(hasta alrededor de 2)para que elhilo inferiorse encuentre tirante en el reties del tejido. 3. Cuesa una &lea simple o varias de puntadas rectas. 4. Tire del o de los hilos inferiores para fruncir el tejido. Darning Zurcido Pattern 2 Stitch Length Any Other Darning Plate 1. Place the darning plate on the needle plate as shown in fig. A. 2. Set the Pattern Selection Dial to 2. 3. Place the portion to be darned under the presser , foot together with a fabric underlay for reinforcement. 4. Lower the presser foot. 5. Begin sewing, alternating between gently drawing the work away from you and pulling it toward you. With the darning plate on the machine the feed dogs will not move the fabric. Puntada 2 Largo de puntada Otros Cualquiera Placa de zurcir 1. lnstale la placa de zurcir sobre la placa de agujas tal como ilustrado en la fig. A. 2. Ponga el selector de puntadas en 2. 3. Ponga el tejido a zurcir debajo del prensatelas con una pieza de tela de refuerzo debajo. 4. Baje elprensatelas. 5. Empiecea coserempujandoy tirandoalternativamente del tejido. Cuando la placa de zurcir esta puesta en la maquina, los sobre el tejido. 41 6. Repeat this motion until the portion to be darned is filled with parallel lines of stitching. See fig. B. A 6. Repita la operaciOn hasta que elzurcido se haya completado creando unas cuantas &leas de puntadas paralelas. Vease fig. B. B Appliques Pattern 3 Stitch Length F-2 An applique is created by cutting a contrasting piece of fabric into a shape to be used as a decoration on a garment or project. 1. Baste the cut design to the fabric in the location where desired. 2. Carefully sew around the edge of the cutout design with a Zigzag Stitch (3) in the fine stitch length. 3. Cut away the surplus fabric outside of the stitching. 4. Remove the basting, if necessary. NOTE: Make reinforcing Straight Stitches at the beginning and the end of the stitching to secure. Aplicaciones Puntada 3 Largo de puntada F-2 Siqueremos colocarunaplique depieletc. queNaga contraste, para utilizarla como decoraciOn en una prenda. 1. Hilvanela aplicaciOnrecortada altejido, en donde desee ponerla. 2. Cosa cuidadosamente los bordes deldiselio conuna Puntada Zigzag (3) en un largo de puntada fino. 3. Recorte el tejido sobrante que quede fuera del pespunte. 4. Quite los hilvanes, si fuera necesario. NOTA: Haga unas puntadas rectas como refuerzo al principio y al final de las puntadas para que no puedan deshacerse. 42
-
 1
1 -
2
-
3
-
4
-
5
-
6
-
7
-
8
-
9
-
10
-
11
-
12
-
13
-
14
-
15
-
16
-
17
-
18
-
 19
19 -
 20
20 -
 21
21 -
 22
22 -
 23
23 -
 24
24 -
 25
25 -
 26
26 -
 27
27 -
 28
28 -
 29
29 -
30
-
31
 |
 |