Canon EOS50D ZoomBrowser 6.2 for Windows Instruction Manual (EOS 50D) - Page 25
Organizing Images, Creating a Folder for Saving Images
 |
View all Canon EOS50D manuals
Add to My Manuals
Save this manual to your list of manuals |
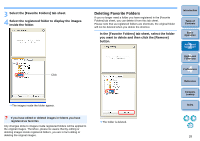
Page 25 highlights
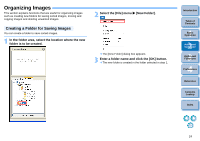
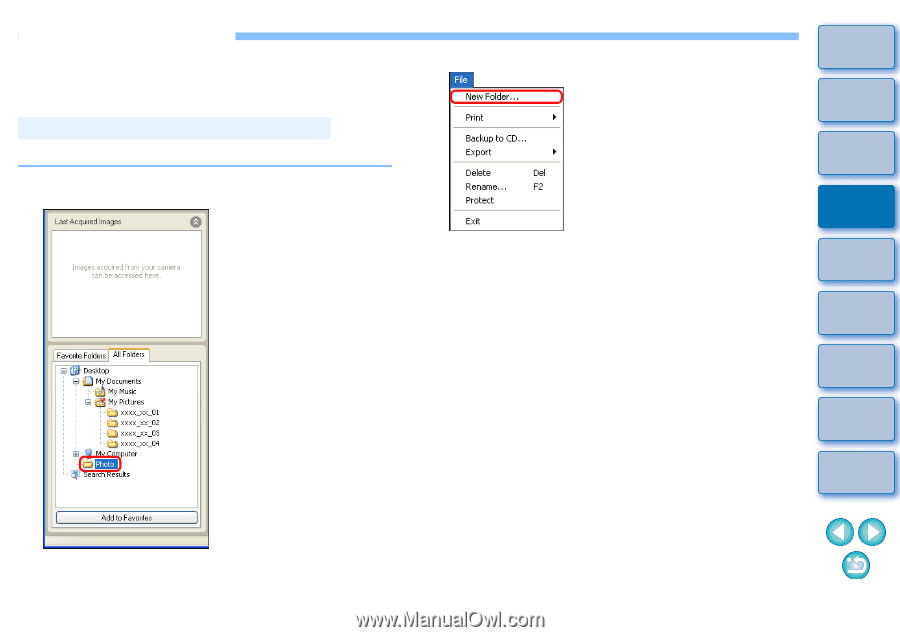
Organizing Images This section explains functions that are useful for organizing images such as creating new folders for saving sorted images, moving and copying images and deleting unwanted images. Creating a Folder for Saving Images You can create a folder to save sorted images. 1 In the folder area, select the location where the new folder is to be created. 2 Select the [File] menu X [New Folder]. The [New Folder] dialog box appears. 3 Enter a folder name and click the [OK] button. The new folder is created in the folder selected in step 1. Introduction Table of Contents 1Basic Operation 2Advanced Operation 3High-Level Functions 4 Preferences Reference Contents Lookup Index 24
-
 1
1 -
2
-
3
-
4
-
5
-
6
-
7
-
8
-
9
-
10
-
11
-
12
-
13
-
14
-
15
-
16
-
17
-
18
-
19
-
 20
20 -
 21
21 -
 22
22 -
 23
23 -
 24
24 -
 25
25 -
 26
26 -
 27
27 -
 28
28 -
 29
29 -
 30
30 -
31
-
32
-
33
-
34
-
35
-
36
-
37
-
38
-
39
-
40
-
41
-
42
-
43
-
44
-
45
-
46
-
47
-
48
-
49
-
50
-
51
-
52
-
53
-
54
-
55
-
56
-
57
-
58
-
59
-
60
-
61
-
62
-
63
-
64
-
65
-
66
-
67
-
68
-
69
-
70
-
71
-
72
-
73
-
74
-
75
-
76
-
77
-
78
 |
 |
24
1
2
3
4
Introduction
Table of
Contents
Basic
Operation
Advanced
Operation
High-Level
Functions
Reference
Preferences
Contents
Lookup
Index
Organizing Images
This section explains functions that are useful for organizing images
such as creating new folders for saving sorted images, moving and
copying images and deleting unwanted images.
You can create a folder to save sorted images.
1
In the folder area, select the location where the new
folder is to be created.
Creating a Folder for Saving Images
2
Select the [File] menu
X
[New Folder].
¿
The [New Folder] dialog box appears.
3
Enter a folder name and click the [OK] button.
¿
The new folder is created in the folder selected in step 1.