Canon FAXPHONE L120 FAXPHONE L120 Advanced Guide
Canon FAXPHONE L120 Manual
 |
View all Canon FAXPHONE L120 manuals
Add to My Manuals
Save this manual to your list of manuals |
Canon FAXPHONE L120 manual content summary:
- Canon FAXPHONE L120 | FAXPHONE L120 Advanced Guide - Page 1
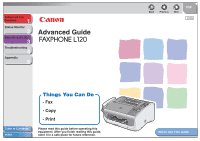
1 Status Monitor 2 Reports and Lists 3 Troubleshooting 4 Appendix 5 Advanced Guide Table of Contents Index Things You Can Do - Fax - Copy - Print Please read this guide before operating this equipment. After you finish reading this guide, store it in a safe place for future reference - Canon FAXPHONE L120 | FAXPHONE L120 Advanced Guide - Page 2
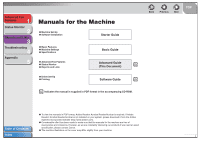
Advanced Fax Features 1 Manuals for the Machine Status Monitor 2 Reports and Lists 3 ● Machine Set-Up ● Software Installation Starter Guide Troubleshooting 4 ● Basic Features ● Machine Settings ● Specifications Basic Guide Appendix 5 ● Advanced Fax Features ● Status Monitor ● Reports and - Canon FAXPHONE L120 | FAXPHONE L120 Advanced Guide - Page 3
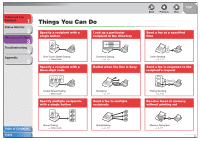
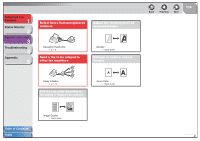
time Timer Sending → p. 1-11 Send a fax in response to the recipient's request Coded Speed Dialing → Basic Guide Specify multiple recipients with a single button Redialing → p. 1-4 Send a fax to multiple recipients Polling Sending → p. 1-12 Receive faxes in memory without printing out Table of - Canon FAXPHONE L120 | FAXPHONE L120 Advanced Guide - Page 4
level of scanned images Reception Restriction → p. 1-9 Send a fax to be relayed to other fax machines Relay Initiation → p. 1-14 Select a scan mode depending on the quality of image to be scanned ABC ABC ABC ABC Image Quality → Basic Guide Density → Basic Guide Enlarge or reduce copied images - Canon FAXPHONE L120 | FAXPHONE L120 Advanced Guide - Page 5
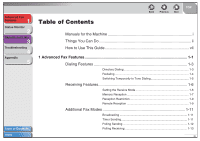
Features 1 Status Monitor 2 Reports and Lists 3 Troubleshooting 4 Appendix 5 Table of Contents Index Table of Contents Back Previous Next TOP Manuals for the Machine i Things You Can Do ii How to Use This Guide vii 1 Advanced Fax Features 1-1 Dialing Features 1-3 Directory Dialing - Canon FAXPHONE L120 | FAXPHONE L120 Advanced Guide - Page 6
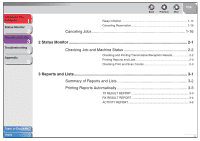
Advanced Fax Features 1 Status Monitor 2 Reports and Lists 3 Troubleshooting 4 Appendix 5 Back Previous Next TOP Relay Initiation 1-14 Canceling Reservation 1-15 Canceling Jobs 1-16 2 Status Monitor ...2-1 Checking Job and Machine Status 2-2 Checking and Printing Transmission/ - Canon FAXPHONE L120 | FAXPHONE L120 Advanced Guide - Page 7
and Lists 3 Troubleshooting 4 Appendix 5 Back Previous Next TOP 4 Troubleshooting...4-1 General Problems 4-2 Paper Feeding Problems 4-3 Faxing Problems 4-4 Sending Problems 4-4 Receiving Problems 4-6 Copying Problems 4-10 Telephone Problems 4-11 Printing Problems 4-12 5 Appendix - Canon FAXPHONE L120 | FAXPHONE L120 Advanced Guide - Page 8
1 Status Monitor 2 Reports and Lists 3 Troubleshooting 4 Appendix 5 How to Use This Guide ■ Using the Top Page Advanced Fax Features 1 Status Monitor 2 Reports and Lists 3 Troubleshooting 4 Appendix 5 Advanced Guide Back Previous Next TOP ENG Back Previous Next TOP Returns - Canon FAXPHONE L120 | FAXPHONE L120 Advanced Guide - Page 9
and Lists 3 Troubleshooting 4 Appendix 5 Table of Contents Index 1 Advanced Fax Features Back Previous Next TOP Dialing Features 1-3 Directory Dialing 1-3 Redialing 1-4 Switching Temporarily to Tone Dialing 1-5 Receiving Features 1-6 Setting the Receive Mode 1-6 Memory Reception - Canon FAXPHONE L120 | FAXPHONE L120 Advanced Guide - Page 10
Advanced Fax Features 1 Status Monitor 2 Reports and Lists 3 Troubleshooting 4 Appendix 5 Back Previous Next TOP The following symbols are used throughout the manuals for the machine and indicate the warnings, cautions and notes you should keep in mind when using the machine. WARNING - Canon FAXPHONE L120 | FAXPHONE L120 Advanced Guide - Page 11
and Lists 3 Troubleshooting 4 Appendix 5 Table of Contents Index 1 Advanced Fax Features Back Previous Next TOP Dialing Features 1-3 Directory Dialing 1-3 Redialing 1-4 Switching Temporarily to Tone Dialing 1-5 Receiving Features 1-6 Setting the Receive Mode 1-6 Memory Reception - Canon FAXPHONE L120 | FAXPHONE L120 Advanced Guide - Page 12
Advanced Fax Features 1 Status Monitor 2 Reports and Lists 3 Troubleshooting 4 Appendix 5 Back Previous Next TOP Canceling Jobs 1-16 Table of Contents Index 1-2 - Canon FAXPHONE L120 | FAXPHONE L120 Advanced Guide - Page 13
The recipients are listed in the order of one-touch speed dialing buttons (01 to 15), and coded speed dialing codes (001 to 100). - For a one-touch speed dialing button or coded speed dialing code with no recipient name registered, their fax number is displayed. 4. Press [Start] to start dialing the - Canon FAXPHONE L120 | FAXPHONE L120 Advanced Guide - Page 14
and Lists 3 Troubleshooting 4 Appendix 5 Table of Contents Index 4. Use [Up/Down] to find the required recipient. 5. Press [Start] to start dialing the displayed recipient. Press [Stop/Reset], then [Set] to cancel sending the fax. ■ Redialing Redialing can be done manually or automatically. For - Canon FAXPHONE L120 | FAXPHONE L120 Advanced Guide - Page 15
Advanced Fax Features 1 Status Monitor 2 Reports and Lists 3 Troubleshooting 4 Appendix 5 ■ Switching Temporarily to Tone Dialing If your machine is set for pulse dialing, use the procedure below to switch to tone dialing to use information services (i.e., banks, airline reservations, and - Canon FAXPHONE L120 | FAXPHONE L120 Advanced Guide - Page 16
Advanced Fax Features 1 Status Monitor 2 Reports and Lists 3 Troubleshooting 4 Appendix 5 Table of Contents Index Receiving Features You can set the receive mode that suits your needs. The machine also provides the following receiving features: memory reception, reception restriction, and - Canon FAXPHONE L120 | FAXPHONE L120 Advanced Guide - Page 17
buttons to enter the duration (10 to 70 seconds) for which the machine attempts to detect the fax tone. Press [Set]. Back Previous Next TOP ■ Memory Reception The machine automatically receives faxes in memory when printing is disabled under certain conditions (i.e., toner or paper has run out - Canon FAXPHONE L120 | FAXPHONE L120 Advanced Guide - Page 18
Advanced Fax Features 1 Status Monitor 2 Reports and Lists 3 Troubleshooting 4 Appendix 5 5. Use the numeric buttons to enter the time (in 24-hour format) when memory reception starts, then press [Set]. If you do not want to set the time, press [Set] without entering any number and skip to - Canon FAXPHONE L120 | FAXPHONE L120 Advanced Guide - Page 19
Troubleshooting 4 Appendix 5 ■ Reception Restriction You can restrict incoming fax calls from only the numbers registered in the machine for speed dialing. This can help eliminate unsolicited calls. NOTE - The sender's fax machine to receive faxes manually. This can be useful when the machine is - Canon FAXPHONE L120 | FAXPHONE L120 Advanced Guide - Page 20
Troubleshooting 4 Appendix 5 Receiving a Fax Remotely 1. When you receive a call, pick up the telephone. 2. Enter the two-digit remote reception ID on the keypad to start reception. 3. When the reception is complete, hang up the telephone. Back Previous Next TOP Table of Contents Index 1-10 - Canon FAXPHONE L120 | FAXPHONE L120 Advanced Guide - Page 21
Lists 3 Troubleshooting 4 Appendix 5 Additional Fax Modes The machine provides the following additional fax modes: BROADCAST?>, then press [Set]. 4. Use the numeric buttons, one-touch speed dialing button, coded speed dialing code, or directory dialing to enter a recipient, then press [Set]. If - Canon FAXPHONE L120 | FAXPHONE L120 Advanced Guide - Page 22
Troubleshooting 4 Appendix 5 Table of Contents Index 4. Use the numeric buttons to enter the time of transmission (in 24-hour format), then press [Set]. Ex. TIMER=20:00 YES=SET 5. Use the numeric buttons to enter a recipient, or press [Add. Mode] to specify the fax the fax feature to scan the - Canon FAXPHONE L120 | FAXPHONE L120 Advanced Guide - Page 23
Fax Features 1 Status Monitor 2 Reports and Lists 3 Troubleshooting 4 Appendix 5 4. Use [Left/Right] to select or , then press [Set]. : The document will be deleted after it is sent to a recipient. : The document will be retained in memory until manually - Canon FAXPHONE L120 | FAXPHONE L120 Advanced Guide - Page 24
Fax Features 1 Status Monitor 2 Reports and Lists 3 Troubleshooting 4 Appendix 5 ■ Relay Initiation Relay initiation allows you to send a document to a remote machine 4. Use the numeric buttons, one-touch speed dialing button, coded speed dialing code, or directory dialing to specify the relay - Canon FAXPHONE L120 | FAXPHONE L120 Advanced Guide - Page 25
Advanced Fax Features 1 Status Monitor 2 Reports and Lists 3 Troubleshooting 4 Appendix 5 ■ Canceling Reservation You can cancel sending jobs reserved in memory. 1. Press [Add. Mode] twice. 2. Use [Up/Down] to select , then press [Set]. 3. Use [Up/Down] to select the job - Canon FAXPHONE L120 | FAXPHONE L120 Advanced Guide - Page 26
Fax Features 1 Status Monitor 2 Reports and Lists 3 Troubleshooting 4 Appendix 5 Canceling Jobs Cancel an ongoing job (sending, receiving, or copying) as follows. To cancel sending jobs reserved in memory fax job, press [Stop/Reset] to return to the fax mode first. - You cannot use the machine - Canon FAXPHONE L120 | FAXPHONE L120 Advanced Guide - Page 27
Advanced Fax Features 1 Status Monitor 2 Reports and Lists 3 Troubleshooting 4 Appendix 5 2 Status Monitor Back Previous Next TOP Checking Job and Machine Status 2-2 Checking and Printing Transmission/Reception Results 2-2 Printing Reports and Lists 2-3 Checking Print and Scan Counts - Canon FAXPHONE L120 | FAXPHONE L120 Advanced Guide - Page 28
Advanced Fax Features 1 Status Monitor 2 Reports and Lists 3 Troubleshooting 4 Appendix 5 Back Previous Next Checking Job and Machine Status Status monitor allows you to view and print transmission and reception results, print reports and lists, and check print and scan counts. ■ Checking - Canon FAXPHONE L120 | FAXPHONE L120 Advanced Guide - Page 29
LIST?>: One-Touch Speed Dialing List : Coded Speed Dialing List : Group Dialing List : Machine Status List If no relevant data is stored in memory, is displayed. Back Previous Next TOP ■ Checking Print and Scan Counts 1. Press [Status - Canon FAXPHONE L120 | FAXPHONE L120 Advanced Guide - Page 30
Advanced Fax Features 1 Status Monitor 2 Reports and Lists 3 Troubleshooting 4 Appendix 5 3 Reports and Lists Back Previous Next TOP Summary of Reports and Lists 3-2 Printing Reports Automatically 3-3 TX RESULT REPORT 3-3 RX RESULT REPORT 3-4 ACTIVITY REPORT 3-5 Table - Canon FAXPHONE L120 | FAXPHONE L120 Advanced Guide - Page 31
and fax numbers of recipients registered in coded speed dialing codes. Also shows subaddresses if set. Lists the names and fax numbers of recipients registered in each group dialing group. Lists current machine settings. Lists documents that were lost from memory due to power cut. Cannot be manually - Canon FAXPHONE L120 | FAXPHONE L120 Advanced Guide - Page 32
Advanced Fax Features 1 Status Monitor 2 Reports and Lists 3 Troubleshooting 4 Appendix 5 Back Previous Next TOP Printing Reports Automatically TX RESULT REPORT, RX RESULT REPORT, and ACTIVITY REPORT can be set to print automatically. ■ TX RESULT - Canon FAXPHONE L120 | FAXPHONE L120 Advanced Guide - Page 33
failed - STOP: Transmission manually canceled before completion - MEM.FULL: Memory became full during transmission - JAM: Document jam occurred - NO ANSWER: Call not answered ● Error code: For descriptions of error codes, see Chapter 9, "Troubleshooting," in the Basic Guide. ■ RX RESULT REPORT - Canon FAXPHONE L120 | FAXPHONE L120 Advanced Guide - Page 34
Advanced Fax Features 1 Status Monitor 2 Reports and Lists 3 Troubleshooting 4 Appendix 5 ■ ACTIVITY REPORT 1. Press [Menu]. 2. Use [Up/Down] to select , then (G3 or ECM) ● RESULT: Result of transaction (OK or NG) and error code if applicable Table of Contents Index 3-5 - Canon FAXPHONE L120 | FAXPHONE L120 Advanced Guide - Page 35
2 Reports and Lists 3 Troubleshooting 4 Appendix 5 4 Troubleshooting Back Previous Next TOP General Problems 4-2 Paper Feeding Problems 4-3 Faxing Problems 4-4 Sending Problems 4-4 Receiving Problems 4-6 Copying Problems 4-10 Telephone Problems 4-11 Printing Problems 4-12 Table of - Canon FAXPHONE L120 | FAXPHONE L120 Advanced Guide - Page 36
Advanced Fax Features 1 Status Monitor 2 Reports and Lists 3 Troubleshooting 4 Appendix 5 General Problems The machine has no power. Q Is the power cord plugged in securely? A Check that the power cord is securely plugged into the machine and into the wall outlet. If the machine is - Canon FAXPHONE L120 | FAXPHONE L120 Advanced Guide - Page 37
2 Reports and Lists 3 Troubleshooting 4 Appendix 5 Back Previous Next TOP Paper Feeding Problems Paper does not feed properly. Q Does the machine contain too many sheets? A Make sure you load the correct quantity. (See Chapter 3, "Print Media," in the Basic Guide.) Q Is the paper - Canon FAXPHONE L120 | FAXPHONE L120 Advanced Guide - Page 38
.) A Make sure the cartridge cover is fully closed. Q Is the one-touch speed dialing button or coded speed dialing code you entered registered correctly? A Check that the speed dialing settings are registered correctly. (See Chapter 4, "Sending Faxes," in the Basic Guide.) Q Did you dial - Canon FAXPHONE L120 | FAXPHONE L120 Advanced Guide - Page 39
. Q Is the recipient's machine a G3 fax machine? Q Is the recipient's machine working properly? A Check the machine by making a copy. If the copy is clear, the problem may be in the recipient's machine. If the copy is spotted or dirty, make sure the scanning platform is properly set into - Canon FAXPHONE L120 | FAXPHONE L120 Advanced Guide - Page 40
, or delete any documents stored in memory. Q Has an error occurred during reception? A Check the LCD for an error message. (See Chapter 9, "Troubleshooting," in the Basic Guide.) Back Previous Next TOP A Print an Activity Report and check for an error. (See "Printing Reports and Lists - Canon FAXPHONE L120 | FAXPHONE L120 Advanced Guide - Page 41
, send, or delete any documents stored in memory. Q Has an error occurred during reception? A Check the LCD for an error message. (See Chapter 9, "Troubleshooting," in the Basic Guide.) A Print an Activity Report and check for an error. (See "Printing Reports and Lists," on p. 2-3.) Back - Canon FAXPHONE L120 | FAXPHONE L120 Advanced Guide - Page 42
check that the scanning components of their machine are clean. Back Previous Next TOP Faxes do not print. Q Have you removed the plastic seal from the toner cartridge? A Make sure you remove the seal from the cartridge. (See "Install Cartridge," in the Starter Guide.) Q Is the toner - Canon FAXPHONE L120 | FAXPHONE L120 Advanced Guide - Page 43
A Redistribute the toner inside the toner cartridge. If the problem persists, replace the toner cartridge. (See Chapter 8, "Maintenance," in the Basic Guide.) Cannot receive using Error Correction Mode (ECM). Q Does the sender's fax machine support ECM? A If this is the case, the document - Canon FAXPHONE L120 | FAXPHONE L120 Advanced Guide - Page 44
occurred during transmission or reception? A Change to the fax mode and check the LCD for an error message. (See Chapter 9, "Troubleshooting," in the Basic Guide.) Q Is the machine's memory full? A Change to the fax mode and check if the memory is not full. Table of Contents Index 4-10 - Canon FAXPHONE L120 | FAXPHONE L120 Advanced Guide - Page 45
Lists 3 Troubleshooting 4 Appendix 5 Telephone Problems Cannot dial. Q A Q A Q A Is the telephone cable connected properly? Make sure the cable is connected properly. (See "Connect Telephone Cables and Install Handset," in the Starter Guide.) Is the power cord plugged in securely? Check that - Canon FAXPHONE L120 | FAXPHONE L120 Advanced Guide - Page 46
seal from the cartridge. (See "Install Cartridge," in the Starter Guide.) Q Is the cartridge out of toner? A Replace the toner cartridge. (See Chapter 8, "Maintenance," in the Basic Guide.) Printout does not match paper size. Q Does the size of paper loaded in the machine match the paper - Canon FAXPHONE L120 | FAXPHONE L120 Advanced Guide - Page 47
Make sure the scanning platform is properly set into position. Q Is the scanning area dirty? A Make sure the scanning area is clean. (See Chapter 8, "Maintenance," in the Basic Guide.) Q Is the toner cartridge installed properly? A Make sure the toner cartridge is installed properly. (See - Canon FAXPHONE L120 | FAXPHONE L120 Advanced Guide - Page 48
Advanced Fax Features 1 Status Monitor 2 Reports and Lists 3 Troubleshooting 4 Appendix 5 5 Appendix Back Previous Next TOP Glossary 5-2 Index ...5-9 Table of Contents Index 5-1 - Canon FAXPHONE L120 | FAXPHONE L120 Advanced Guide - Page 49
waits the specified time and dials again. B bps Bits per second. Refers to the speed with which a fax machine sends and receives data. Broadcasting Transmitting documents to more than one location (through the machine's memory). Back Previous Next TOP C CNG Calling Tone. This is a signal sent - Canon FAXPHONE L120 | FAXPHONE L120 Advanced Guide - Page 50
reports, print documents or register information while the machine sends a fax from memory. Back Previous Next TOP E ECM Error Correction Mode. The ability of your machine to reduce system and line errors when sending or receiving from another fax with ECM capability. ECM is most effective in - Canon FAXPHONE L120 | FAXPHONE L120 Advanced Guide - Page 51
Troubleshooting 4 Appendix 5 G G3, Group 3 fax machine Defined by CCITT/ITU-T. Uses encoding schemes to transmit image data while reducing the amount of data that needs to be transmitted, thus reducing transmission time. G3 fax machines one-touch speed dialing or coded speed dialing numbers - Canon FAXPHONE L120 | FAXPHONE L120 Advanced Guide - Page 52
] to receive the incoming fax. Manual redialing When you use regular dialing, you can redial a number manually simply by pressing [Redial] on the operation panel. The last number called is the number redialed. Memory sending Scans a document into memory before the machine dials the number(s) and - Canon FAXPHONE L120 | FAXPHONE L120 Advanced Guide - Page 53
in the machine's memory for speed dialing so that you can save time dialing destinations you call frequently. Regular dialing Pressing the individual numeric buttons to dial a fax or telephone number. Remote reception ID The two-digit code that enables you to manually activate fax reception using - Canon FAXPHONE L120 | FAXPHONE L120 Advanced Guide - Page 54
to identify that particular fax document. Back Previous Next TOP Speed dialing Dialing fax or telephone numbers by pressing a few buttons. To use automatic dialing, you must register the numbers in the machine's memory. See also One-Touch Speed Dialing, Coded Speed Dialing, and Group Dialing - Canon FAXPHONE L120 | FAXPHONE L120 Advanced Guide - Page 55
drum inside the machine via an electrophotographic mechanism. Toner saver The feature that extends cartridge life by reducing toner consumption rate at a slight decrease in print quality. Transmit See Sending. TX See Sending. U UHQ ™ (Ultra High Quality) An exclusive Canon digital image processing - Canon FAXPHONE L120 | FAXPHONE L120 Advanced Guide - Page 56
1-3 DRPD 1-6 E Error correction mode (ECM) 4-5, 4-9 External telephone 1-9 F FAX ONLY 1-6 FAX/TEL 1-6 Optional settings 1-7 G GROUP DIAL LIST 3-2 H [Hook] button 1-5 L LCD 4-2 LIST 1-3 LOST REPORT 3-2 M MACHINE STATUS LIST 3-2 MANUAL 1-6 MEMORY DATA LIST 3-2 MEMORY IMAGE PRINT 3-2 Memory reception - Canon FAXPHONE L120 | FAXPHONE L120 Advanced Guide - Page 57
3-2 Printing automatically 3-3 Printing manually 2-3 RX RESULT REPORT 3-2 Printing automatically 3-4 S SEARCH 1-3 [Status] button 2-2 Status monitor 2-2 Subaddress 1-13, 1-14 T Timer sending 1-11 [Tone] button 1-5 Tone dialing 1-5 Troubleshooting Copying 4-10 Faxing 4-4 General 4-2 Paper feeding - Canon FAXPHONE L120 | FAXPHONE L120 Advanced Guide - Page 58
Advanced Fax Features 1 Status Monitor 2 Reports and Lists 3 Troubleshooting 4 Appendix 5 Table of Contents Index CANON INC. 30-2, Shimomaruko 3-chome, Ohta-ku, Tokyo 146-8501, Japan CANON U.S.A., INC. One Canon Plaza, Lake Success, NY 11042, U.S.A. CANON CANADA INC. 6390 Dixie Road
-
 1
1 -
 2
2 -
 3
3 -
 4
4 -
 5
5 -
 6
6 -
 7
7 -
8
-
9
-
10
-
11
-
12
-
13
-
14
-
15
-
16
-
17
-
18
-
19
-
20
-
21
-
22
-
23
-
24
-
25
-
26
-
27
-
28
-
29
-
30
-
31
-
32
-
33
-
34
-
35
-
36
-
37
-
38
-
39
-
40
-
41
-
42
-
43
-
44
-
45
-
46
-
47
-
48
-
49
-
50
-
51
-
52
-
53
-
54
-
55
-
56
-
57
-
58
 |
 |

1
2
3
4
5
ENG
Advanced Fax
Features
Status Monitor
Reports and Lists
Troubleshooting
Appendix
Table of Contents
Index
How to Use This Guide
TOP
Back
Previous
Next
Things You Can Do
Advanced Guide
- Fax
- Copy
- Print
Please read this guide before operating this
equipment. After you finish reading this guide,
store it in a safe place for future reference.