Canon PIXMA MG8120 MG8120 series Getting Started - Page 13
against the back end of the slot., Tilt the ink tank, then insert it under the label
 |
View all Canon PIXMA MG8120 manuals
Add to My Manuals
Save this manual to your list of manuals |
Page 13 highlights
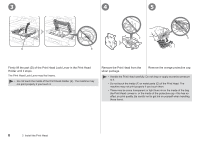
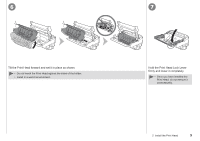
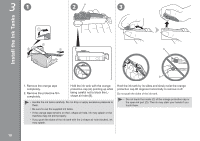
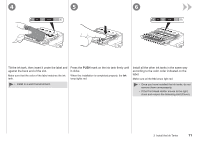
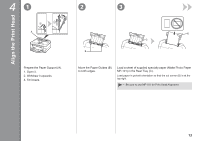
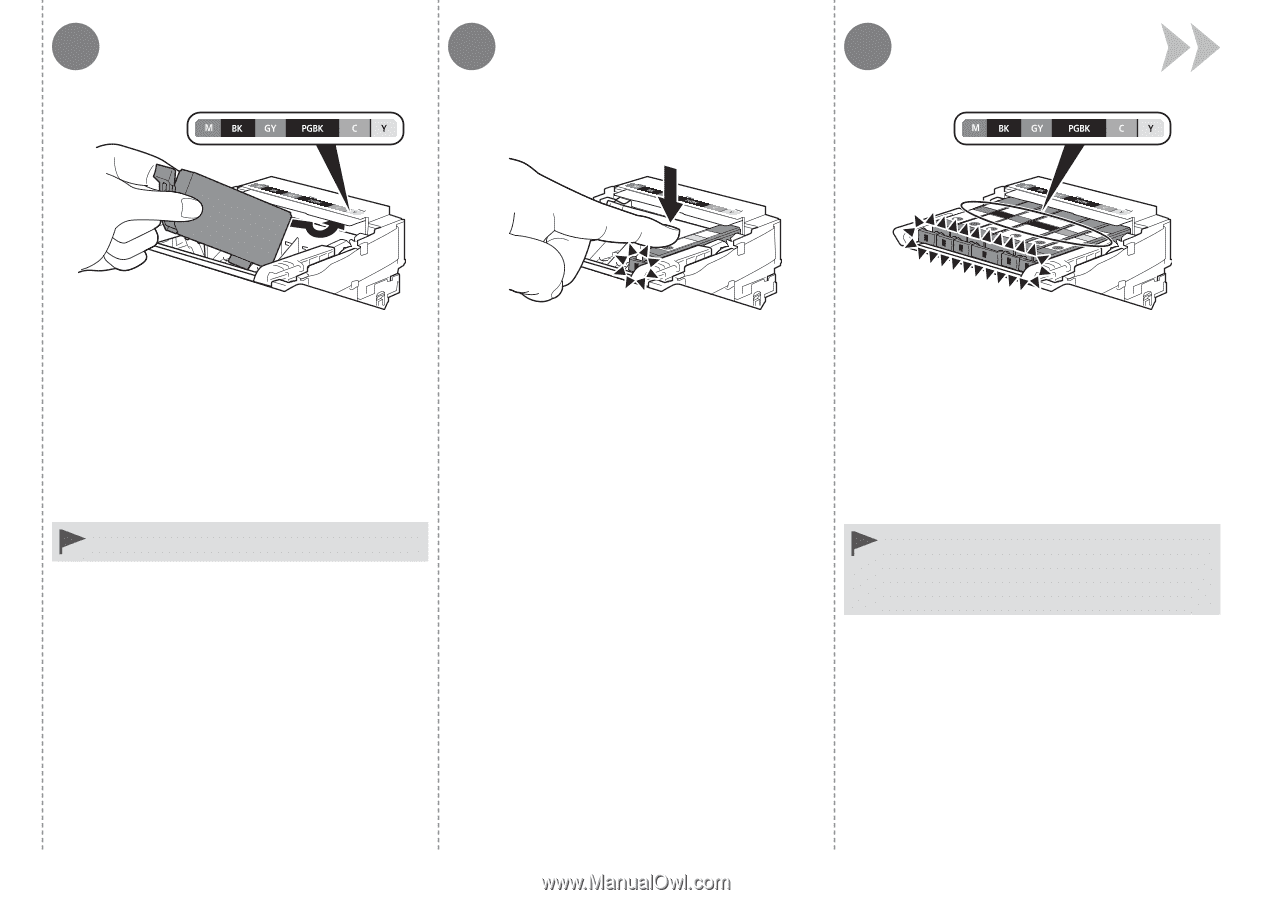
4 5 6 Tilt the ink tank, then insert it under the label and against the back end of the slot. Make sure that the color of the label matches the ink tank. • Install in a well-lit environment. Press the PUSH mark on the ink tank firmly until it clicks. When the installation is completed properly, the Ink lamp lights red. Install all the other ink tanks in the same way according to the color order indicated on the label. Make sure all the Ink lamps light red. • Once you have installed the ink tanks, do not remove them unnecessarily. • If the Print Head Holder moves to the right, close and reopen the Scanning Unit (Cover). 3 Install the Ink Tanks 11
-
 1
1 -
2
-
3
-
4
-
5
-
6
-
7
-
 8
8 -
 9
9 -
 10
10 -
 11
11 -
 12
12 -
 13
13 -
 14
14 -
 15
15 -
 16
16 -
 17
17 -
 18
18 -
19
-
20
-
21
-
22
-
23
-
24
-
25
-
26
-
27
-
28
-
29
-
30
-
31
-
32
-
33
-
34
-
35
-
36
-
37
-
38
-
39
-
40
-
41
-
42
-
43
-
44
-
45
-
46
-
47
-
48
-
49
-
50
-
51
-
52
-
53
-
54
 |
 |
4
5
6
±±
3
Install the Ink Tanks
Tilt the ink tank, then insert it under the label and
against the back end of the slot.
Install in a well-lit environment.
•
Press the
PUSH
mark on the ink tank firmly until
it clicks.
When the installation is completed properly, the
Ink
lamp lights red.
Install all the other ink tanks in the same way
according to the color order indicated on the
label.
Make sure all the
Ink
lamps light red.
Once you have installed the ink tanks, do not
remove them unnecessarily.
If the Print Head Holder moves to the right,
close and reopen the Scanning Unit (Cover).
•
•
Make sure that the color of the label matches the ink
tank.