Canon PIXMA MG8120 MG8120 series Getting Started - Page 15
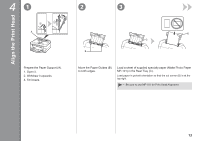
Align the Print Head
 |
View all Canon PIXMA MG8120 manuals
Add to My Manuals
Save this manual to your list of manuals |
Page 15 highlights
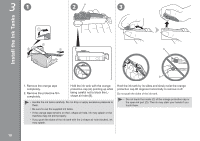
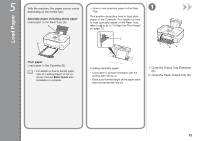
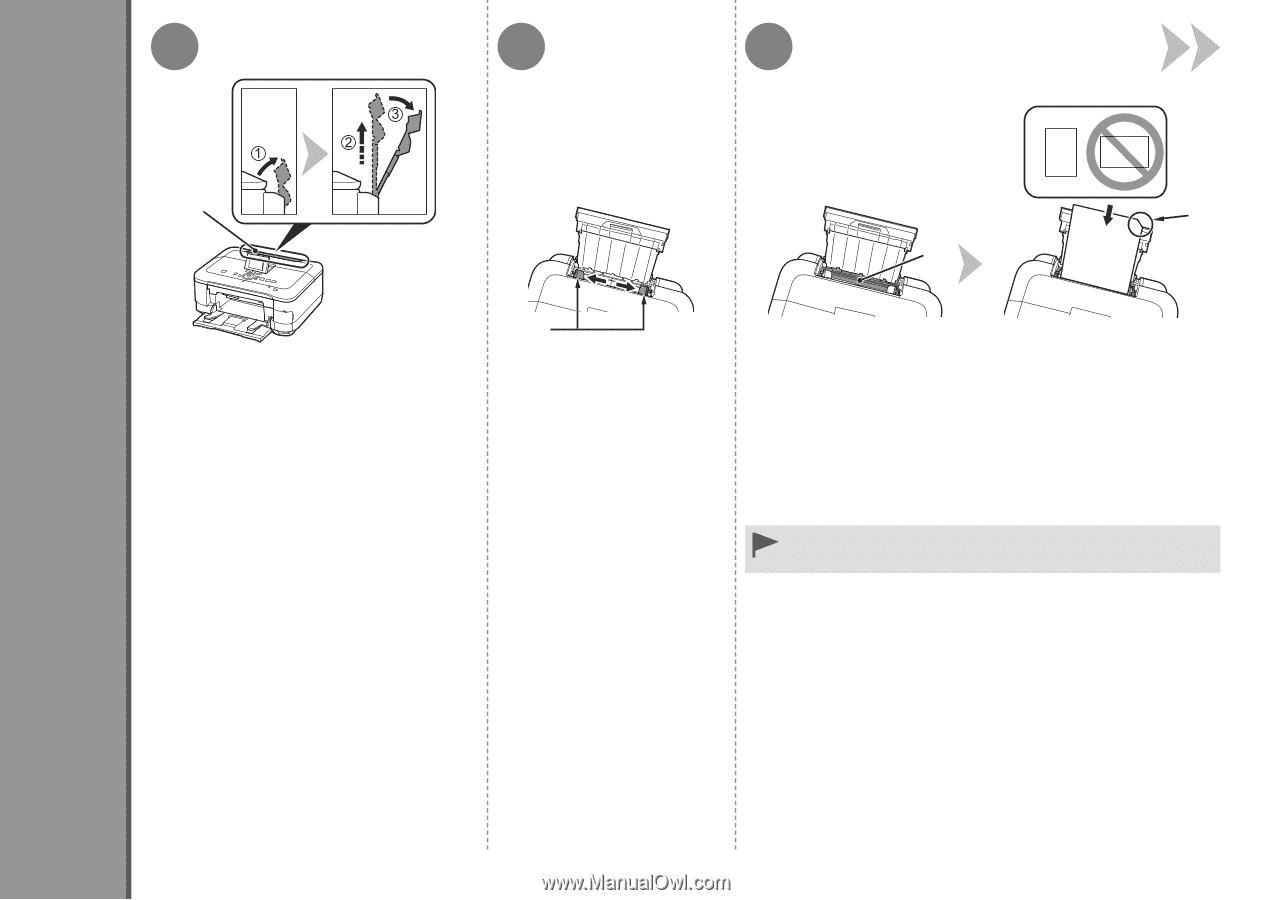
41 2 3 Align the Print Head A Prepare the Paper Support (A). 1. Open it. 2. Withdraw it upwards. 3. Tilt it back. D C B Move the Paper Guides (B) to both edges. Load a sheet of supplied specialty paper (Matte Photo Paper MP-101) in the Rear Tray (C). Load paper in portrait orientation so that the cut corner (D) is at the top right. • Be sure to use MP-101 for Print Head Alignment. 13
-
 1
1 -
2
-
3
-
4
-
5
-
6
-
7
-
8
-
9
-
 10
10 -
 11
11 -
 12
12 -
 13
13 -
 14
14 -
 15
15 -
 16
16 -
 17
17 -
 18
18 -
 19
19 -
 20
20 -
21
-
22
-
23
-
24
-
25
-
26
-
27
-
28
-
29
-
30
-
31
-
32
-
33
-
34
-
35
-
36
-
37
-
38
-
39
-
40
-
41
-
42
-
43
-
44
-
45
-
46
-
47
-
48
-
49
-
50
-
51
-
52
-
53
-
54
 |
 |
4
1
3
2
A
B
C
D
±³
Align the Print Head
Prepare the Paper Support (A).
1. Open it.
2. Withdraw it upwards.
3. Tilt it back.
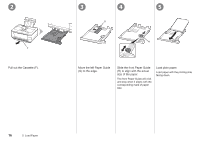
Move the Paper Guides (B)
to both edges.
Load a sheet of supplied specialty paper (Matte Photo Paper
MP-101) in the Rear Tray (C).
Be sure to use MP-101 for Print Head Alignment.
•
Load paper in portrait orientation so that the cut corner (D) is at the
top right.