Canon PIXMA MP800 MP800 User's Guide - Page 17
Operation Panel Name and Functions - print head error
 |
View all Canon PIXMA MP800 manuals
Add to My Manuals
Save this manual to your list of manuals |
Page 17 highlights
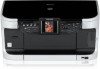
(25) Power Connector This is the connector used to connect the provided power cord. (26) Rear Cover Open when clearing jammed paper. (27) USB Connector (for computer) This is the connector used to connect the machine to a computer using a USB cable. Important While the machine is printing from or scanning images to the computer, or the computer is in the sleep mode or standby mode, do not disconnect and connect the USB cable. Note z For information on how to install the Print Head and ink tanks, refer to the Easy Setup Instructions. Ink Tank Lamps z You can check the status of each ink tank according to the way its lamp flashes. On: The machine is ready to print. Slow flashing (about three seconds): Ink is low. Prepare a new ink tank. For details, see "Getting the Ink Level Information" on page 95. Fast flashing (about one second): Ink tank is empty, or the machine is not ready due to an error. Off: Make sure all the ink tanks are installed properly. If an Ink Tank Lamp remains unlit even after reinstalling ink tanks, an error has occurred and the machine is not ready to print. „ Operation Panel Name and Functions (1) (2) (3) (4) (5) (6) (7) (8) (9) (10) (11)(12) (13) (14) (15) (16) (17)(18)(19)(20)(21) (1) [ON/OFF] Turns the machine ON and OFF. Before turning ON the machine, make sure the Document Cover is closed. (2) [COPY] Switches the machine to Copy mode. Flashes when the machine is turned on. (3) [SCAN] Switches the machine to Scan mode. This button is used when the machine is connected to a computer. (Refer to the Scan Guide.) (4) [PHOTO/FILM] Switches the machine to Photo/film mode. (5) [MEMORY CARD] Switches the machine to Memory card mode. Chapter 1 Before Printing 15
-
 1
1 -
2
-
3
-
4
-
5
-
6
-
7
-
8
-
9
-
10
-
11
-
 12
12 -
 13
13 -
 14
14 -
 15
15 -
 16
16 -
 17
17 -
 18
18 -
 19
19 -
 20
20 -
 21
21 -
 22
22 -
23
-
24
-
25
-
26
-
27
-
28
-
29
-
30
-
31
-
32
-
33
-
34
-
35
-
36
-
37
-
38
-
39
-
40
-
41
-
42
-
43
-
44
-
45
-
46
-
47
-
48
-
49
-
50
-
51
-
52
-
53
-
54
-
55
-
56
-
57
-
58
-
59
-
60
-
61
-
62
-
63
-
64
-
65
-
66
-
67
-
68
-
69
-
70
-
71
-
72
-
73
-
74
-
75
-
76
-
77
-
78
-
79
-
80
-
81
-
82
-
83
-
84
-
85
-
86
-
87
-
88
-
89
-
90
-
91
-
92
-
93
-
94
-
95
-
96
-
97
-
98
-
99
-
100
-
101
-
102
-
103
-
104
-
105
-
106
-
107
-
108
-
109
-
110
-
111
-
112
-
113
-
114
-
115
-
116
-
117
-
118
-
119
-
120
-
121
-
122
-
123
-
124
-
125
-
126
-
127
-
128
-
129
-
130
-
131
-
132
-
133
-
134
-
135
-
136
-
137
-
138
-
139
-
140
-
141
-
142
-
143
-
144
-
145
-
146
-
147
-
148
-
149
-
150
-
151
-
152
-
153
-
154
-
155
-
156
-
157
-
158
-
159
-
160
-
161
-
162
-
163
-
164
 |
 |
