Canon PowerShot A570IS ImageBrowser 5.8 Software User Guide - Page 10
Downloading Images to a Computer 3/5
 |
UPC - 013803078442
View all Canon PowerShot A570IS manuals
Add to My Manuals
Save this manual to your list of manuals |
Page 10 highlights
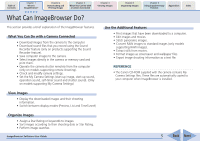
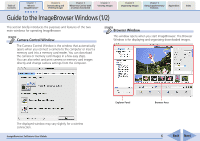
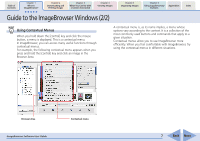
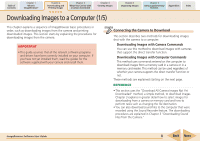
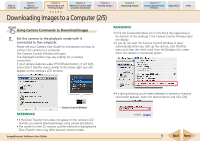
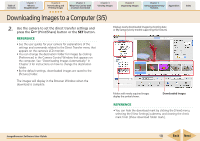
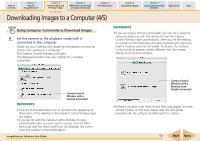
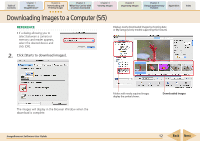
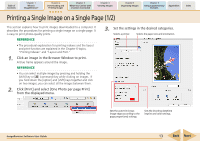
Table of Contents Chapter 1 What is ImageBrowser? Chapter 2 Downloading and Printing Images Chapter 3 What You Can Do with a Camera Connected Chapter 4 Viewing Images Chapter 5 Organizing Images Chapter 6 Using Supplementary Features Appendices Index Downloading Images to a Computer (3/5) 2. Use the camera to set the direct transfer settings and press the (Print/Share) button or the SET button. REFERENCE • See the user guides for your camera for explanations of the settings and commands related to the Direct Transfer menu that appears on the camera's LCD monitor. • You can change the destination folder for images by clicking [Preferences] in the Camera Control Window that appears on the computer. See "Downloading Images Automatically" in Chapter 3 for instructions on how to change the destination folder. • By the default settings, downloaded images are saved to the [Pictures] folder. The images will display in the Browser Window when the download is complete. Displays newly downloaded images by shooting date or My Category (only models supporting this feature). Folders with newly acquired images display the symbol shown. Downloaded Images REFERENCE • You can hide the download mark by clicking the [View] menu, selecting the [View Settings] submenu and clearing the check mark from [Show download folder mark]. ImageBrowser Software User Guide 10 Back Next
-
 1
1 -
2
-
3
-
4
-
 5
5 -
 6
6 -
 7
7 -
 8
8 -
 9
9 -
 10
10 -
 11
11 -
 12
12 -
 13
13 -
 14
14 -
 15
15 -
16
-
17
-
18
-
19
-
20
-
21
-
22
-
23
-
24
-
25
-
26
-
27
-
28
-
29
-
30
-
31
-
32
-
33
-
34
-
35
-
36
-
37
-
38
-
39
-
40
-
41
-
42
-
43
-
44
-
45
-
46
-
47
-
48
-
49
-
50
-
51
-
52
-
53
-
54
-
55
-
56
-
57
-
58
-
59
-
60
-
61
-
62
-
63
-
64
-
65
-
66
-
67
-
68
-
69
-
70
-
71
-
72
-
73
-
74
-
75
-
76
-
77
-
78
-
79
-
80
-
81
-
82
-
83
-
84
-
85
-
86
-
87
-
88
-
89
-
90
-
91
-
92
-
93
-
94
-
95
-
96
-
97
-
98
-
99
-
100
-
101
-
102
-
103
-
104
-
105
-
106
-
107
-
108
-
109
-
110
-
111
-
112
-
113
-
114
-
115
-
116
-
117
-
118
-
119
-
120
-
121
-
122
-
123
-
124
-
125
-
126
-
127
-
128
-
129
-
130
-
131
-
132
-
133
-
134
-
135
 |
 |
