Canon PowerShot A70 Direct Print User Guide - Page 21
Play] menu, select [Print
 |
View all Canon PowerShot A70 manuals
Add to My Manuals
Save this manual to your list of manuals |
Page 21 highlights
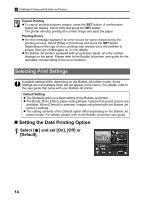
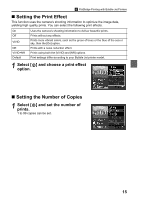
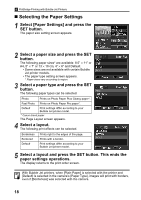
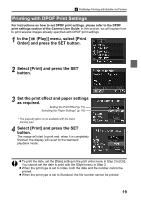
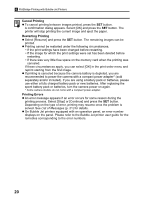
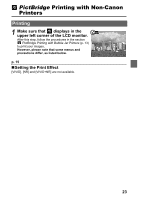
PictBridge Printing with Bubble Jet Printers Printing with DPOF Print Settings For instructions on how to set DPOF print settings, please refer to the DPOF print settings section of the Camera User Guide. In this section, we will explain how to print several images already specified with DPOF print settings. 1 In the [ (Play)] menu, select [Print Order] and press the SET button. 2 Select [Print] and press the SET button. 3 Set the print effect and paper settings as required. Setting the Print Effect (p. 15) Selecting the Paper Settings* (p. 18) * The [Layout] option is not available with the index printing type. 4 Select [Print] and press the SET button. The image will start to print and, when it is completely finished, the display will revert to the standard playback mode. z To print the date, set the [Date] setting in the print order menu in Step 2 to [On]. You cannot set the date to print with the [Style] menu in Step 3. z When the print type is set to Index, both the date and file number cannot be printed. z When the print type is set to Standard, the file number cannot be printed. 19
-
 1
1 -
2
-
3
-
4
-
5
-
6
-
7
-
8
-
9
-
10
-
11
-
12
-
13
-
14
-
15
-
 16
16 -
 17
17 -
 18
18 -
 19
19 -
 20
20 -
 21
21 -
 22
22 -
 23
23 -
 24
24 -
 25
25 -
 26
26 -
27
-
28
-
29
-
30
-
31
-
32
-
33
-
34
-
35
-
36
-
37
-
38
-
39
-
40
-
41
-
42
-
43
-
44
-
45
-
46
-
47
-
48
-
49
-
50
-
51
-
52
-
53
-
54
-
55
-
56
-
57
-
58
-
59
-
60
-
61
-
62
-
63
-
64
-
65
-
66
-
67
-
68
-
69
-
70
-
71
-
72
-
73
-
74
-
75
-
76
 |
 |
