Canon PowerShot ELPH 110 HS User Guide - Page 173
Display images., Con the settings., Connect the camera to the TV., Controlling the Camera
 |
View all Canon PowerShot ELPH 110 HS manuals
Add to My Manuals
Save this manual to your list of manuals |
Page 173 highlights
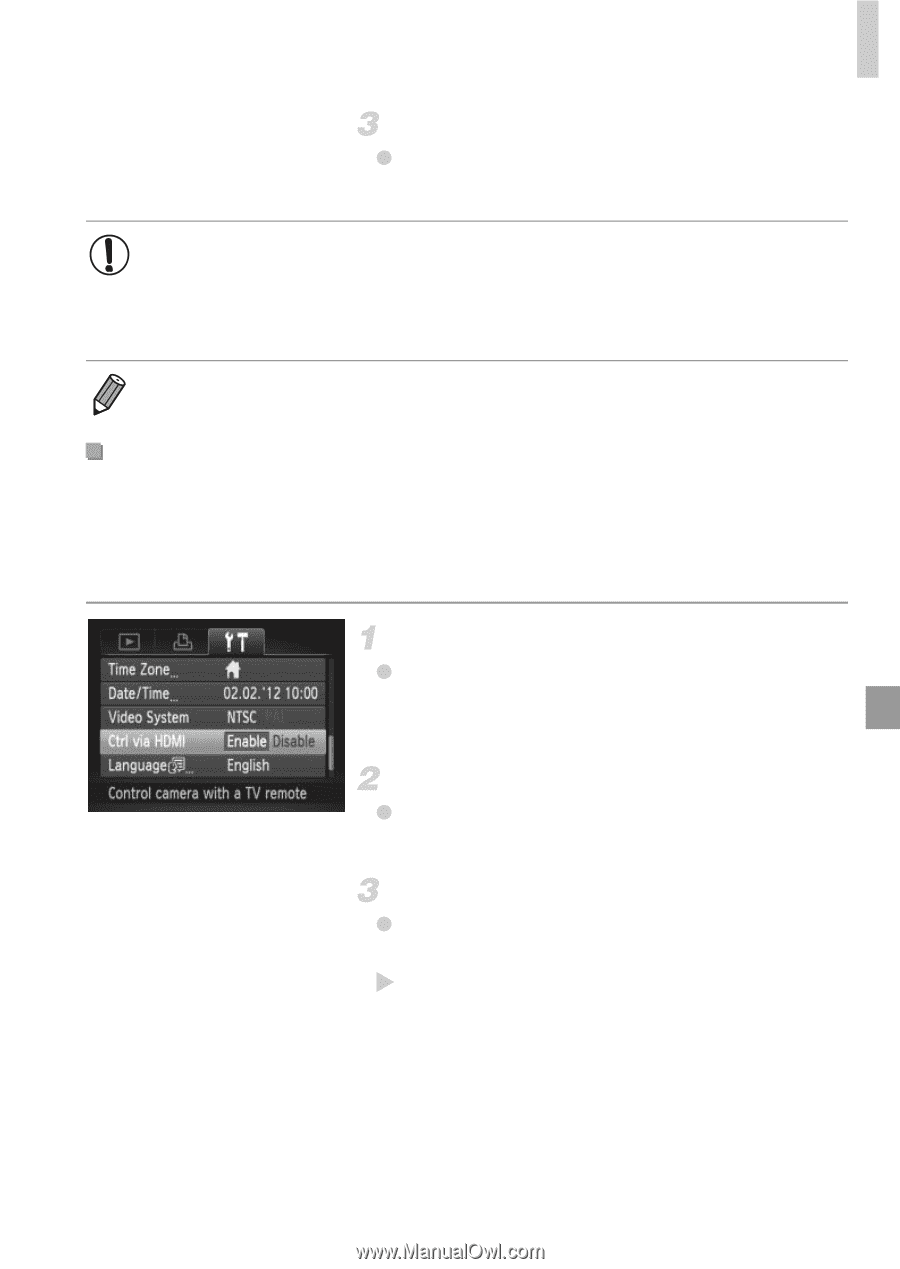
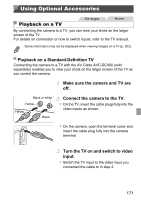
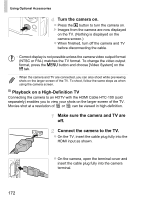
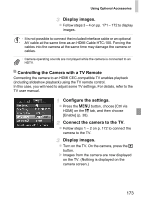
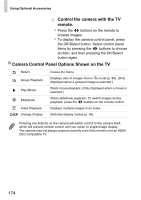
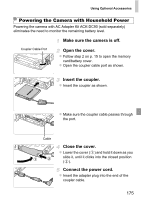
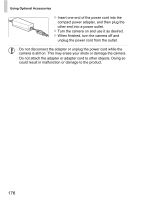
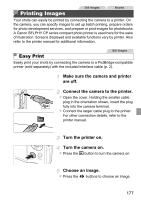
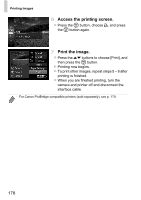
Using Optional Accessories Display images. z Follow steps 3 - 4 on pp. 171 - 172 to display images. • It is not possible to connect the included interface cable or an optional AV cable at the same time as an HDMI Cable HTC-100. Forcing the cables into the camera at the same time may damage the camera or cables. • Camera operating sounds are not played while the camera is connected to an HDTV. Controlling the Camera with a TV Remote Connecting the camera to an HDMI CEC-compatible TV enables playback (including slideshow playback) using the TV remote control. In this case, you will need to adjust some TV settings. For details, refer to the TV user manual. Configure the settings. z Press the n button, choose [Ctrl via HDMI] on the 3 tab, and then choose [Enable] (p. 38). Connect the camera to the TV. z Follow steps 1 - 2 on p. 172 to connect the camera to the TV. Display images. z Turn on the TV. On the camera, press the 1 button. X Images from the camera are now displayed on the TV. (Nothing is displayed on the camera screen.) 173
-
 1
1 -
2
-
3
-
4
-
5
-
6
-
7
-
8
-
9
-
10
-
11
-
12
-
13
-
14
-
15
-
16
-
17
-
18
-
19
-
20
-
21
-
22
-
23
-
24
-
25
-
26
-
27
-
28
-
29
-
30
-
31
-
32
-
33
-
34
-
35
-
36
-
37
-
38
-
39
-
40
-
41
-
42
-
43
-
44
-
45
-
46
-
47
-
48
-
49
-
50
-
51
-
52
-
53
-
54
-
55
-
56
-
57
-
58
-
59
-
60
-
61
-
62
-
63
-
64
-
65
-
66
-
67
-
68
-
69
-
70
-
71
-
72
-
73
-
74
-
75
-
76
-
77
-
78
-
79
-
80
-
81
-
82
-
83
-
84
-
85
-
86
-
87
-
88
-
89
-
90
-
91
-
92
-
93
-
94
-
95
-
96
-
97
-
98
-
99
-
100
-
101
-
102
-
103
-
104
-
105
-
106
-
107
-
108
-
109
-
110
-
111
-
112
-
113
-
114
-
115
-
116
-
117
-
118
-
119
-
120
-
121
-
122
-
123
-
124
-
125
-
126
-
127
-
128
-
129
-
130
-
131
-
132
-
133
-
134
-
135
-
136
-
137
-
138
-
139
-
140
-
141
-
142
-
143
-
144
-
145
-
146
-
147
-
148
-
149
-
150
-
151
-
152
-
153
-
154
-
155
-
156
-
157
-
158
-
159
-
160
-
161
-
162
-
163
-
164
-
165
-
166
-
167
-
 168
168 -
 169
169 -
 170
170 -
 171
171 -
 172
172 -
 173
173 -
 174
174 -
 175
175 -
 176
176 -
 177
177 -
 178
178 -
179
-
180
-
181
-
182
-
183
-
184
-
185
-
186
-
187
-
188
-
189
-
190
-
191
-
192
-
193
-
194
-
195
-
196
-
197
-
198
-
199
-
200
-
201
-
202
-
203
-
204
-
205
-
206
-
207
-
208
-
209
-
210
-
211
-
212
-
213
-
214
-
215
-
216
-
217
-
218
 |
 |