Canon Speedlite 430EX III-RT Instruction Manual - Page 4
Conventions Used in this Manual, Icons in this Manual, Basic Assumptions - battery
 |
View all Canon Speedlite 430EX III-RT manuals
Add to My Manuals
Save this manual to your list of manuals |
Page 4 highlights
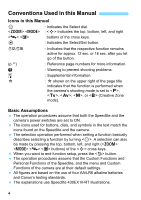
Conventions Used in this Manual Icons in this Manual 9 : Indicates the Select dial. : Indicates the top, bottom, left, and right buttons of the cross keys. 8 : Indicates the Select/Set button. p/2 : Indicates that the respective function remains active for approx. 12 sec. or 16 sec. after you let go of the button. (p.**) : Reference page numbers for more information. : Warning to prevent shooting problems. : Supplemental information. M : M shown on the upper right of the page title indicates that the function is performed when the camera's shooting mode is set to , , , , or (Creative Zone mode). Basic Assumptions The operation procedures assume that both the Speedlite and the camera's power switches are set to ON. The icons used for buttons, dials, and symbols in the text match the icons found on the Speedlite and the camera. The selection operation performed when setting a function basically describes selecting a function by turning . A selection can also be made by pressing the top, bottom, left, and right ( buttons) of the cross keys. When you want to end function setup, press the button. The operation procedures assume that the Custom Functions and Personal Functions of the Speedlite, and the menu and Custom Functions of the camera are at their default settings. All figures are based on the use of four AA/LR6 alkaline batteries and Canon's testing standards. The explanations use Speedlite 430EX III-RT illustrations. 4
-
 1
1 -
 2
2 -
 3
3 -
 4
4 -
 5
5 -
 6
6 -
 7
7 -
 8
8 -
 9
9 -
 10
10 -
11
-
12
-
13
-
14
-
15
-
16
-
17
-
18
-
19
-
20
-
21
-
22
-
23
-
24
-
25
-
26
-
27
-
28
-
29
-
30
-
31
-
32
-
33
-
34
-
35
-
36
-
37
-
38
-
39
-
40
-
41
-
42
-
43
-
44
-
45
-
46
-
47
-
48
-
49
-
50
-
51
-
52
-
53
-
54
-
55
-
56
-
57
-
58
-
59
-
60
-
61
-
62
-
63
-
64
-
65
-
66
-
67
-
68
-
69
-
70
-
71
-
72
-
73
-
74
-
75
-
76
-
77
-
78
-
79
-
80
-
81
-
82
-
83
-
84
-
85
-
86
-
87
-
88
-
89
-
90
-
91
-
92
-
93
-
94
-
95
-
96
-
97
-
98
-
99
-
100
-
101
-
102
-
103
-
104
-
105
-
106
-
107
-
108
 |
 |
