Canon VB-H651VE User Manual - Page 114
Camera Settings, Low Light Visibility
 |
View all Canon VB-H651VE manuals
Add to My Manuals
Save this manual to your list of manuals |
Page 114 highlights
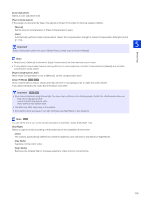
[Digital PTZ Position] M50 H652 H651 H761 H760 H751 Register the current digital PTZ position as the initial setting. If you select [Register], a yellow frame is displayed in the video display area. Operate the frame to specify the Digital PTZ trim position during startup. Note M50 H652 H651 H761 H760 H751 The Digital PTZ trim frame (yellow) displayed during startup can be set to incremental sizes. The sizes that can be set are the same as the Digital PTZ of the Viewer (P. 77). Camera Settings Sets the camera settings at camera start up. [Simple Camera Settings] Recommended settings for [Camera Settings] are displayed according to the selected type. You can also change the recommended settings as required and click [Apply]. Type Motion Priority Usage scenario Reduces vibrations for moving subjects. [Exposure] Auto (Shutterpriority AE) [AGC Limit] 6 [Shutter Speed] 1/1000 (sec.) [Slow Shutter] - [Smart Shade Control] Disable [Noise Reduction] Mild [Sharpness] 3 [Color Saturation] 4 [Haze Compensation] Disable Depth Priority Focuses within a wide range, from near to far. Auto (Aperturepriority AE) 6 Disable Disable Standard 6 4 Disable Low Light Visibility Data Size Reduction Brightens by raising the sensitivity for dark subjects. Reduces the data size in low-light conditions. Standard Setting Cancels the scenario settings and restores the factory default settings. Auto Auto Auto 6 1/8 (sec.) 4 1/8 (sec.) 6 Disable Disable Disable Disable Strong 3 4 Strong 3 2 Standard 3 4 Disable Disable Disable Important Note the following regarding [Simple Camera Settings]. - [Motion Priority]: The range in which the appropriate exposure can be maintained becomes narrower. Flickering may occur due to fluorescent lighting, etc. - [Depth Priority]: The range in which the appropriate exposure can be maintained may become narrower. - [Low Light Visibility]: Residual images may appear for moving subjects in dark situations. - [Data Size Reduction]: Residual images may appear for moving subjects in dark situations. [Focus] Selects the focus. [Auto] Automatically adjusts the focus. [Manual] You can click and hold the [Near] and [Far] buttons in [Adjust Focus] to adjust the focus in the near and far directions. When you click [Exec] in [One-shot AF], the camera will focus once using autofocus and then switch to manual mode. The following procedure enables you to adjust the focus appropriately. 1. Select [Auto (Aperture-priority AE)] in [Exposure], and move the aperture slider to the right limit to fully open the aperture. The depth of field becomes shallow, and you can adjust the focus appropriately. 2. To adjust the focus, click and hold the [Far] or [Near] button in [Adjust Focus], or click [Exec] in [One-shot AF]. 114
-
 1
1 -
2
-
3
-
4
-
5
-
6
-
7
-
8
-
9
-
10
-
11
-
12
-
13
-
14
-
15
-
16
-
17
-
18
-
19
-
20
-
21
-
22
-
23
-
24
-
25
-
26
-
27
-
28
-
29
-
30
-
31
-
32
-
33
-
34
-
35
-
36
-
37
-
38
-
39
-
40
-
41
-
42
-
43
-
44
-
45
-
46
-
47
-
48
-
49
-
50
-
51
-
52
-
53
-
54
-
55
-
56
-
57
-
58
-
59
-
60
-
61
-
62
-
63
-
64
-
65
-
66
-
67
-
68
-
69
-
70
-
71
-
72
-
73
-
74
-
75
-
76
-
77
-
78
-
79
-
80
-
81
-
82
-
83
-
84
-
85
-
86
-
87
-
88
-
89
-
90
-
91
-
92
-
93
-
94
-
95
-
96
-
97
-
98
-
99
-
100
-
101
-
102
-
103
-
104
-
105
-
106
-
107
-
108
-
 109
109 -
 110
110 -
 111
111 -
 112
112 -
 113
113 -
 114
114 -
 115
115 -
 116
116 -
 117
117 -
 118
118 -
 119
119 -
120
-
121
-
122
-
123
-
124
-
125
-
126
-
127
-
128
-
129
-
130
-
131
-
132
-
133
-
134
-
135
-
136
-
137
-
138
-
139
-
140
-
141
-
142
-
143
-
144
-
145
-
146
-
147
-
148
-
149
-
150
-
151
-
152
-
153
-
154
-
155
-
156
-
157
-
158
-
159
-
160
-
161
-
162
-
163
-
164
-
165
-
166
-
167
-
168
-
169
-
170
-
171
-
172
-
173
-
174
-
175
-
176
-
177
-
178
-
179
-
180
-
181
-
182
-
183
-
184
-
185
-
186
-
187
-
188
-
189
-
190
-
191
-
192
-
193
-
194
-
195
-
196
-
197
-
198
-
199
-
200
-
201
-
202
-
203
-
204
-
205
-
206
-
207
-
208
-
209
-
210
-
211
-
212
-
213
-
214
-
215
-
216
-
217
-
218
-
219
-
220
-
221
-
222
-
223
-
224
-
225
-
226
-
227
-
228
-
229
-
230
-
231
-
232
-
233
-
234
-
235
-
236
-
237
-
238
-
239
-
240
-
241
-
242
-
243
-
244
-
245
-
246
-
247
-
248
-
249
-
250
-
251
-
252
-
253
-
254
-
255
-
256
-
257
-
258
-
259
-
260
-
261
-
262
-
263
-
264
-
265
-
266
 |
 |
