Cisco 3725 Hardware Installation Guide - Page 49
Rack-Mounting the Chassis, RIGHT - fan
 |
UPC - 746320810911
View all Cisco 3725 manuals
Add to My Manuals
Save this manual to your list of manuals |
Page 49 highlights
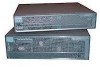
Chapter 3 Installing the Router Setting Up the Chassis Warning To prevent personal injury or damage to the chassis, never attempt to lift or tilt the chassis using the handles on modules (such as power supplies, fans, or cards); these types of handles are not designed to support the weight of the unit. Statement 1032 Caution Do not place anything on top of the router that weighs more than 10 lb (4.5 kg). Excessive weight on top could damage the chassis. After the router has been installed, you must connect the chassis to a reliable earth ground. For the chassis ground connection procedures, see the "Installing the Chassis Ground Connection" section on page 3-8. Rack-Mounting the Chassis If you are planning to rack-mount the router, do so before making network and power connections. If you need to install network modules or interface cards, you can do so either before or after rack-mounting the router. Ideally, you would install modules and interface cards when you have the best access to the rear panel of the router. Note The Cisco 3725 requires additional clearance on the left side (as viewed from the front of the chassis) to accommodate cooling fans. This clearance is provided through the use of special brackets. Be sure to install the wide bracket (marked right) on the side of the chassis with the cooling fans. The Cisco 3725 router is shipped with rack-mounting brackets for 19-inch racks. (See Figure 3-1.) Figure 3-1 Rack-Mounting Brackets for Cisco 3725 Router Slots for cable tie attachment RIGHT 117327 LEFT Narrow bracket for Wide bracket for chassis side opposite fans chassis side with fans The Cisco 3745 router is shipped with rack-mounting brackets for 19-inch racks. (See Figure 3-2.) You can order optional bracket for 23-inch rack-mounting. (See Figure 3-3.) OL-2180-08 Cisco 3700 Series Routers Hardware Installation Guide 3-3
-
 1
1 -
2
-
3
-
4
-
5
-
6
-
7
-
8
-
9
-
10
-
11
-
12
-
13
-
14
-
15
-
16
-
17
-
18
-
19
-
20
-
21
-
22
-
23
-
24
-
25
-
26
-
27
-
28
-
29
-
30
-
31
-
32
-
33
-
34
-
35
-
36
-
37
-
38
-
39
-
40
-
41
-
42
-
43
-
 44
44 -
 45
45 -
 46
46 -
 47
47 -
 48
48 -
 49
49 -
 50
50 -
 51
51 -
 52
52 -
 53
53 -
 54
54 -
55
-
56
-
57
-
58
-
59
-
60
-
61
-
62
-
63
-
64
-
65
-
66
-
67
-
68
-
69
-
70
-
71
-
72
-
73
-
74
-
75
-
76
-
77
-
78
-
79
-
80
-
81
-
82
-
83
-
84
-
85
-
86
-
87
-
88
-
89
-
90
-
91
-
92
-
93
-
94
-
95
-
96
-
97
-
98
-
99
-
100
-
101
-
102
-
103
-
104
-
105
-
106
-
107
-
108
-
109
-
110
-
111
-
112
-
113
-
114
 |
 |
