Cisco AIR-BR1310G-A-K9 Hardware Installation Guide - Page 46
Mounting the Access Point/Bridge, Mounting Hardware - replacement
 |
UPC - 746320927565
View all Cisco AIR-BR1310G-A-K9 manuals
Add to My Manuals
Save this manual to your list of manuals |
Page 46 highlights
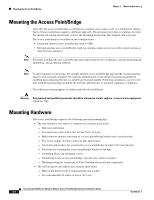
Mounting the Access Point/Bridge Chapter 3 Mounting Overview Mounting the Access Point/Bridge Typically, the access point/bridge is installed on a rooftop, mast, tower, wall, or a suitable flat surface. Each of these installations requires a different approach. This document provides a mounting overview. For detailed mounting instructions, refer to the mounting instructions that shipped with your unit. The access point/bridge is available in two configurations: • Integrated antenna access point/bridge (with 13-dBi) • External antenna access point/bridge (with two antenna connectors for use with a single antenna or dual diversity antennas) Note Personnel installing the access point/bridge must understand wireless techniques, antenna mounting and adjustment, and grounding methods. Note To meet regulatory restrictions, the external antenna access point/bridge unit and the external antenna must be professionally installed. The network administration or other IT professional responsible for installing and configuring the unit is a suitable professional installer. Following installation, access to the unit should be password-protected by the network administrator to maintain regulatory compliance. The following warning applies to outdoor and vehicle installations: Warning Only trained and qualified personnel should be allowed to install, replace, or service this equipment. Statement 1030 Mounting Hardware The access point/bridge supports the following optional mounting kits: • The roof mount kit (for indoor or outdoor use) contains these items: - One roof-wall mount - Two dual-coax cables [20 ft (6.1 m) and 50 ft (15.2 m)] - Multi-function mount (consisting of a access point/bridge bracket and a mast bracket) - Two tower clamps (U-bolts) with four nuts and washers - Four bolts and washers for securing the access point/bridge bracket to the mast bracket - Four bolts for securing the access point/bridge bracket to the unit - Grounding block and mounting screws - Ground lug for the access point/bridge, two hex nuts, and two washers - Weatherproofing kit (consisting of Coax Seal and electrical joint compound) • The wall mount kit (for indoor use) contains these items: - Wall mount bracket with 4 mounting bolts and washers - Two sub-mini RG-59 cables (12 in or 30.5 cm) Cisco Aironet 1300 Series Wireless Outdoor Access Point/Bridge Hardware Installation Guide 3-2 OL-5048-06
-
 1
1 -
2
-
3
-
4
-
5
-
6
-
7
-
8
-
9
-
10
-
11
-
12
-
13
-
14
-
15
-
16
-
17
-
18
-
19
-
20
-
21
-
22
-
23
-
24
-
25
-
26
-
27
-
28
-
29
-
30
-
31
-
32
-
33
-
34
-
35
-
36
-
37
-
38
-
39
-
40
-
 41
41 -
 42
42 -
 43
43 -
 44
44 -
 45
45 -
 46
46 -
 47
47 -
 48
48 -
 49
49 -
 50
50 -
 51
51 -
52
-
53
-
54
-
55
-
56
-
57
-
58
-
59
-
60
-
61
-
62
-
63
-
64
-
65
-
66
-
67
-
68
-
69
-
70
-
71
-
72
-
73
-
74
-
75
-
76
-
77
-
78
-
79
-
80
-
81
-
82
-
83
-
84
-
85
-
86
-
87
-
88
-
89
-
90
-
91
-
92
-
93
-
94
-
95
-
96
-
97
-
98
-
99
-
100
-
101
-
102
-
103
-
104
-
105
-
106
-
107
-
108
-
109
-
110
-
111
-
112
-
113
-
114
-
115
-
116
-
117
-
118
 |
 |
