Cisco E1000 User Guide - Page 12
Restrict Internet Access List, Set Up Parental Controls, Remove, Rename, Always, Specific, times - specifications
 |
View all Cisco E1000 manuals
Add to My Manuals
Save this manual to your list of manuals |
Page 12 highlights
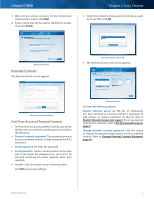
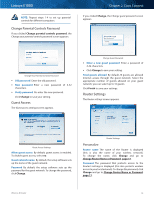
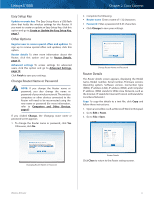
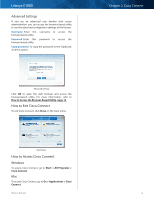
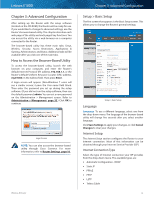
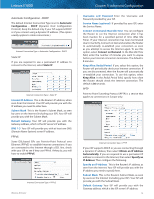
Linksys E1000 Restrict Internet Access List Chapter 2: Cisco Connect Set Up Parental Controls To set up parental controls for a computer, follow these instructions: 1. Select the computer from the Restrict Internet access on list. (If the computer is not listed, click Add to select the computer.) Parental Controls Add If you want to apply parental controls to additional computers, click Add. If you clicked Add, the Set up parental controls for screen appears. Set Up Parental Controls For Select the computer whose parental controls you want to set up. Then click OK. Remove If there is a computer that should not have parental controls applied, select the computer and click Remove. Rename To give a computer a new name, select the computer and click Rename. If you clicked Rename, the Rename the device screen appears. Parental Controls 2. The Block Internet access option offers the following: •• Always To always block Internet access, select this option. •• Specific times To block Internet access during specific days and times, select this option and set the schedule: -- School nights Select the appropriate start and end times. -- Weekends Select the appropriate start and end times •• Never To always allow Internet access, keep the default, Never. 3. For the Block specific sites option, click Edit to create a list of websites you want to block. By default, the list is empty. If you clicked Edit, the Block these sites screen appears. Rename the Device Enter the new name. Then click Rename. Wireless-N Router Block These Sites a. Enter a website address on each line. b. Click Save to save your settings. 4. On the Parental controls screen, click Finish to save your settings. 9
-
 1
1 -
2
-
3
-
4
-
5
-
6
-
 7
7 -
 8
8 -
 9
9 -
 10
10 -
 11
11 -
 12
12 -
 13
13 -
 14
14 -
 15
15 -
 16
16 -
 17
17 -
18
-
19
-
20
-
21
-
22
-
23
-
24
-
25
-
26
-
27
-
28
-
29
-
30
-
31
-
32
-
33
-
34
-
35
-
36
-
37
-
38
-
39
-
40
-
41
-
42
-
43
-
44
-
45
-
46
-
47
-
48
-
49
-
50
-
51
-
52
-
53
-
54
-
55
-
56
-
57
-
58
-
59
-
60
 |
 |
