Cisco E900 User Manual - Page 77
How to disable the Ethernet port status lights
 |
View all Cisco E900 manuals
Add to My Manuals
Save this manual to your list of manuals |
Page 77 highlights
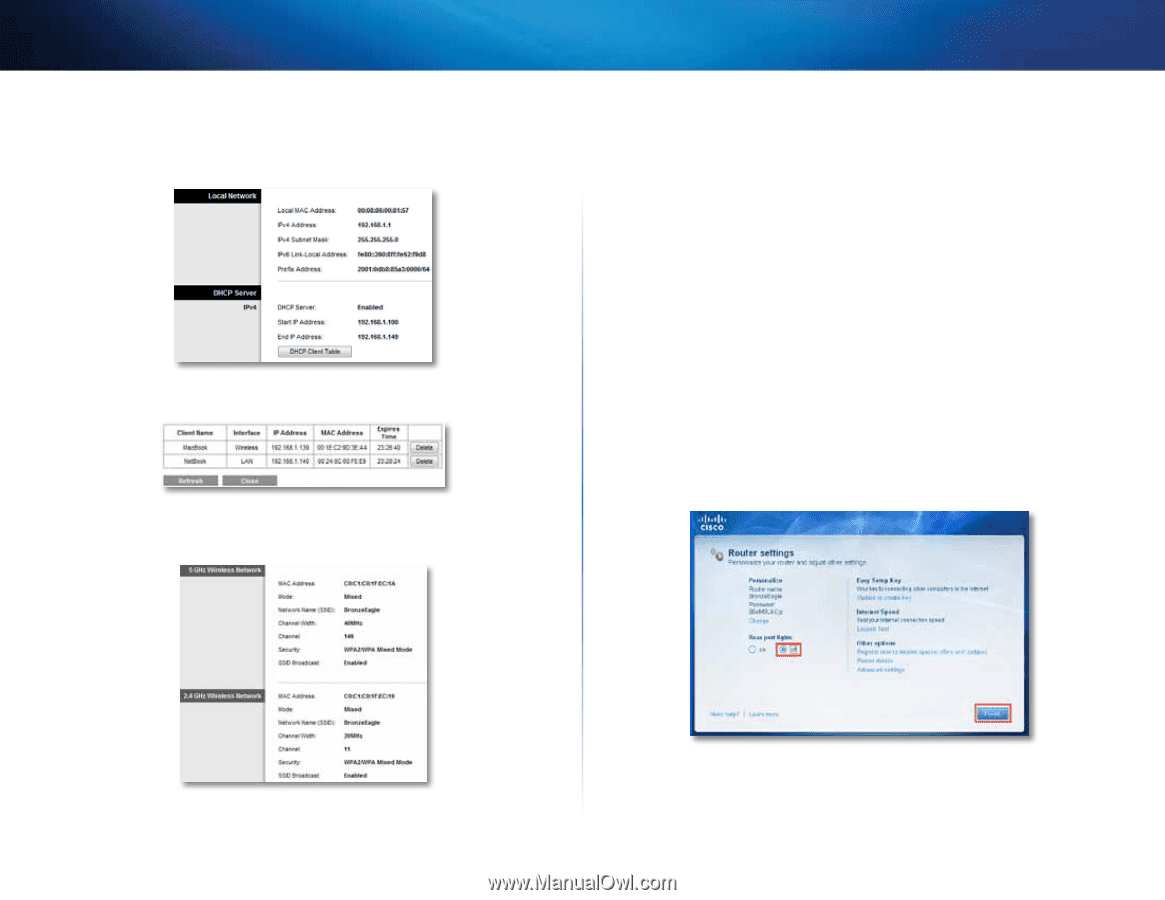
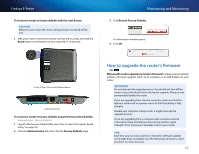
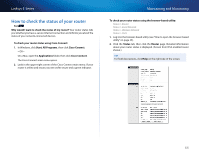
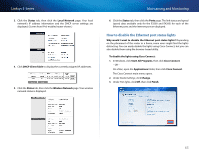
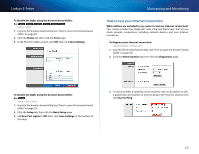
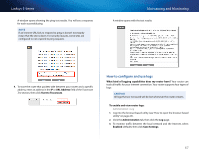
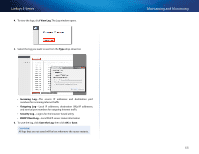
Linksys E-Series 3. Click the Status tab, then click the Local Network page. Your local network's IP address information and the DHCP server settings are displayed. (Screen from IPv6-enabled router shown.) 4. Click DHCP Client Table to display the currently assigned IP addresses. 5. Click the Status tab, then click the Wireless Network page. Your wireless network status is displayed. Maintaining and Monitoring 6. Click the Status tab, then click the Ports page. The link status and speed (speed data available only for the E3200 and E4200) for each of the Ethernet ports and the Internet port are displayed. How to disable the Ethernet port status lights Why would I want to disable the Ethernet port status lights? Depending on the placement of the router in a home, some users might find the lights distracting. You can easily disable the lights using Cisco Connect, but you can also disable them using the browser-based utility. To disable the lights using Cisco Connect: 1. In Windows, click Start, All Programs, then click Cisco Connect. - OR - On a Mac, open the Applications folder, then click Cisco Connect. The Cisco Connect main menu opens. 2. Under Router Settings, click Change. 3. Under Port lights, click Off, then click Finish. 65
-
 1
1 -
2
-
3
-
4
-
5
-
6
-
7
-
8
-
9
-
10
-
11
-
12
-
13
-
14
-
15
-
16
-
17
-
18
-
19
-
20
-
21
-
22
-
23
-
24
-
25
-
26
-
27
-
28
-
29
-
30
-
31
-
32
-
33
-
34
-
35
-
36
-
37
-
38
-
39
-
40
-
41
-
42
-
43
-
44
-
45
-
46
-
47
-
48
-
49
-
50
-
51
-
52
-
53
-
54
-
55
-
56
-
57
-
58
-
59
-
60
-
61
-
62
-
63
-
64
-
65
-
66
-
67
-
68
-
69
-
70
-
71
-
 72
72 -
 73
73 -
 74
74 -
 75
75 -
 76
76 -
 77
77 -
 78
78 -
 79
79 -
 80
80 -
 81
81 -
 82
82 -
83
-
84
-
85
-
86
-
87
-
88
-
89
-
90
-
91
-
92
 |
 |