Compaq ProLiant 1000 Installation and Configuration Guide for Linux and Apache - Page 17
Red Hat - proliant 1600 smartstart cd
 |
View all Compaq ProLiant 1000 manuals
Add to My Manuals
Save this manual to your list of manuals |
Page 17 highlights
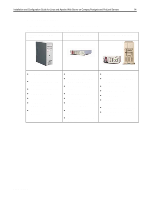
,QVWDOODWLRQ DQG &RQILJXUDWLRQ *XLGH IRU /LQX[ DQG $SDFKH :HE 6HUYHU RQ &RPSDT 3URVLJQLD DQG 3UR/LDQW 6HUYHUV 4: 15. The Prosignia SmartStart process does not install a system partition and does not request that you supply a specific operating system. Since Prosignia servers do not install a system partition to handle server configuration, a ROMbased setup utility can be invoked at boot time by pressing the F10 key. This ROM-based utility is invoked before the server attempts to boot from a particular medium (floppy, CD, or hard drive). Therefore, it affects the LILO setup since LILO does not need to boot the setup program from the hard-drive. Thus, no additional LILO section is necessary for Prosignia configurations. Specifics are covered in the respective setup sections for each distribution. Now that the differences are noted, the details of a Prosignia SmartStart setup will be discussed. Each server ships with a SmartStart CD and Server Profile Diskette (SPD). The following steps should be taken for the SmartStart setup: 16. You must boot the CD and place the SPD disk into the floppy drive after booting. 17. After SmartStart boots, you will be asked to choose a language. 18. A screen prompts you to set locale, date and time parameters. 19. You are asked to create support software diskettes if desired. 20. You must exit to reboot the server. 21. At this point, remove the SmartStart CD and SPD disk and replace with the appropriate setup media for the Linux distribution you have chosen. Either before or after the Linux setup, you can press the F10 key at the server startup screen to invoke the ROM-based setup utility to change hardware configurations. Red Hat The Red Hat version used in the testing for this guide has a simple installation program. Most of the devices available with the ProLiant 1600, 1600R, 1850R, and Prosignia Server 720 can be correctly autodetected by Red Hat. However, Red Hat's installation program does not allow for manual selection or autodetection of the TLAN NIC controller. This controller can be configured after the installation. Testing for this Solutions Guide was performed using Red Hat Linux version 5.2. SCSI Installation The Red Hat installation program performs well in auto-detecting any known hardware. All four of the Compaq servers used in this testing have NCR53C8XX SCSI controllers, and Red Hat's installation software can properly auto-detect them. Following the auto-detecting, Red Hat allows for disk partitioning using either fdisk or Red Hat's Disk Druid software. Both work equally well in partitioning the drives for installation. The System Partition (ID 0x12) should be left intact when creating operating system and swap partitions. Once these partitions are set up, you are prompted for the mount-points and software installation. You should then choose the configuration you find most useful. After the software is installed, Red Hat walks you through the following configuration screens: x A screen that prompts you to choose the mouse-type. Red Hat detects the mouse correctly as PS/2. You should choose to emulate three buttons. If the mouse has only two buttons, then button number three is invoked under X by pressing left and right mouse buttons simultaneously. ECG513/0399
-
 1
1 -
2
-
3
-
4
-
5
-
6
-
7
-
8
-
9
-
10
-
11
-
 12
12 -
 13
13 -
 14
14 -
 15
15 -
 16
16 -
 17
17 -
 18
18 -
 19
19 -
 20
20 -
 21
21 -
 22
22 -
23
-
24
-
25
-
26
-
27
-
28
-
29
-
30
-
31
-
32
-
33
-
34
-
35
-
36
-
37
-
38
-
39
-
40
 |
 |
