Creative CT4670 User Guide - Page 17
motherboard, with the cable's, connector on your
 |
View all Creative CT4670 manuals
Add to My Manuals
Save this manual to your list of manuals |
Page 17 highlights
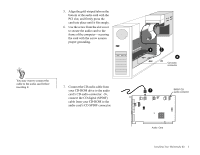
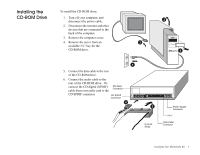
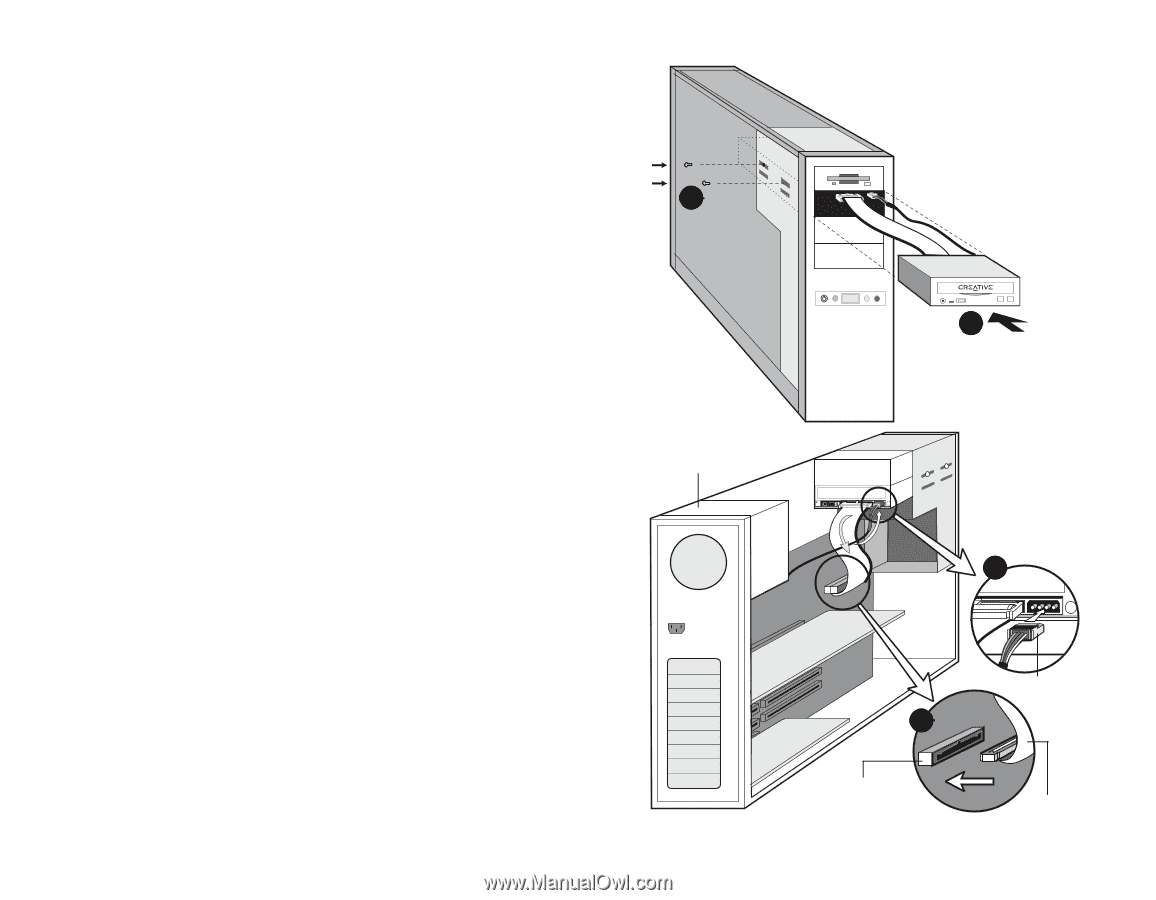
7. Insert the drive into the open 5¼" bay, feeding the cables through the bay. 8. Secure the CD-ROM drive to your computer's frame using the supplied screws. 8 7 9. Locate an available power supply cable, and attach it to the rear of the CD-ROM drive. 10. Connect the data cable to an available enhanced IDE connector on your motherboard, with the cable's colored stripe connecting to pin 1. 11. Replace the computer cover. 12. Reconnect the power cable, monitor, and other devices. Power Supply 9 Power Supply Cable 10 EIDE Connector Data Cable Installing Your Multimedia Kit 6
-
 1
1 -
2
-
3
-
4
-
5
-
6
-
7
-
8
-
9
-
10
-
11
-
 12
12 -
 13
13 -
 14
14 -
 15
15 -
 16
16 -
 17
17 -
 18
18 -
 19
19 -
 20
20 -
 21
21 -
 22
22 -
23
-
24
-
25
-
26
-
27
-
28
-
29
-
30
-
31
-
32
-
33
-
34
 |
 |
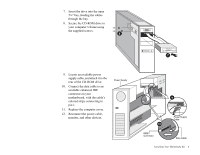
Installing Your Multimedia Kit
6
7.
Insert the drive into the open
5¼” bay, feeding the cables
through the bay.
8.
Secure the CD-ROM drive to
your computer’s frame using
the supplied screws.
9.
Locate an available power
supply cable, and attach it to the
rear of the CD-ROM drive.
10.
Connect the data cable to an
available enhanced IDE
connector on your
motherboard, with the cable’s
colored stripe connecting to
pin 1.
11.
Replace the computer cover.
12.
Reconnect the power cable,
monitor, and other devices.
8
7
9
10
Power Supply
EIDE
Connector
Power Supply
Cable
Data Cable