D-Link 502G User Guide - Page 15
Front Panel, Rear Panel - modem
 |
View all D-Link 502G manuals
Add to My Manuals
Save this manual to your list of manuals |
Page 15 highlights
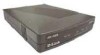
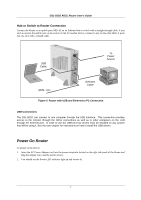
DSL-502G ADSL Router User's Guide Front Panel Place the Modem in a location that allows a view of the LED indicators. To save space you can use the feet to stand the device on either its right or left side. Figure 1. Front Panel Rear Panel All cable connections to the Modem are made at the rear panel. The factory reset button is located here as well. Figure 2. Rear Panel 3
-
 1
1 -
2
-
3
-
4
-
5
-
6
-
7
-
8
-
9
-
 10
10 -
 11
11 -
 12
12 -
 13
13 -
 14
14 -
 15
15 -
 16
16 -
 17
17 -
 18
18 -
 19
19 -
 20
20 -
21
-
22
-
23
-
24
-
25
-
26
-
27
-
28
-
29
-
30
-
31
-
32
-
33
-
34
-
35
-
36
-
37
-
38
-
39
-
40
-
41
-
42
-
43
-
44
-
45
-
46
-
47
-
48
-
49
-
50
-
51
-
52
-
53
-
54
-
55
-
56
-
57
-
58
-
59
-
60
-
61
-
62
-
63
-
64
-
65
-
66
-
67
-
68
-
69
-
70
-
71
-
72
-
73
-
74
-
75
-
76
-
77
-
78
-
79
-
80
-
81
-
82
-
83
-
84
-
85
-
86
 |
 |

DSL-502G ADSL Router User’s Guide
3
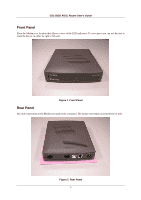
Front Panel
Place the Modem in a location that allows a view of the LED indicators. To save space you can use the feet to
stand the device on either its right or left side.
Figure 1. Front Panel
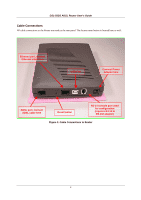
Rear Panel
All cable connections to the Modem are made at the rear panel. The factory reset button is located here as well.
Figure 2. Rear Panel