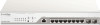
D-Link DBS-2000-10MP User Manual
D-Link DBS-2000-10MP Manual
 |
View all D-Link DBS-2000-10MP manuals
Add to My Manuals
Save this manual to your list of manuals |
D-Link DBS-2000-10MP manual content summary:
- D-Link DBS-2000-10MP | User Manual - Page 1
i - D-Link DBS-2000-10MP | User Manual - Page 2
device may not cause harmful interference, and (2) this device must accept any interference received, including interference that may cause undesired operation. D-Link Corporate 17595 Mt. Hermann Street Fountain Valley, CA 92708 (800) 326-1688 CE Mark Warning This equipment is compliant with Class - D-Link DBS-2000-10MP | User Manual - Page 3
1 Table of Contents 1. Introduction 1 1.1 Audience ...1 1.2 Other Documentation 1 1.3 Conventions ...1 1.4 Notes, Notices, and Cautions 1 2 Product Introduction 2 2.1 Terms and Concepts 2 3 Getting Started with Nuclias 4 3.1 Creating an Account 4 3.2 Logging In To Nuclias 5 3.3 Adding a - D-Link DBS-2000-10MP | User Manual - Page 4
Table Test 27 7.1.1.11 Performing a Cable Test 27 7.1.1.12 Performing a Port Cycle Test 27 7.1.1.13 Performing a Blink LED Test 27 7.1.1.14 Manually Rebooting a Device 27 7.1.1.15 Adding a License Key to a Device 28 7.1.1.16 Deleting a License Key From a Device 28 7.1.2 Clients ...29 - D-Link DBS-2000-10MP | User Manual - Page 5
Configuring DHCP Server Screening 52 8.1.6.5 Configuring Voice VLAN Functionality 53 8.1.6.6 Configuring Jumbo Frame 54 8.1.6.7 Configuring Quality of Service Settings 54 8.1.7 Configuring Switch Profile IPv4 ACL Settings 56 8.1.7.1 Creating IPv4 Access Control Policy Rules 56 8.1.7.2 Editing - D-Link DBS-2000-10MP | User Manual - Page 6
8.1.9 Pushing Configuration Changes 61 8.2 Devices...61 8.2.1 Filtering Device Information 61 8.2.2 Adding a Single Device...62 8.2.3 Bulk Adding Multiple Devices to the Inventory 63 8.2.4 Bulk Adding and Registering Multiple Devices to a Site 63 8.2.5 Adding a Tag to One or More Devices 64 - D-Link DBS-2000-10MP | User Manual - Page 7
10.4.7 Exporting the Inventory List 93 10.5 Firmware...93 10.5.1 Setting an Automatic Upgrade Window 94 10.5.2 Setting a Custom Device Upgrade Time 94 10.5.3 Performing a Manual Firmware Upgrade 95 10.6 Alert Settings...96 vii - D-Link DBS-2000-10MP | User Manual - Page 8
10.6.1 Configuring Alert Notifications 96 10.7 Add Device ...97 11 Help ...98 11.1 Contact Us...98 11.1.1 Contacting Nuclias Support 98 viii - D-Link DBS-2000-10MP | User Manual - Page 9
source of information with regards to configuring and troubleshooting Nuclias Portal. All the documents are available on either the D-Link or Nuclias website. Other documents related to Nuclias Portal are: • Nuclias Switch User Manual 1.3 Conventions Convention Boldface Font Initial capital letter - D-Link DBS-2000-10MP | User Manual - Page 10
Cautions Below are examples of the three types of indicators used in this manual. When making changes to Nuclias Portal using the information in this document, of data and tells you how to avoid the problem. CAUTION: A caution indicates a potential for property damage, personal injury, or death. 1 - D-Link DBS-2000-10MP | User Manual - Page 11
the management of your wireless and wired network, reducing the need for dedicated support staff, and allowing large numbers of devices to be managed from a used in this product. Service Provider (SP): A Service Provider is an instance that sells the D-Link Nuclias service to customers and is - D-Link DBS-2000-10MP | User Manual - Page 12
organizations are considered clients. Examples of organizations include, branch offices, restaurants, medium-sized offices. Site Tag: A Site Tag is a label for structurally organizing and visualizing an organization. Site Tags act as branches, with each Site Tag being able to carry one or more - D-Link DBS-2000-10MP | User Manual - Page 13
is designed to provide new users with instructions on how to get started with the D-Link Nuclias Cloud. This covers the basic requirements and customer service country and click Next. Server Region Country Select which server region to store your data on. Select a country for local support. If - D-Link DBS-2000-10MP | User Manual - Page 14
create a Site using this region. Select a time zone. Enter your address. 3. Click Create Account. 4. You will receive an email containing a verification link. Once verified, you can now log into the Nuclias Portal interface using your account email address and password. 3.2 Logging In To Nuclias - D-Link DBS-2000-10MP | User Manual - Page 15
listed in the format XXXX-XXXXXXXX or XXXXXXXXXXXX. When entering the UID, do not include dashes. Enter a name for the device. Select a Site to link this device to. Select a Profile for this device. The device will use the settings configured in that profile. [Optional] Enter the device license key - D-Link DBS-2000-10MP | User Manual - Page 16
3.3.2 Bulk Adding Devices to Inventory Devices can be bulk imported and added to Inventory to be assigned to a Site later. 1. Navigate to the Configure > Switch > Profiles page. 2. Click Bulk import. 3. [Optional] Download the reference sample template. 4. Click Browse. 5. Locate the CSV-formatted - D-Link DBS-2000-10MP | User Manual - Page 17
3. [Optional] Download the reference sample template. 4. Click Browse. 5. Locate the CSV-formatted file containing the UIDs of the devices. Note: To directly register devices to a Site, use the following format: [UID][Device Name][Profile Name][Site][License Key] 6. Click Upload. 3.3.4 Adding a - D-Link DBS-2000-10MP | User Manual - Page 18
3.4 Managing With Nuclias With the everything now set up, you can now start expanding and managing your network using Nuclias. There are several ways you can manage your network, refer to the following overview for more information. • To view the real-time status of the network and at-a-glance - D-Link DBS-2000-10MP | User Manual - Page 19
4 Accessing the Nuclias Portal 4.1 Logging in to Nuclias 1. In a web browser, go to login.nuclias.com. 2. Enter your registration email address and password. 3. Click Log In. 4.2 Logging Out of Nuclias 1. Click the user name in the top-right corner. 2. Click Logout. Note: Clicking Logout will - D-Link DBS-2000-10MP | User Manual - Page 20
5 Interface Overview Section A Item Global Toolbar B Management Toolbar C Workspace Description Provides access to the organization and site selection menu as well as alerts, user account, and language menu. Provides access to the various device management, report, and inventory sections. - D-Link DBS-2000-10MP | User Manual - Page 21
5.1 Global Toolbar 5.1.1 Site Menu The Site menu is used to select a Site or Site Tag within the selected organization, and may only contain selected sites, depending on the privilege of the account that you have logged in with. Site Tags and Sites are an easy way of grouping devices within an - D-Link DBS-2000-10MP | User Manual - Page 22
5.1.2 Account Menu The account menu contains the User Profile and Logout options and can be reached by clicking the user name you have logged in with. Figure 5-1 5.1.2.1 Editing a User Profile The User Profile page is used to view the current user's profile and access privilege information. It can - D-Link DBS-2000-10MP | User Manual - Page 23
c. Edit profile image i. Click on the green pencil icon in the bottom-right corner of the profile image. ii. In the Upload Image window click Browse and navigate to the image you want to use. iii. Click Save. d. Email user information i. Click the Email this page button to send your user information - D-Link DBS-2000-10MP | User Manual - Page 24
5.1.2.2 Sending A User Profile Snapshot by Email 1. From the Global Toolbar, click the Account menu. 2. Select User Profile. 3. Click Email this page. Note: This will immediately send a snapshot of the user profile page to the email address registered to this user account. 5.1.2.3 Deleting a User - D-Link DBS-2000-10MP | User Manual - Page 25
menu. Note: Selecting another language will immediately change the portal display language into the selected language. Currently only English is supported. 5.2 Management Toolbar From the Management toolbar, users can access the various management features of the Nuclias Cloud platform, including - D-Link DBS-2000-10MP | User Manual - Page 26
inventory, and firmware management. Refer to the Settings section on page 79 for more information. The Help section offers users a platform to submit support tickets and provide feedback. Refer to the Help section on page 98 for more information. 6 Dashboard The Dashboard page is the default window - D-Link DBS-2000-10MP | User Manual - Page 27
4. In the Connected Clients section, select a time frame from the drop-down menu. 5. In the Top Information section, click the filter selection in the top-right. 6. Check the information parameters to display the corresponding top information in the overview window. 7. In the Top Information section - D-Link DBS-2000-10MP | User Manual - Page 28
6.2 Sending A Dashboard Snapshot by Email Users can create and send a snapshot of the dashboard window by email. 1. Navigate to the Dashboard page. 2. Select a dashboard viewing mode from the drop-down menu in the top-right of the screen. Note: The information and subsequent sections on the - D-Link DBS-2000-10MP | User Manual - Page 29
6. Check the information parameters to display the corresponding top information in the overview window. 7. In the Top Information section, select a time frame from the drop-down menu for each enabled section. 8. Click Email this page in the top-right. 9. In the Email report window, enter the email - D-Link DBS-2000-10MP | User Manual - Page 30
7 Monitor From the Monitor tab, users can view detailed device monitoring reports and access the map and floor plan windows. Switch Map Floor Plans The Switch section provides detailed logs for switch devices, connected clients, and events. Refer to the Switch section for more information. The Map - D-Link DBS-2000-10MP | User Manual - Page 31
4. Click the checkbox next to the parameters to display them in the overview. Note: All checked parameters will automatically appear. 7.1.1.2 Downloading Device Monitoring Logs 1. Navigate to the Monitor > Switch > Device page. 2. From the device list, click the Download icon in the top-right. - D-Link DBS-2000-10MP | User Manual - Page 32
4. When prompted to confirm, click Yes. 5. Select a VLAN ID from the drop-down menu to assign the switch to a VLAN. Note: VLAN and Voice VLAN settings can be configured on the Profile Basic Settings page. Refer to the Configuring Basic Switch Profile Settings section on page 50 for more information. - D-Link DBS-2000-10MP | User Manual - Page 33
3. In the Connectivity and CPU Utilization sections, select a time frame from the drop-down menu to show data for the specified time frame. Click the refresh icon to renew the data. 4. [Optional] Click on a port on the interactive switch diagram to view port-specific information. 5. [Optional] Click - D-Link DBS-2000-10MP | User Manual - Page 34
is used to detect the loop created by a specific port while Spanning Tree Protocol (STP) is not enabled in the network, especially when the down links are hubs or unmanaged switches. The Switch will automatically shut down the port and sends a log to the administrator. Note: LBD cannot be used in - D-Link DBS-2000-10MP | User Manual - Page 35
support Power over Ethernet. Choose a port schedule. Port schedules are configured separately. Refer to the Creating a Switch Port Schedule section on page 47. 6. Click Apply. 7. In the Cable Test window of the Troubleshooting any problems. 8. In the Cycle Port window of the Troubleshooting section, - D-Link DBS-2000-10MP | User Manual - Page 36
. 3. In the Others section, click Start. Note: The Start button will change to Stop once the test begins. 4. Click Stop to end the test. 7.1.1.14 Manually Rebooting a Device 27 - D-Link DBS-2000-10MP | User Manual - Page 37
1. Navigate to the Monitor > Switch > Device page and select a device from the list. 2. Select the Tools tab in the top-right of the screen. 3. In the Others section, click Reboot. 7.1.1.15 Adding a License Key to a Device 1. Navigate to the Monitor > Switch > Device page and select a device from - D-Link DBS-2000-10MP | User Manual - Page 38
7.1.2 Clients From the Clients window, users can consult a detailed overview of all currently registered devices with additional information including status, clients, and general settings. 7.1.2.1 Customizing the Client Monitor Overview 1. Navigate to the Monitor > Switch > Clients page. 2. Select - D-Link DBS-2000-10MP | User Manual - Page 39
7.1.3 Event Logs From the Events Logs window, users can consult a detailed log of events occurring on the network. Users can define event filter parameters, including event type and time period. 7.1.3.1 Filtering Event Log Parameters 1. Navigate to the Monitor > Switch > Event Logs page. 2. In the - D-Link DBS-2000-10MP | User Manual - Page 40
the Map window, users can consult a geographical overview of the organization's Sites in the form of an interactive world map. Note: Sites must be linked to a valid address in order to show up on the map. 7.2.1 Navigating the Map From the interactive map, users can view a geographical representation - D-Link DBS-2000-10MP | User Manual - Page 41
4. Click and drag the left-mouse button to move around on the map. 5. Click the + and - buttons in the bottom-right corner of the map to zoom in and out on the map. Alternatively, hold Ctrl and scroll the mouse wheel up and down to zoom in and out. 6. Drag and drop the Pegman icon anywhere on the - D-Link DBS-2000-10MP | User Manual - Page 42
1. Navigate to the Monitor > Map page. 2. Click Site List on the left-hand side of the map. 3. In the Site List, click the organization name to expand the list of Sites under the organization. 4. [Optional] Click the search field and enter the Site name. 5. From the expanded Site list, click the - D-Link DBS-2000-10MP | User Manual - Page 43
7.3 Floor Plans Floor plans offer an easy way to visually represent the location of each device within the organization. Floor plans are managed per Site, and each Site can have multiple floor plans. 7.3.1 Adding a Floor Plan Users can create floor plans to have a visual overview of device placement - D-Link DBS-2000-10MP | User Manual - Page 44
2. Select a Site from the Site menu. Note: Selecting a Site will only show floor plans created for the selected Site. Select All to show all floor plans for all Sites. 3. From the floor plan list click on the floor plan name. 4. Click and drag a device from the Unplaced Devices list onto the floor - D-Link DBS-2000-10MP | User Manual - Page 45
5. Click Save. 7.3.1.3 Editing a Floor Plan Name 1. Navigate to the Monitor > Floor Plan page. 2. Select a Site from the Site menu. Note: Selecting a Site will only show floor plans created for the selected Site. Select All to show all floor plans for all Sites. 3. From the floor plan list, click on - D-Link DBS-2000-10MP | User Manual - Page 46
5. Enter a new name and press Enter or click outside of the field 6. Click Save. 7.3.1.4 Adding a Custom Floor Plan Image 1. Navigate to the Monitor > Floor Plan page. 2. Select a Site from the Site menu. Note: Selecting a Site will only show floor plans created for the selected Site. Select All to - D-Link DBS-2000-10MP | User Manual - Page 47
2. Select a Site from the Site menu. Note: Selecting a Site will only show floor plans created for the selected Site. Select All to show all floor plans for all Sites. 3. From the floor plan list, click on the floor plan name. 4. On the floor plan page, click Remove image. 5. When prompted to - D-Link DBS-2000-10MP | User Manual - Page 48
group. Within each profile, users can configure switch port functionality, port activity schedules, and advanced features including VLAN, Quality of Service, and access control functions. Note: Profiles are created for individual organizations. In order to configure Profiles, select the organization - D-Link DBS-2000-10MP | User Manual - Page 49
2. Click Create Profile. 3. Enter a name for the Profile and choose the device model. Note: The Profile can only be used for the selected device model type. 4. [Optional] Select Clone from exist profile and choose a Profile from the drop-down menu to clone an existing Profile. 5. Click Create - D-Link DBS-2000-10MP | User Manual - Page 50
8.1.4.1 Customizing the Profile Port Configuration Overview 1. Navigate to the Configure > Switch > Profiles page. 2. From the Profile list, click Ports under the Actions column of the Profile you wish to edit. 3. Select a port group from the drop-down menu. This will only display ports for the - D-Link DBS-2000-10MP | User Manual - Page 51
or disable the port. Choose to enable or disable Rapid Spanning Tree Protocol (RSTP). RSTP prevents data loops by issuing frequent BPDU packets to monitor link status. STP guard LBD Note: RSTP cannot be used in conjunction with LBD. If RSTP is enabled, choose the guard type. Disabled: Do not use - D-Link DBS-2000-10MP | User Manual - Page 52
to increase port bandwidth and redundancy in the event of a single physical link failure. Ports can be aggregated using either LACP or static link. Note: Port aggregation is not supported if the port type is set to "Access". To configure the port type, refer to the Configuring Port Settings for One - D-Link DBS-2000-10MP | User Manual - Page 53
: Static link requires manual configuration of the ports in the aggregation group. Link Aggregation Control Protocol (LACP) dynamically queries to listening ports to join the aggregation group. LACP Static LACP (Link Aggregation Control Protocol) allows the switch to automatically detect links in - D-Link DBS-2000-10MP | User Manual - Page 54
8.1.4.5 Mirroring Port Traffic to Another Switch Profile Port Port Mirroring is a method of monitoring network traffic that forwards a copy of each incoming and/or outgoing packet from one port of the switch to another port, where the packet can be studied. This enables network managers to better - D-Link DBS-2000-10MP | User Manual - Page 55
Note: This will immediately undo the selected mirrored ports. 5. Click Push Configuration. 8.1.4.7 Adding a Tag to One or More Switch Profile Ports User can add descriptive tag to ports to identify and filter different ports or groups of ports. Tags are purely informational and do not affect the - D-Link DBS-2000-10MP | User Manual - Page 56
8.1.4.8 Removing a Tag From One or More Switch Ports 1. Navigate to the Configure > Switch > Profiles page. 2. From the Profile list, click Ports under the Actions column of the Profile you wish to edit. 3. From the port list, check the box next to the tagged port(s) you wish to remove the tag(s) - D-Link DBS-2000-10MP | User Manual - Page 57
4. Enter a name for the schedule. 5. [Optional] Select a predefined schedule template from the drop-down menu. 6. [Optional] Click the 24 HOURS or AM/PM button in the top-right to change the time display format. 7. In the Availability column, select the schedule behavior for each day of the week: - D-Link DBS-2000-10MP | User Manual - Page 58
1. Navigate to the Configure > Switch > Profiles page. 2. From the Profile list, click Port Schedules under the Actions column of the Profile you wish to edit. 3. From the port schedule list, click Edit under the Actions column of the port schedule you wish to edit. 4. [Optional] Select a - D-Link DBS-2000-10MP | User Manual - Page 59
8. Click Save. 9. Click Push Configuration. 8.1.5.3 Deleting a Switch Port Schedule 1. Navigate to the Configure > Switch > Profiles page. 2. From the Profile list, click Port Schedules under the Actions column of the Profile you wish to edit. 3. From the port schedule list, click Delete under the - D-Link DBS-2000-10MP | User Manual - Page 60
an availability and redundancy feature that prevents redundant backup links between switches and prevents switch loops from forming by Ports page, or at Configure > Profile > Ports. Note: RSTP must be manually enabled under BOTH Switch Settings of a profile and Switch Ports. 1. Navigate to - D-Link DBS-2000-10MP | User Manual - Page 61
Internet Group Management Protocol (IGMP) Snooping allows administrators to configure switches to subscribe to and receive multicast traffic. If a switch is not added to the IGMP list, it will not receive multicast traffic by default. 1. Navigate to the Configure > Switch > Profiles page. 2. From - D-Link DBS-2000-10MP | User Manual - Page 62
traffic priority (via Voice VLAN CoS setting). Note: Voice VLAN priority settings overrule any priority settings configured in the Quality of Service section. Note: Voice VLAN is not supported if the port type is set to "Trunk". To configure the port type, refer to the Configuring Port Settings for - D-Link DBS-2000-10MP | User Manual - Page 63
edit. 3. Click the Basic tab. 4. In the Jumbo Frame Configuration section, select Enable next to Jumbo Frame. 5. Click Save. 6. Click Push Configuration. 8.1.6.7 Configuring Quality of Service Settings QoS is an implementation of the IEEE 802.1p standard that allows network administrators to 54 - D-Link DBS-2000-10MP | User Manual - Page 64
for critical traffic, less critical traffic is deprioritized to ensure that critical data is transmitted smoothly. The Quality of Service windows displays the status of Quality of Service priority levels of each port, a higher priority means the traffic from this port will be first handled by the - D-Link DBS-2000-10MP | User Manual - Page 65
8.1.7 Configuring Switch Profile IPv4 ACL Settings 8.1.7.1 Creating IPv4 Access Control Policy Rules IPv4 Access Control Lists (ACL) allow administrators to configure a set of criteria for permitting or denying traffic coming from and to the switch based on IP address. 1. Navigate to the Configure - D-Link DBS-2000-10MP | User Manual - Page 66
Destination Dst port Comment Enter the destination IP address. If the destination address is configured as Any, all destination traffic will be evaluated according to the conditions of the rule. Specify the destination port number between 0 and 65535. If the source port is configured as Any, all - D-Link DBS-2000-10MP | User Manual - Page 67
Src port Destination Dst port VLAN Comment Specify the source port number between 0 and 65535. If the source port is configured as Any, all source ports will be evaluated according to the conditions of the rule. Enter the destination IP address. If the destination address is configured as Any, all - D-Link DBS-2000-10MP | User Manual - Page 68
If an IPv4 Access Control List contains multiple rules other than the default rule, rules can be moved around. Moving rules will affect their priority. In the event of a conflict between two rules, the rule listed as #1 will override the rule(s) below it. Note: The index means priority. The lower - D-Link DBS-2000-10MP | User Manual - Page 69
2. From the Profile list, click Settings under the Actions column of the Profile you wish to edit. 3. Click the Access Policies tab. 4. Enter a name for the policy. 5. In the RADIUS servers field, click Add to add a new RADIUS server. 6. In the Add RADIUS servers window, specify the following - D-Link DBS-2000-10MP | User Manual - Page 70
5. Click Save. 6. Click Push Configuration. 8.1.9 Pushing Configuration Changes The Push Configuration function allows users to quickly apply Profile configuration changes to all devices using this Profile. Note: Changes made to a Profile's ports, port schedule or settings, will be pushed to all - D-Link DBS-2000-10MP | User Manual - Page 71
be listed in the format XXXX-XXXXXXXX or XXXXXXXXXXXX. When entering the UID, do not include dashes. Enter a name for the device. Select a Site to link this device to. Select a Profile for this device. The device will use the settings configured in that profile. Enter the device license key. Note - D-Link DBS-2000-10MP | User Manual - Page 72
to the Inventory Bulk adding new devices to the Inventory stores the devices in a warehouse where they are kept inactive until they are manually assigned to a Site and Profile by the user at a later point. 1. Navigate to the Configure > Switch > Devices page. 2. Click Bulk import. 3. [Optional - D-Link DBS-2000-10MP | User Manual - Page 73
1. Navigate to the Configure > Switch > Devices page. 2. Click Bulk import. 3. [Optional] Download the reference sample template. 4. Click Browse. 5. Locate the CSV-formatted file containing the UIDs of the devices. Note: To directly register devices to a Site, use the following format: [UID][Device - D-Link DBS-2000-10MP | User Manual - Page 74
will be navigated to Monitor > Switch >Device page when you select a device from this list. Please refer to Monitor > Switch > Devices for a comprehensive guide on how to edit and monitor your switch. 8.2.8 Deleting a Device Assigned devices can be unassigned and sent back to the device inventory so - D-Link DBS-2000-10MP | User Manual - Page 75
1. Navigate to the Configure > Switch > Devices page. 2. From the device list, click the checkbox next to the device you wish to delete. 3. Click Delete. 4. When prompted to confirm, click Yes. Note: Deleted devices are automatically moved to the inventory until they are reassigned by the user. - D-Link DBS-2000-10MP | User Manual - Page 76
to the organization. Select All to show all port groups. 3. If the organization has multiple switches of the same port group, for example multiple DBS-2000-10MP switches, select a specific switch from the drop-down menu to only show the ports of that switch. 4. Select a time frame from the time - D-Link DBS-2000-10MP | User Manual - Page 77
RSTP Choose to enable or disable Rapid Spanning Tree Protocol (RSTP). RSTP prevents data loops caused by issuing frequent BPDU packets to monitor link status. Note: RSTP cannot be used in conjunction with LBD. Note: User must enable Profile/Settings/STP Configuration for this port to enable - D-Link DBS-2000-10MP | User Manual - Page 78
port while Spanning Tree Protocol (STP) is not enabled in the network, especially when the down links are hubs or unmanaged switches. The Switch will automatically shut down the port and sends a will only apply to ports that support Power over Ethernet. Choose a port schedule. Port schedules are - D-Link DBS-2000-10MP | User Manual - Page 79
the box next to the ports you wish to link together. 4. Click Aggregate. 5. In the Link Aggregation Setting window, select the aggregation type. Note: Static link requires manual configuration of the ports in the aggregation group. Link Aggregation Control Protocol (LACP) dynamically queries to - D-Link DBS-2000-10MP | User Manual - Page 80
7. Click Push Configuration. 8.3.4 Splitting Aggregated Switch Ports Linked port groups can be split into their respective individual ports. Splitting port groups will undo all aggregation settings applied to the affected ports. Note: These - D-Link DBS-2000-10MP | User Manual - Page 81
1. Navigate to the Configure > Switch > Switch Ports page. 2. From the port list, check the box next to the port(s) you wish to mirror. 3. Click Mirror. 4. Specify the following information: Source ports Destination port Select the data to mirror from the drop-down menu for each selected port. - D-Link DBS-2000-10MP | User Manual - Page 82
5. Click Add. Note: Any tags associated to a port will be shown in the Tags column. 8.3.8 Removing a Tag from One or More Switch Ports 1. Navigate to the Configure > Switch > Switch Ports page. 2. From the port list, check the box next to the tagged port(s) you wish to remove the tag(s) from. 3. - D-Link DBS-2000-10MP | User Manual - Page 83
the following information: Note: Multiple filters can be populated to narrow down the search result. Account 74 Enter the Account name that the event is linked to. - D-Link DBS-2000-10MP | User Manual - Page 84
Device Enter the name of the Site the event is linked to. Enter the name of the Profile the event is linked to. Enter the name of the SSID the event is linked to. Enter the name of the Device the event is linked to. 9.1.2 Downloading Change Logs 1. Navigate to the Reports > Change Log - D-Link DBS-2000-10MP | User Manual - Page 85
5. Check the profiles to filter switch rankings for from the Ranking report drop-down menu. 6. Select the maximum number of entries to display from the Show Top Results drop-down menu. 7. Check the type of switch logs to show from the Customize Report drop-down menu. Select All to show all report - D-Link DBS-2000-10MP | User Manual - Page 86
9.3 Alerts From the Alerts window, users can view a detailed log of all alerts occurring on the network. Alerts are divided into two types: processed and not processed alerts. Unprocessed alerts are events that have occurred on the network which are pending action by the managing user. Processed - D-Link DBS-2000-10MP | User Manual - Page 87
3. From the alerts list, click the checkbox next to the alert(s) you wish to delete. 4. Click Delete. 5. When prompted to confirm, click Yes. Note: Deleted alerts will be permanently deleted, this action cannot be undone. 9.3.3 Deleting Processed Alerts Unprocessed alerts shown in the alert log can - D-Link DBS-2000-10MP | User Manual - Page 88
9.4 Licenses 9.4.1 Filtering the License Logs 1. Navigate to the Reports > Licenses page. 2. Click the filter selection in the top-right. 3. Check the information parameters to display the corresponding license information in the overview window. Check All to show all license information parameters. - D-Link DBS-2000-10MP | User Manual - Page 89
window. Refer to the Inventory section on page 88 for more information. From the Firmware section, users can set device upgrade schedules, or manually upgrade a device's firmware. Refer to the Firmware section on page 93 for more information. From the Alert Settings section, users can choose the - D-Link DBS-2000-10MP | User Manual - Page 90
3. Specify the following information: User name Access Level Email address Managed Site Role Enter the user's name. Select the access level of the user. This determines what information the user can view. Based on the selected access level, select the organization from the drop-down menu. Enter - D-Link DBS-2000-10MP | User Manual - Page 91
4. Click Save change. 10.1.2.2 Editing a User's Access Privilege 1. Navigate to the Settings > Account Management page. 2. From the user account list, click the user you wish to edit. 3. In the Edit User window, edit the following information: Managed Site Role Based on the selected Site tag, - D-Link DBS-2000-10MP | User Manual - Page 92
window, users can view more information about all organizations linked to the user account including organization type, device status and a New Organization Organization creation is only available for Managed Services Providers (MSP)-level users. Normal user accounts cannot create additional - D-Link DBS-2000-10MP | User Manual - Page 93
informational and do not impact the configuration settings of devices that are listed under it. Creating additional Sites allows users to further subdivide and structure the organization and network. 1. Navigate to the Settings > Organization Management page. 2. From the organization list, click - D-Link DBS-2000-10MP | User Manual - Page 94
4. Click Save. 10.2.4 Invite Users to an Organization Additional users can be invited to the organization through the organization management window. Note: The ability to invite users depends on the account role and privilege level of the managing user. 1. Navigate to the Settings > Organization - D-Link DBS-2000-10MP | User Manual - Page 95
Organization Organization deletion is only available for Managed Services Providers (MSP)-level users. Normal user a License Key A single licenses key can be added to the organization so they can be manually assigned to a device at a later point. 1. Navigate to the Settings > License Management - D-Link DBS-2000-10MP | User Manual - Page 96
was added to the organization in the format mm/dd/yyyy 00:00 AM/PM. Enter the name of the organization the license key is linked to. Enter the UID of the device the license is linked to. Enter the model name of the device the license is - D-Link DBS-2000-10MP | User Manual - Page 97
MAC Address Start Date Expiration Date Time Remaining Enter the MAC address of the device the license is linked to. Enter the license start date in the format mm/dd/yyyy. Enter the license expiration date in the format mm/dd/yyyy. Enter the - D-Link DBS-2000-10MP | User Manual - Page 98
. 5. Specify the following information: Site Profile License Key Select a Site to link this device to. Select a Profile for this device. The device will use in a warehouse where it is kept inactive until it is manually assigned to a Site and Profile by the user at a later point. 1. Navigate to - D-Link DBS-2000-10MP | User Manual - Page 99
to the Inventory Bulk adding new devices to the Inventory stores the devices in a warehouse where they are kept inactive until they are manually assigned to a Site and Profile by the user at a later point. 1. Navigate to the Settings > Inventory page. 2. Click Bulk import. 3. [Optional] Download - D-Link DBS-2000-10MP | User Manual - Page 100
4. Click Browse. 5. Locate the CSV-formatted file containing the UIDs of the devices. Note: To add devices to the inventory, use the following format: [UID] 6. Click Upload. 10.4.4 Bulk Adding and Registering Multiple Devices to a Site When bulk adding a new device, assigning a Site and Profile to - D-Link DBS-2000-10MP | User Manual - Page 101
Upload. 10.4.5 Deleting a Device from the Inventory Deleting a device from the inventory completely removes the device from the organization it was linked to, allowing it to be reassigned to a different organization. 1. Navigate to the Settings > Inventory page. 2. Click the tab of the inventory - D-Link DBS-2000-10MP | User Manual - Page 102
schedule. Firmware upgrades are managed at the Site level and configured per device type, which means that all devices of the same type that are linked to that Site will use the same firmware upgrading policy. 93 - D-Link DBS-2000-10MP | User Manual - Page 103
10.5.1 Setting an Automatic Upgrade Window Automatic upgrade windows provide an easy way of regularly maintaining device firmware by setting a fixed weekly time and date to automatically scan for new firmware and upgrade devices if a new firmware version is available. 1. Navigate to the Settings > - D-Link DBS-2000-10MP | User Manual - Page 104
6. Click the date field to choose a date and select a time from the drop-down menu. 7. Click Save. 10.5.3 Performing a Manual Firmware Upgrade Devices can be manually upgraded by performing an on-the-spot firmware upgrade check. 1. Navigate to the Settings > Firmware page. 2. Select a Site from the - D-Link DBS-2000-10MP | User Manual - Page 105
5. Select Perform the upgrade now. 6. Click Upgrade now. 7. When prompted to confirm, click Yes. 10.6 Alert Settings 10.6.1 Configuring Alert Notifications Users can customize what type of network events will trigger alert notifications. Events are divided into general and device-specific events. - D-Link DBS-2000-10MP | User Manual - Page 106
listed in the format XXXX-XXXXXXXX or XXXXXXXXXXXX. When entering the UID, do not include dashes. Enter a name for the device. Select a Site to link this device to. Select a Profile for this device. The device will use the settings configured in that profile. [Optional] Enter the device license key - D-Link DBS-2000-10MP | User Manual - Page 107
so we may continue to improve the quality of our platform. 11.1.1 Contacting Nuclias Support 1. Navigate to the Help > Contact Us page. 2. Specify the following information: Name E-mail Phone Issue category Problem device Description Click to enter a sender name. The recipient will see this name
-
 1
1 -
 2
2 -
 3
3 -
 4
4 -
 5
5 -
 6
6 -
 7
7 -
8
-
9
-
10
-
11
-
12
-
13
-
14
-
15
-
16
-
17
-
18
-
19
-
20
-
21
-
22
-
23
-
24
-
25
-
26
-
27
-
28
-
29
-
30
-
31
-
32
-
33
-
34
-
35
-
36
-
37
-
38
-
39
-
40
-
41
-
42
-
43
-
44
-
45
-
46
-
47
-
48
-
49
-
50
-
51
-
52
-
53
-
54
-
55
-
56
-
57
-
58
-
59
-
60
-
61
-
62
-
63
-
64
-
65
-
66
-
67
-
68
-
69
-
70
-
71
-
72
-
73
-
74
-
75
-
76
-
77
-
78
-
79
-
80
-
81
-
82
-
83
-
84
-
85
-
86
-
87
-
88
-
89
-
90
-
91
-
92
-
93
-
94
-
95
-
96
-
97
-
98
-
99
-
100
-
101
-
102
-
103
-
104
-
105
-
106
-
107
 |
 |
i