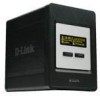
D-Link DNS-343 Product Manual - Page 10
Installation, Hardware Setup
 |
UPC - 790069313745
View all D-Link DNS-343 manuals
Add to My Manuals
Save this manual to your list of manuals |
Page 10 highlights
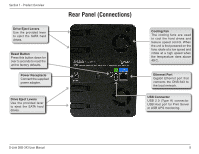
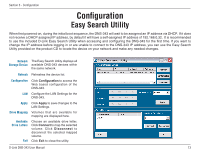
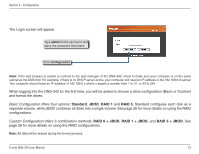
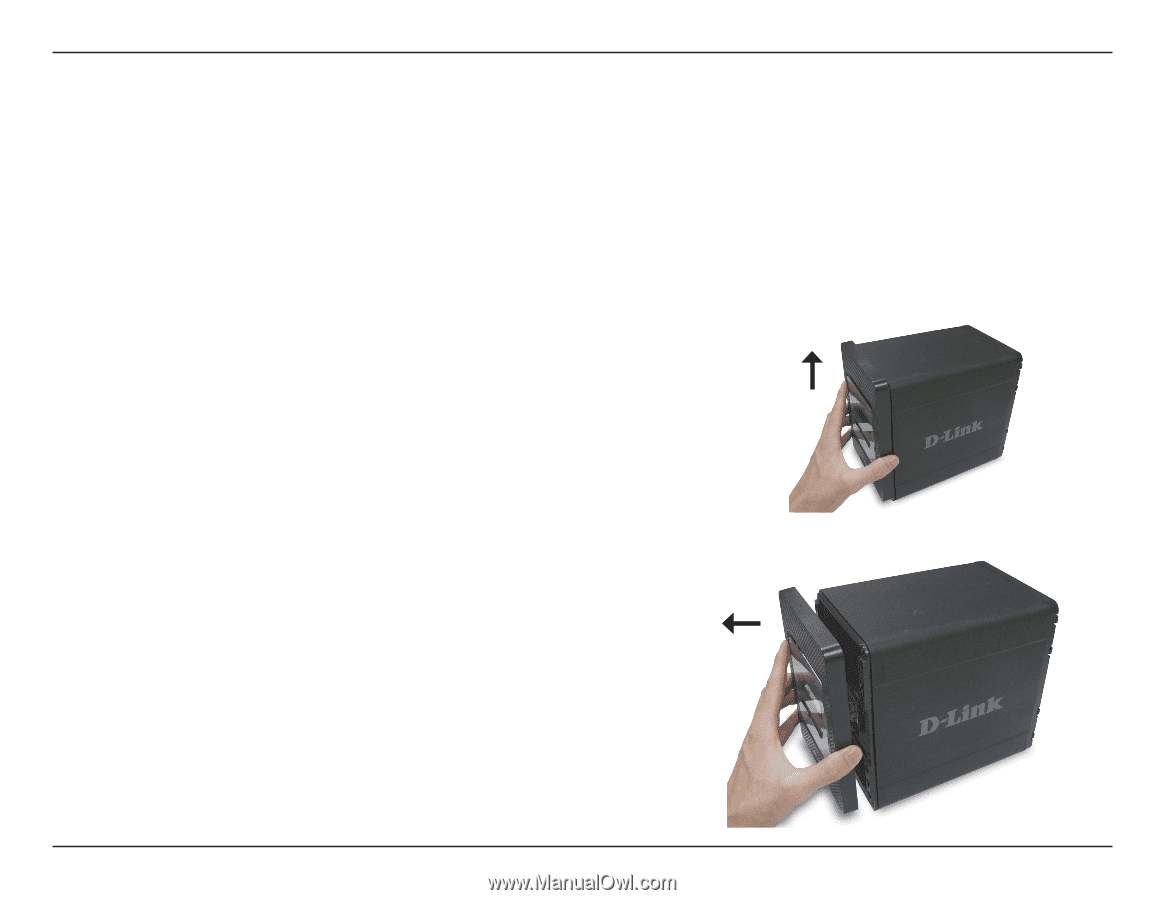
Section 2 - Installation Installation Hardware Setup This section provides unpacking and installation information for the DNS-343. Open the shipping carton for the DNS-343 and carefully unpack its contents. If this is the first time using the DNS-343 or if a new hard disk is installed, use the Easy Search utility located on the Installation CD and follow the instructions for setting up, configuring and formatting the new drive. To install the DNS-343 on your local network, refer to the steps below: 1. Access the drive bays by sliding the faceplate up until it unlatches from the device. 2. Once the faceplate is unlatched, pull it off the device, exposing the drive bay. D-Link DNS-343 User Manual 10
-
 1
1 -
2
-
3
-
4
-
 5
5 -
 6
6 -
 7
7 -
 8
8 -
 9
9 -
 10
10 -
 11
11 -
 12
12 -
 13
13 -
 14
14 -
 15
15 -
16
-
17
-
18
-
19
-
20
-
21
-
22
-
23
-
24
-
25
-
26
-
27
-
28
-
29
-
30
-
31
-
32
-
33
-
34
-
35
-
36
-
37
-
38
-
39
-
40
-
41
-
42
-
43
-
44
-
45
-
46
-
47
-
48
-
49
-
50
-
51
-
52
-
53
-
54
-
55
-
56
-
57
-
58
-
59
-
60
-
61
-
62
-
63
-
64
-
65
-
66
-
67
-
68
-
69
-
70
-
71
-
72
-
73
-
74
-
75
-
76
-
77
-
78
-
79
-
80
-
81
-
82
-
83
-
84
-
85
-
86
 |
 |
10
D-Link DNS-343 User Manual
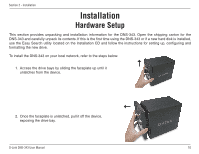
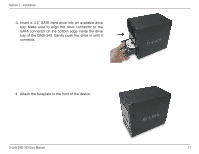
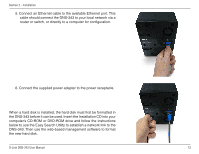
Section ± - Installation
Installation
1. Access the drive bays by sliding the faceplate up until it
unlatches from the device.
2. Once the faceplate is unlatched, pull it off the device,
exposing the drive bay.
This section provides unpacking and installation information for the DNS-343. Open the shipping carton for the
DNS-343 and carefully unpack its contents. If this is the first time using the DNS-343 or if a new hard disk is installed,
use the Easy Search utility located on the Installation CD and follow the instructions for setting up, configuring and
formatting the new drive.
To install the DNS-343 on your local network, refer to the steps below:
Hardware Setup