D-Link DXS-3600-EM-STACK Hardware Installation Guide - Page 16
Installing an AC Power Module
 |
View all D-Link DXS-3600-EM-STACK manuals
Add to My Manuals
Save this manual to your list of manuals |
Page 16 highlights
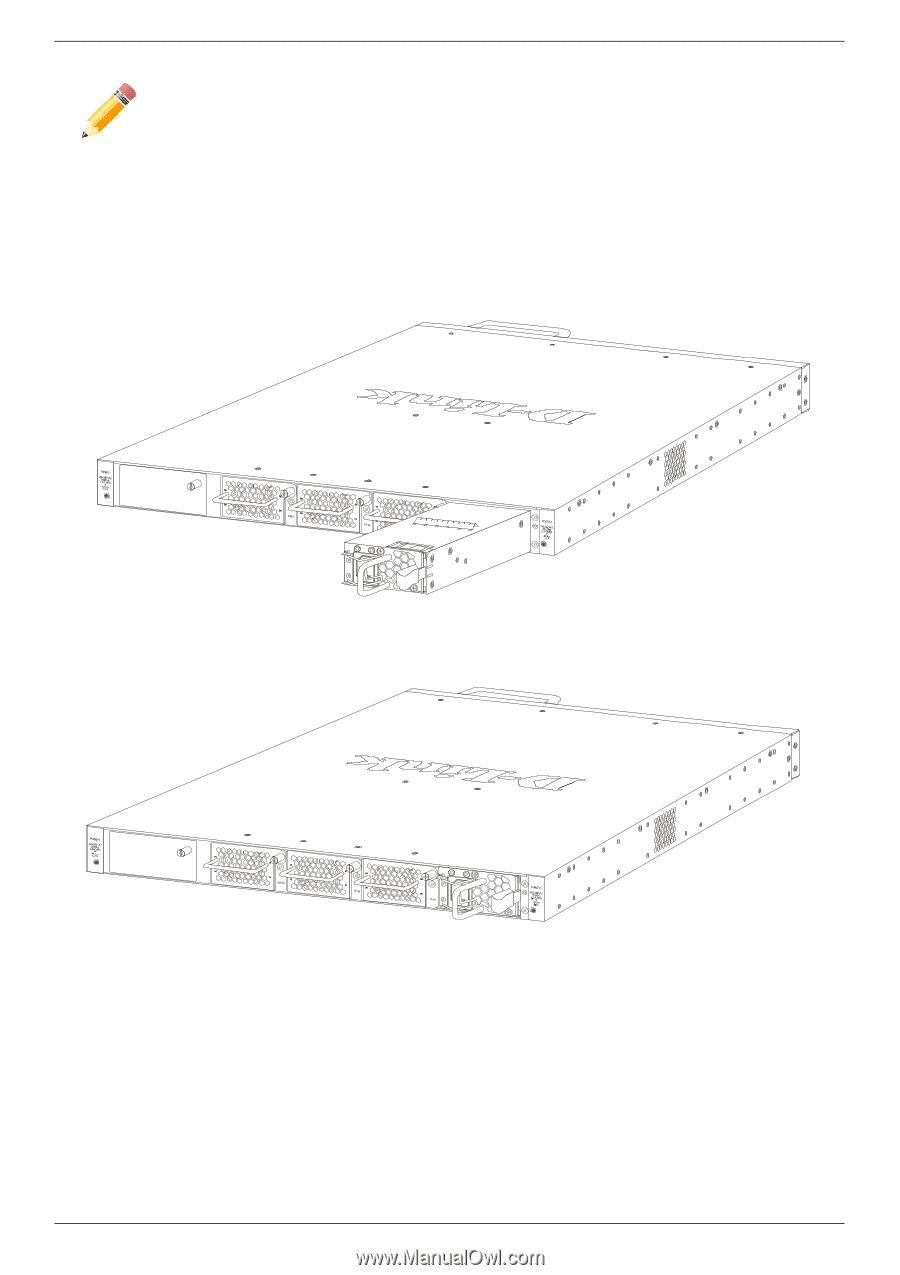
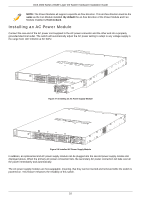
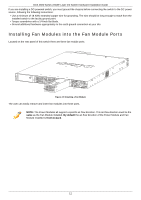
DXS-3600 Series 10GbE Layer 2/3 Switch Hardware Installation Guide NOTE: The Power Modules all support a specific air-flow direction. This air-flow direction must be the same as the Fan Module installed. By default the air-flow direction of the Power Module and Fan Module installed is front-to-back. Installing an AC Power Module Connect the one end of the AC power cord supplied to the AC power connector and the other end into a properly grounded electrical outlet. The switch will automatically adjust the AC power setting to adapt to any voltage supply in the range from 100~240VAC at 50~60Hz. Figure 2-5 Installing an AC Power Supply Module Figure 2-6 Installed AC Power Supply Module In addition, an optional second AC power supply module can be plugged into the second power supply module slot displayed above. When the primary AC power connection fails, the secondary AC power connection will take over all the power immediately and automatically. The AC power supply modules are hot-swappable, meaning, that they can be inserted and removed while the switch is powered on. This feature enhances the reliability of this switch. 10
-
 1
1 -
2
-
3
-
4
-
5
-
6
-
7
-
8
-
9
-
10
-
 11
11 -
 12
12 -
 13
13 -
 14
14 -
 15
15 -
 16
16 -
 17
17 -
 18
18 -
 19
19 -
 20
20 -
 21
21 -
22
-
23
-
24
-
25
-
26
-
27
-
28
-
29
-
30
-
31
-
32
-
33
-
34
-
35
-
36
 |
 |