Dell Alienware M15x Service Manual - Page 17
Removing the Hard Drive
 |
UPC - 074450000064
View all Dell Alienware M15x manuals
Add to My Manuals
Save this manual to your list of manuals |
Page 17 highlights
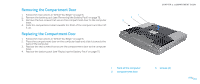
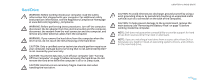
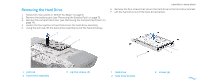
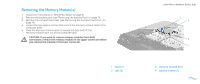
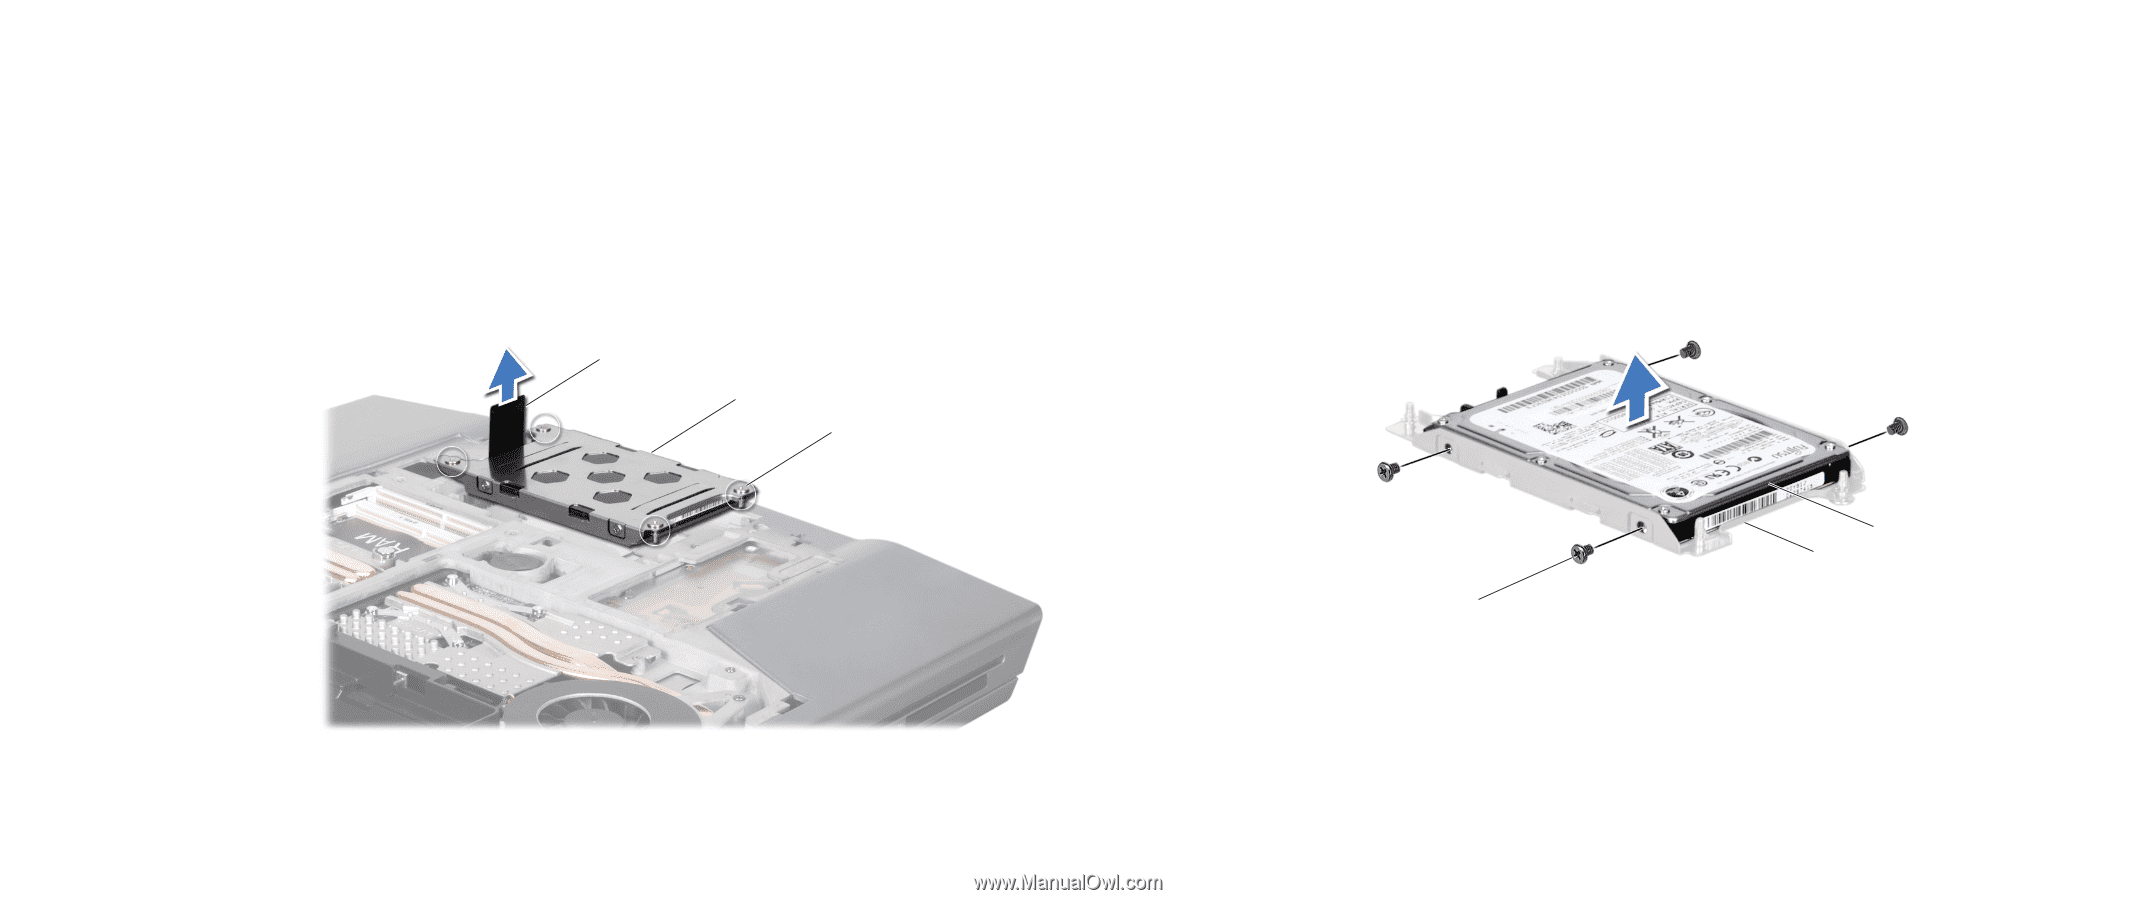
Removing the Hard Drive 1. Follow the instructions in "Before You Begin" on page 6. 2. Remove the battery pack (see "Removing the Battery Pack" on page 11). 3. Remove the compartment door (see "Removing the Compartment Door" on page 14). 4. Loosen the four captive screws that secure the hard-drive assembly. 5. Using the pull-tab, lift the hard-drive assembly out of the hard-drive bay. 1 2 3 CHAPTER 4: HARD DRIVE 6. Remove the four screws that secure the hard drive to the hard-drive bracket. 7. Lift the hard drive out of the hard-drive bracket. 1 2 3 1 pull-tab 2 hard-drive assembly 3 captive screws (4) 1 hard drive 2 hard-drive bracket 3 screws (4) 017 /017
-
 1
1 -
2
-
3
-
4
-
5
-
6
-
7
-
8
-
9
-
10
-
11
-
 12
12 -
 13
13 -
 14
14 -
 15
15 -
 16
16 -
 17
17 -
 18
18 -
 19
19 -
 20
20 -
 21
21 -
 22
22 -
23
-
24
-
25
-
26
-
27
-
28
-
29
-
30
-
31
-
32
-
33
-
34
-
35
-
36
-
37
-
38
-
39
-
40
-
41
-
42
-
43
-
44
-
45
-
46
-
47
-
48
-
49
-
50
-
51
-
52
-
53
-
54
-
55
-
56
-
57
-
58
-
59
-
60
-
61
-
62
-
63
-
64
-
65
-
66
-
67
-
68
-
69
-
70
-
71
-
72
-
73
-
74
-
75
-
76
-
77
-
78
-
79
-
80
-
81
-
82
-
83
-
84
-
85
-
86
-
87
-
88
-
89
-
90
-
91
-
92
-
93
-
94
-
95
-
96
-
97
-
98
-
99
-
100
-
101
-
102
-
103
-
104
-
105
-
106
-
107
-
108
-
109
-
110
-
111
-
112
-
113
-
114
-
115
-
116
-
117
-
118
 |
 |
017
017
/
CHAPTER 4: HARD DRIVE
Removing the Hard Drive
Follow the instructions in “Before You Begin” on page
1.
6
.
Remove the battery pack (see “Removing the Battery Pack” on page
2.
11
).
Remove the compartment door (see “Removing the Compartment Door” on
3.
page
14
).
Loosen the four captive screws that secure the hard-drive assembly.
4.
Using the pull-tab, lift the hard-drive assembly out of the hard-drive bay.
5.
3
1
2
1
pull-tab
3
captive screws (4)
2
hard-drive assembly
Remove the four screws that secure the hard drive to the hard-drive bracket.
6.
Lift the hard drive out of the hard-drive bracket.
7.
3
1
2
1
hard drive
3
screws (4)
2
hard-drive bracket